Viewing and Adding Merchant Members
You can view the members associated with a merchant account and invite new members with specific roles.
Sign in as described in Signing In To the Partner Portal and navigate to the Merchants tab.
The Merchants page appears.
Click the row of the merchant whose members you want to view.
The Merchant details page appears.
Click on the Members tab.
The Members page appears, listing all members associated with the merchant account. The following information is shown for each member:
Full name - The member's full name.
Email address - The email address associated with the member's account.
Member type - Indicates whether the member is a Merchant or Partner member.
Role - The member's permission level within the merchant account (for example, Owner or Viewer).
Last login - The date and time of the member's most recent login.
Created at - The date and time when the member was added to the account.
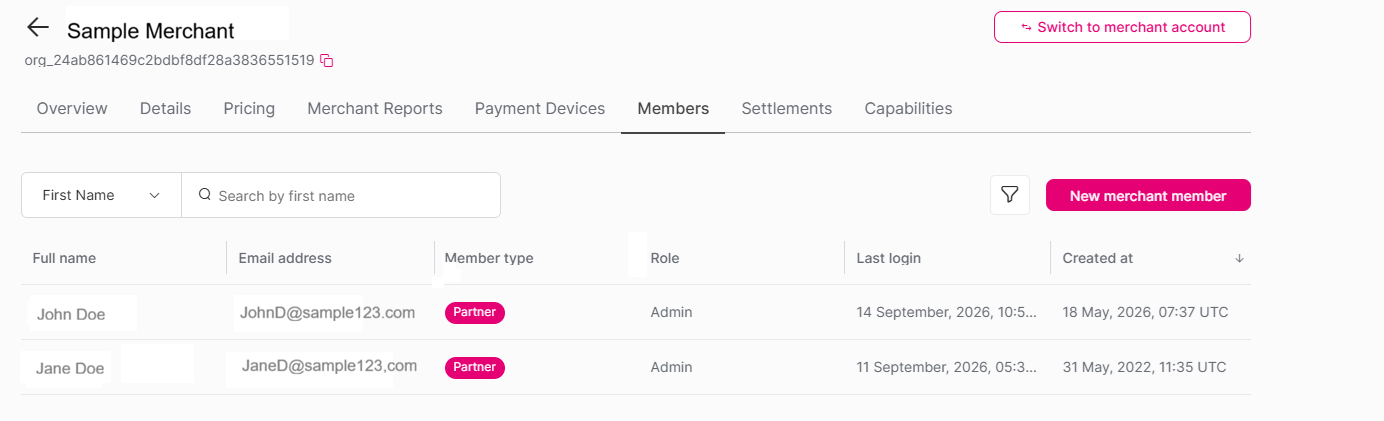
On the Members page, click New merchant member.
The Invite merchant member dialog appears.
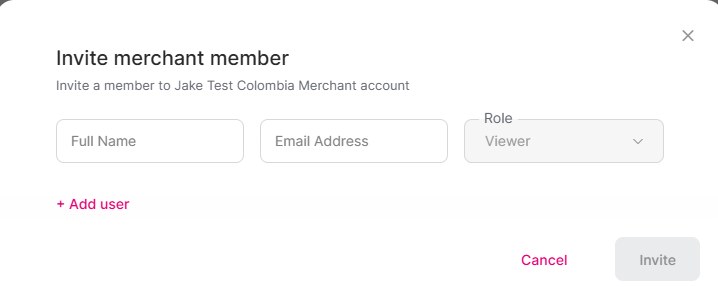
Enter the member's Full Name and Email Address.
Select a Role from the dropdown. Viewer is selected by default.
Optional: To invite additional members in the same operation, click + Add user and fill in the new row. To remove a row, click the trash icon next to it.
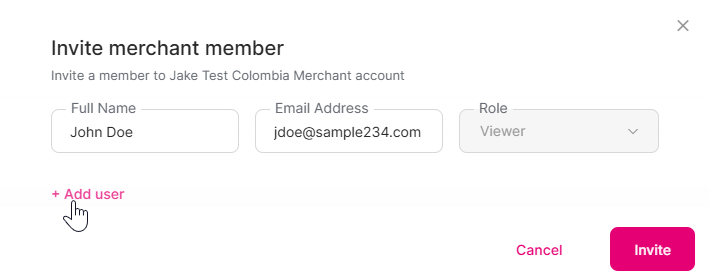
Click Invite.
An invitation is sent to each specified email address. The new member appears on the Members page once they accept the invitation.