Create a Sender
Create a Sender using the Client Portal.
You can create a sender right from the Client Portal by logging in and going to Disburse > Senders > Create Sender.
Note: This procedure requires Owner or Administrator privileges.
Sign in as described in Accessing the Client Portal and navigate to Disburse > Senders.
The Senders page appears.
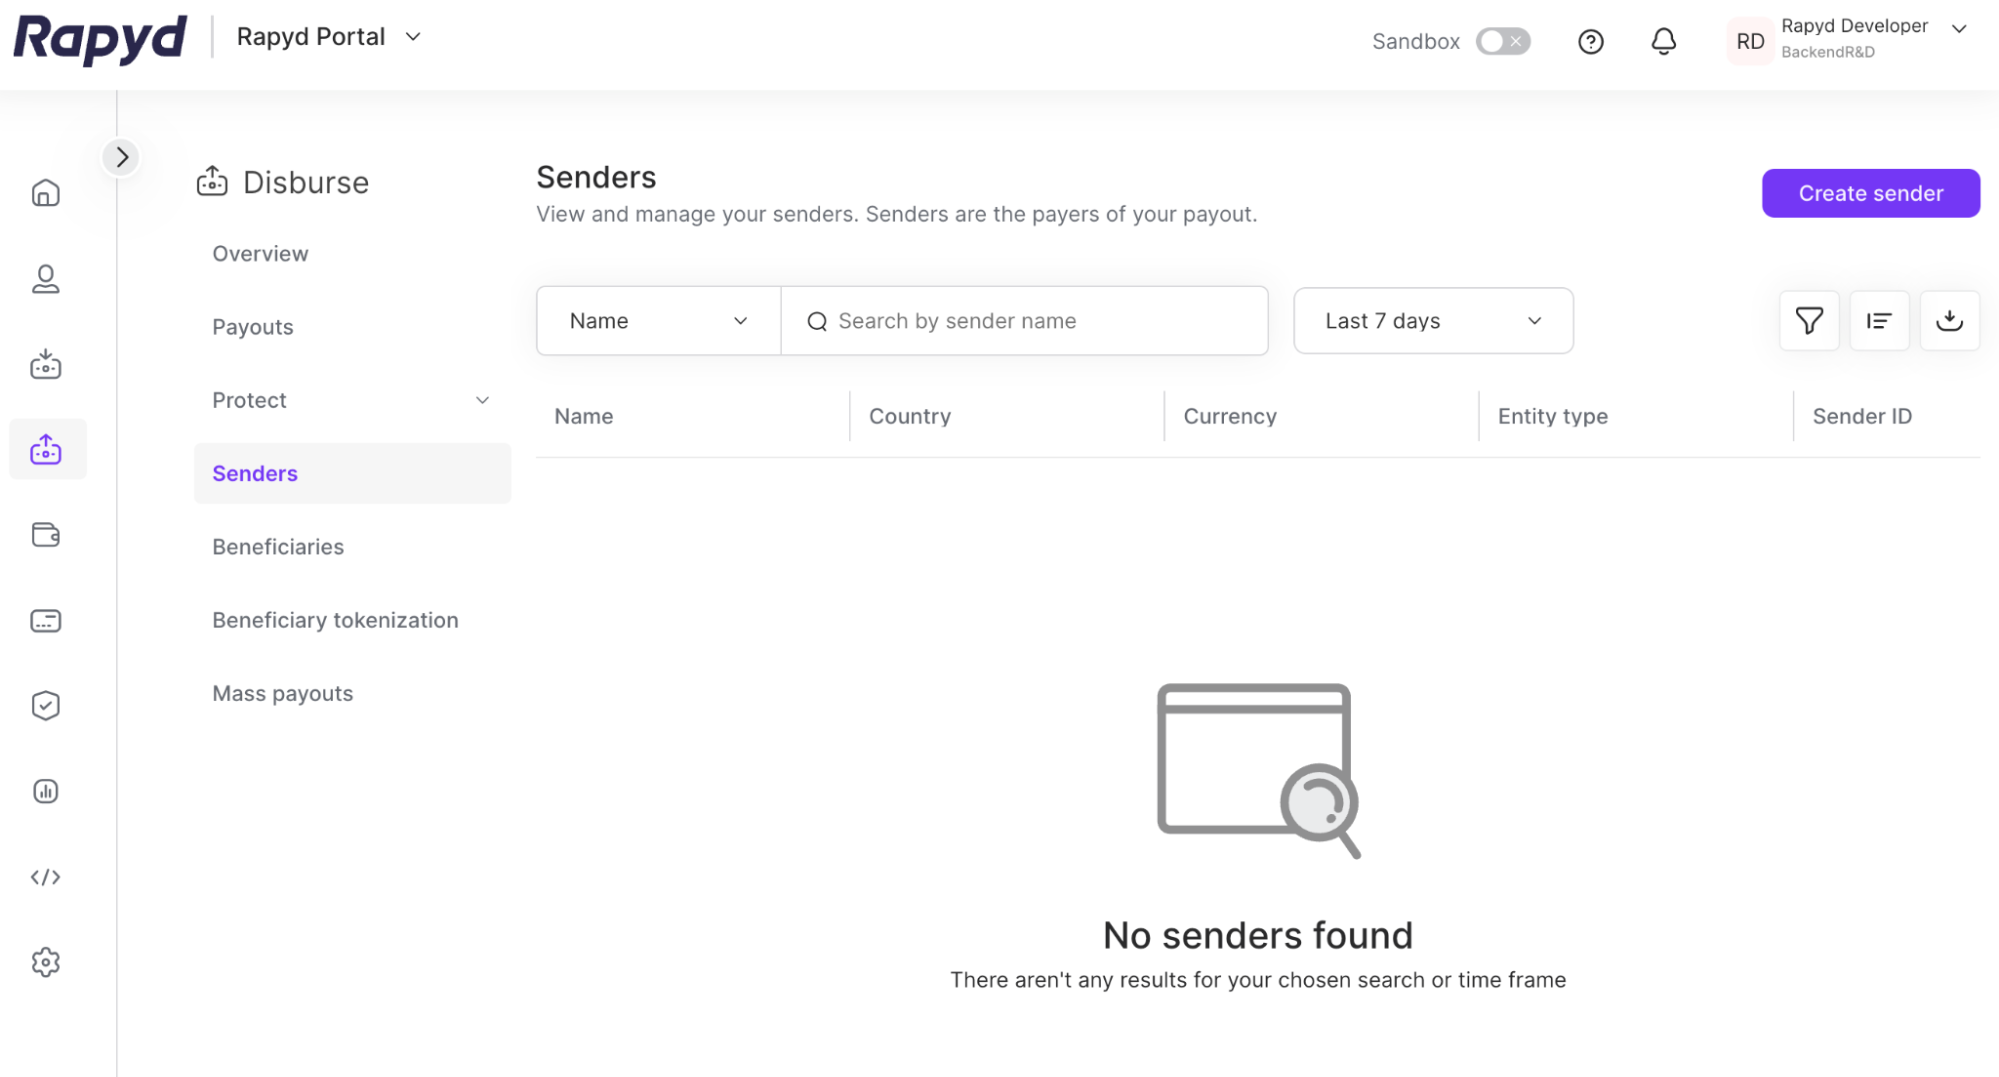
Click Create sender.
The Create sender dialog box appears.
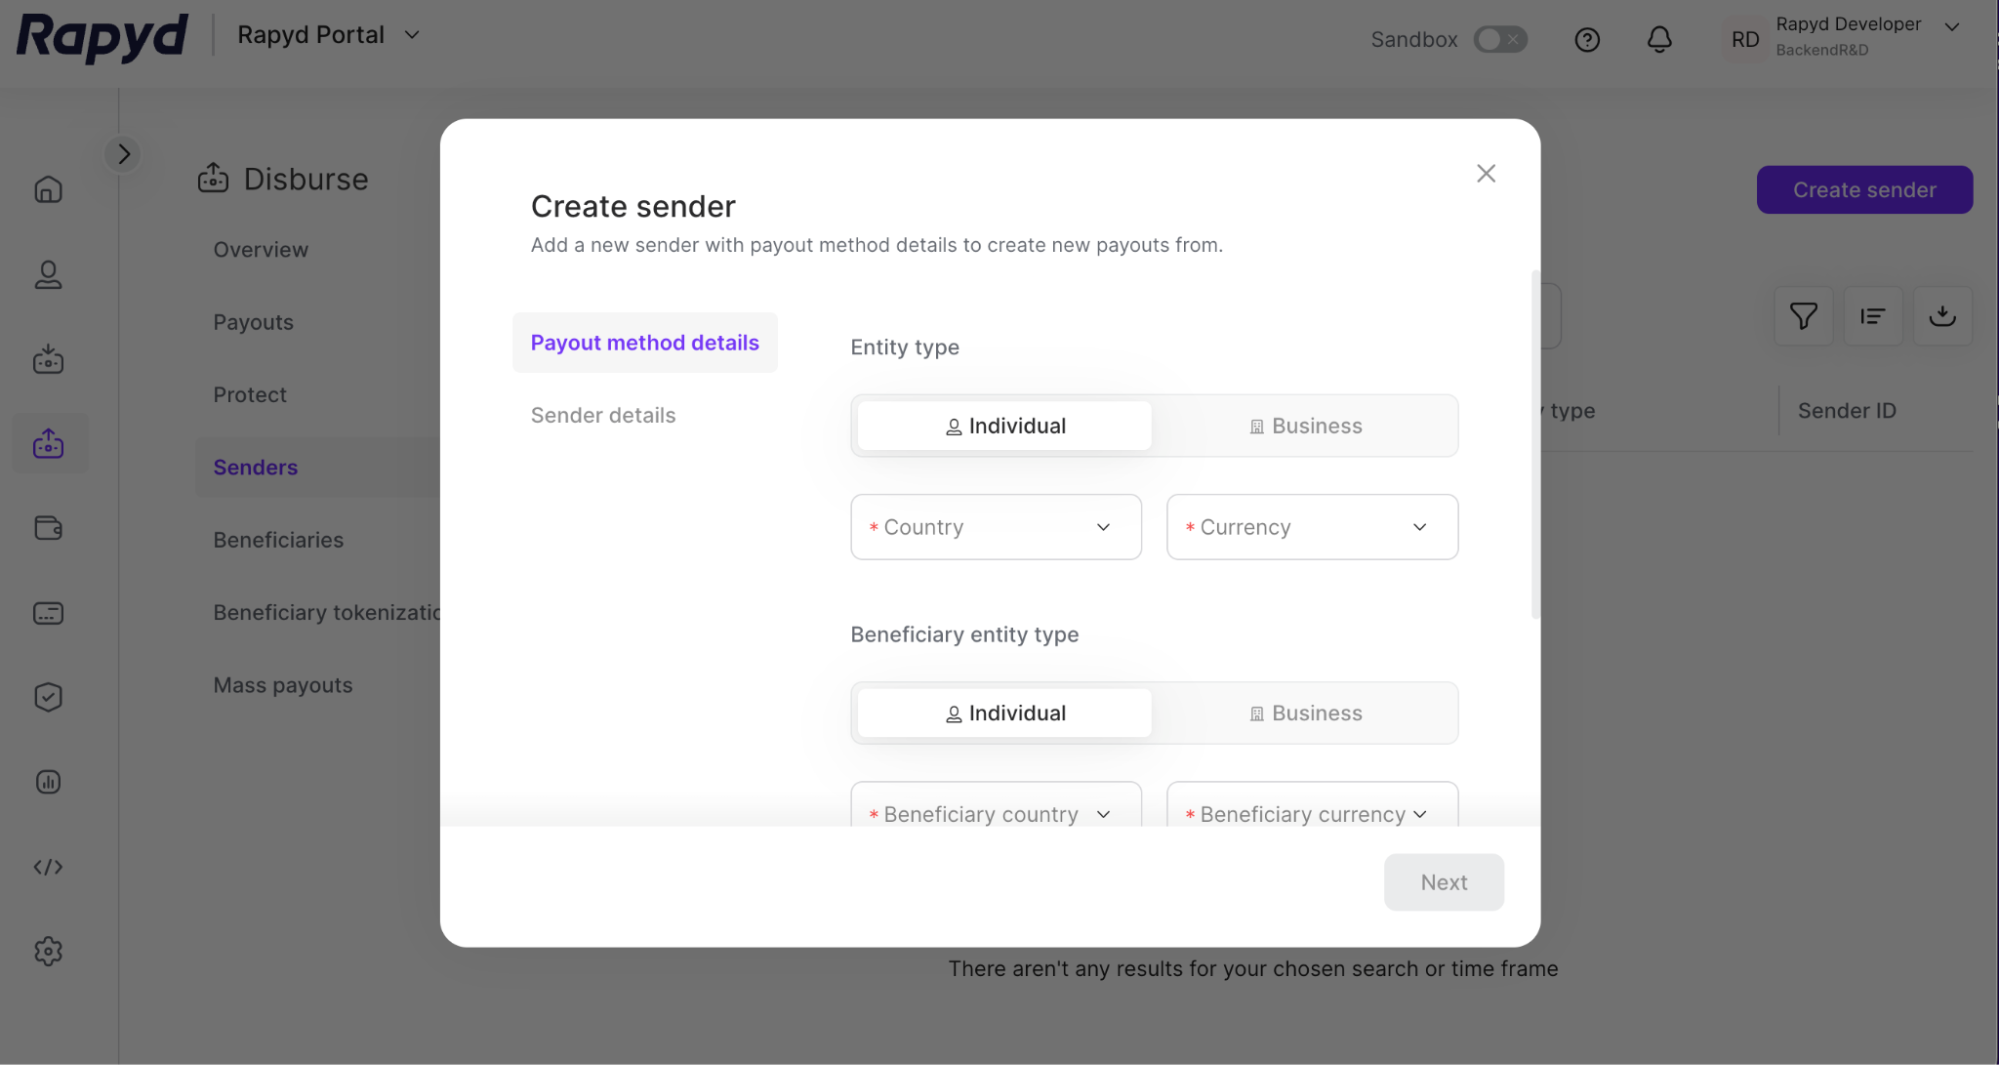
Entity Type
Complete the Entity type by choosing Individual or Business.
Select the Country and Currency of the Sender.
Beneficiary Entity Type
Complete the Beneficiary entity type that would receive from the sender as an Individual or Business.
Select the Beneficiary country and currency.
Select the payout category.
Note: The payout category is the method that the beneficiary would like to receive their funds.
Click Next.
Sender Details
Note: The sender details will vary according to the required fields of the payout method.
Complete the sender details including the following:
First Name - (Sender is an individual)
Last name - (Sender is an individual)
Company Name - (Sender is a business)
Reference ID
Date of Birth
Country Code & Mobile Number
Address
City
Post Code
The Sender Created dialogue box appears.
View Sender
On the sender created dialogue box, tap View Sender to view the specific sender details.