Setting Up an SFTP Server
A guide to set up SFTP in the Client Portal to receive reconciliation reports.
You can set up SSH File Transfer Protocol (SFTP) to configure your reconciliation reports found under Reports in the Client Portal.
Sign in as described in Accessing the Client Portal and tap Reports.
Follow the instructions to set up an SFTP server with Rapyd or your own client server.
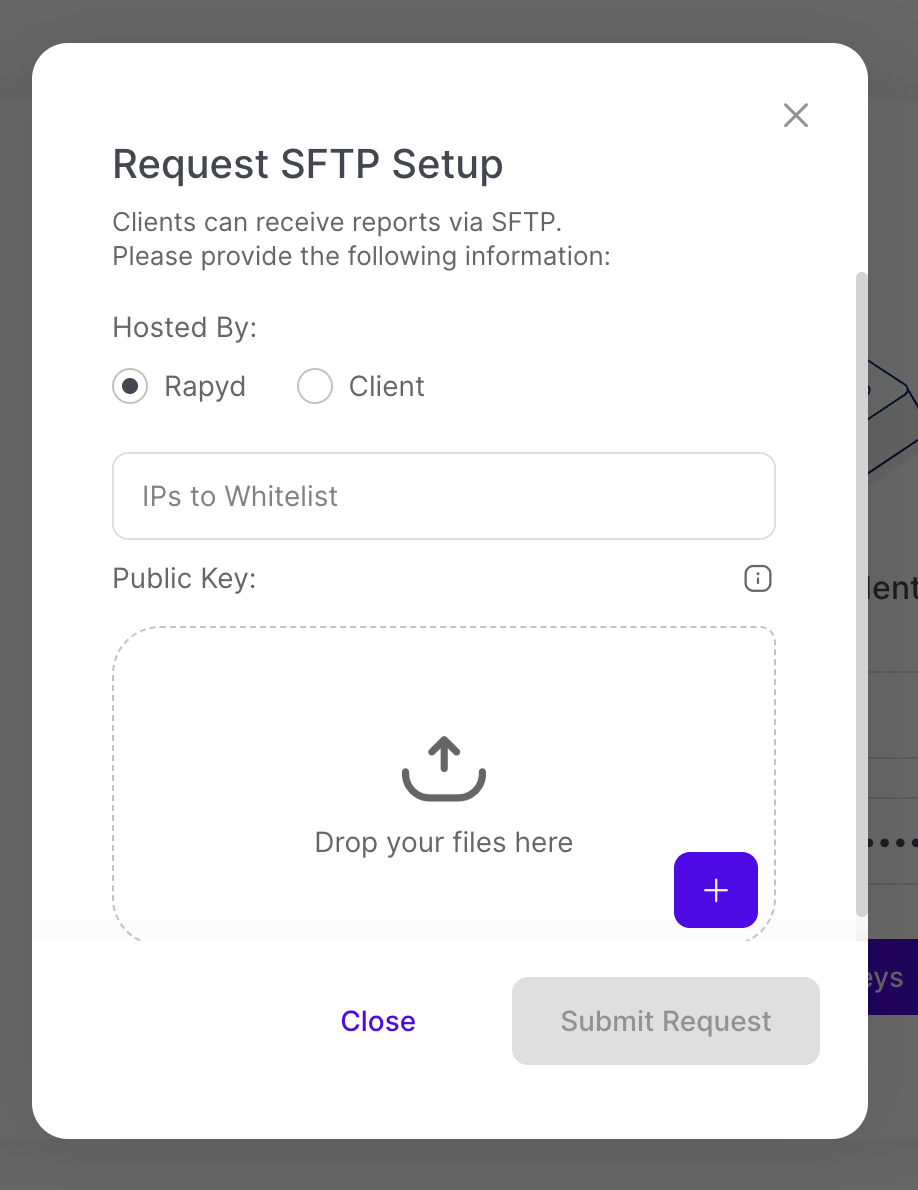
If you are using Rapyd to host the SFTP you will need to whitelist your public IP Addresses and upload your Public Key file.
Navigate to Reports > Reports & Billing.
Select the Setup SFTP button in the upper right corner.
The Request SFTP Setup dialogue box appears.

Input your IP Addresses to Whitelist in the first field.
Upload your Public Key file (.ssh or .txt format).
Tap Submit Request.
The SFTP Request Received dialogue box appears.
Your submission will be reviewed and someone from support will reach out to you soon with further details including the Rapyd Server Hostname URL.
Navigate to Reports > Reports & Billing.
Select Setup SFTP button in the upper right corner.
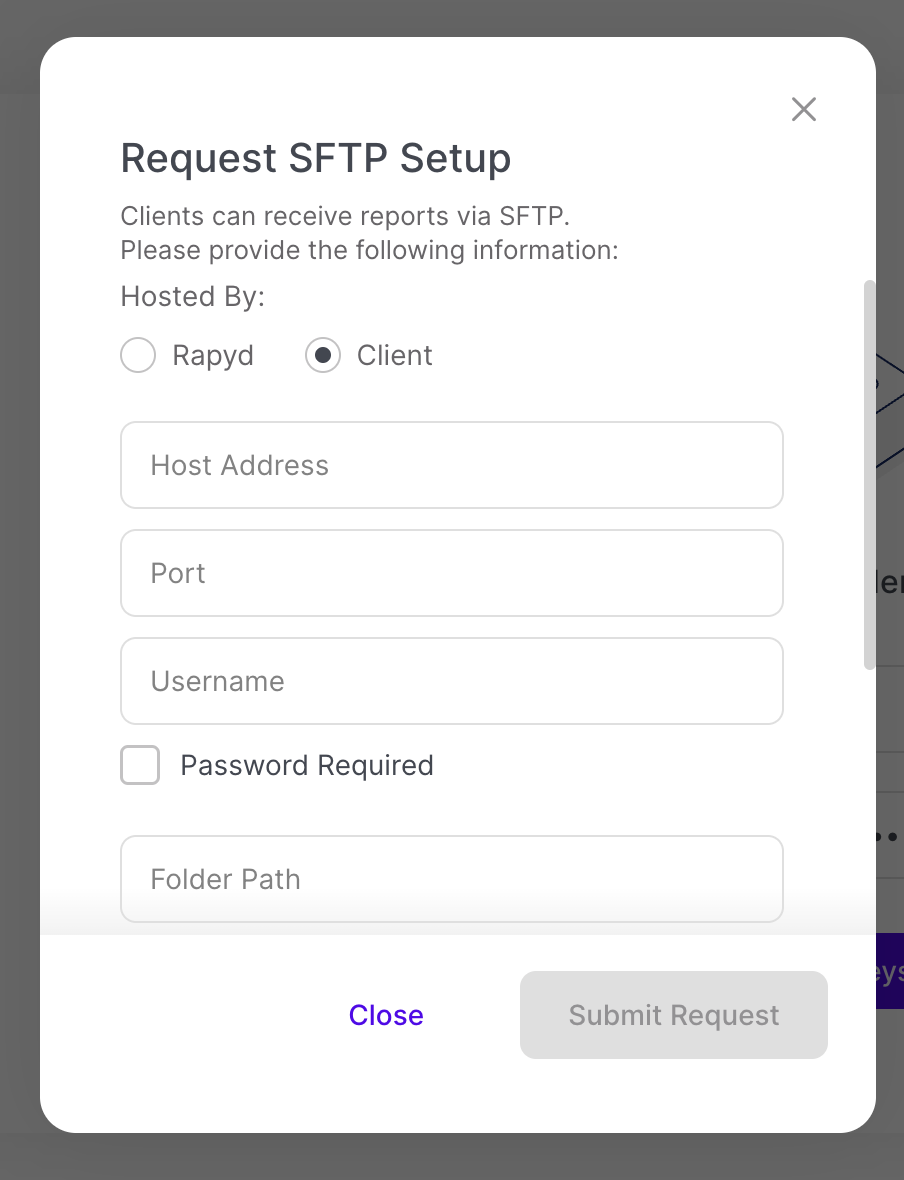
The Request SFTP Setup dialogue box appears.

Select the Client radio button.
Enter your website in Host Address .
Enter the Port number.
Enter your dedicated SFTP Username when connecting into their dedicated folder (e.g. merchant-sftp).
Check the box for Password Required .
Enter in your dedicated SFTP Folder Path (e.g. /merchant-sftp).
Tap Submit Request.
The SFTP Request Received dialogue box appears.
Your submission will be reviewed and someone from support will reach out to you soon.