Creating a Fraud Rule
Rules determine which transactions are allowed, blocked or held for review.
You must have Owner or Administrator privileges to create a rule.
You can create three different types of rules:
Allow - This type of rule takes precedence over block rules or review rules. Each transaction is allowed if it meets the criteria defined in this type of rule.
Block - A transaction will be blocked if it matches the requirements defined in this type of rule (and does not match any of the Allow rules).
Trigger 3DS - The user will be challenged to complete a "3D Secure" (e.g. Verified by Visa / Mastercard Securecode) transaction.
Review - A transaction will be sent to the "Under Review" section if it matches the conditions defined in this type of rule (and does not match any of the Allow or Block rules). You will need to manually approve or decline each Under Review transaction within 7 days.
Category | Attribute |
|---|---|
Payment Type | Rapyd Product Used, Payment Method and Category |
Payment Method Details | Country of Payment Method, Card Brand, Issuing Bank, Card Type, Card Level, BIN Number, Card Number (PAN), Card Fingerprint, Card Token, Billing Address, Expiration Date |
Payout Method Details | Beneficiary Bank, Country of Bank, Account Number Account Fingerprint |
Device | Device Fingerprint, IP Address, IP v4 Address, IP Country |
Technology | eCommerce Platform Plug-in, Initiator of Transaction |
Transaction | Time and Date:
Amount by Currency Number of Transactions:
Aggregate Activity Level |
Buyer | Cardholder Name, Email Address, Email Domain Name |
Sender | Sender Country, Sender Name, Entity Type, Sender Fingerprint, Identification Type, Identification Value, Date of Birth, Number of Transactions, Value of Transactions, Number of Beneficiaries, eWallet Balance, eWallet Currency, eWallet Token |
Beneficiary | Beneficiary Country, Beneficiary Name, Entity Type, Beneficiary Fingerprint, Identification Type, Identification Value, Number of Transactions, Value of Transactions, Number of Senders, Number of IDs, Length of Relationship |
Risk Score | Rapyd Risk Score |
Each rule is made up of one or more conditions. Each condition includes the following:
Field - The attribute that the condition refers to. Examples: A currency, a date and time, a specific card or token, a specific card type.
Condition - The relation between the Field and the Value. Examples: Less than, greater than, equals to. There are unique conditions for each type of field.
Value - The value of the field.
The And or Or operators are used to filter a rule based on more than one condition. All conditions in a rule of multiple conditions are governed by the same operator.
Sign in as described in Accessing the Client Portal and navigate to Protect > Rules
The Rules page appears.
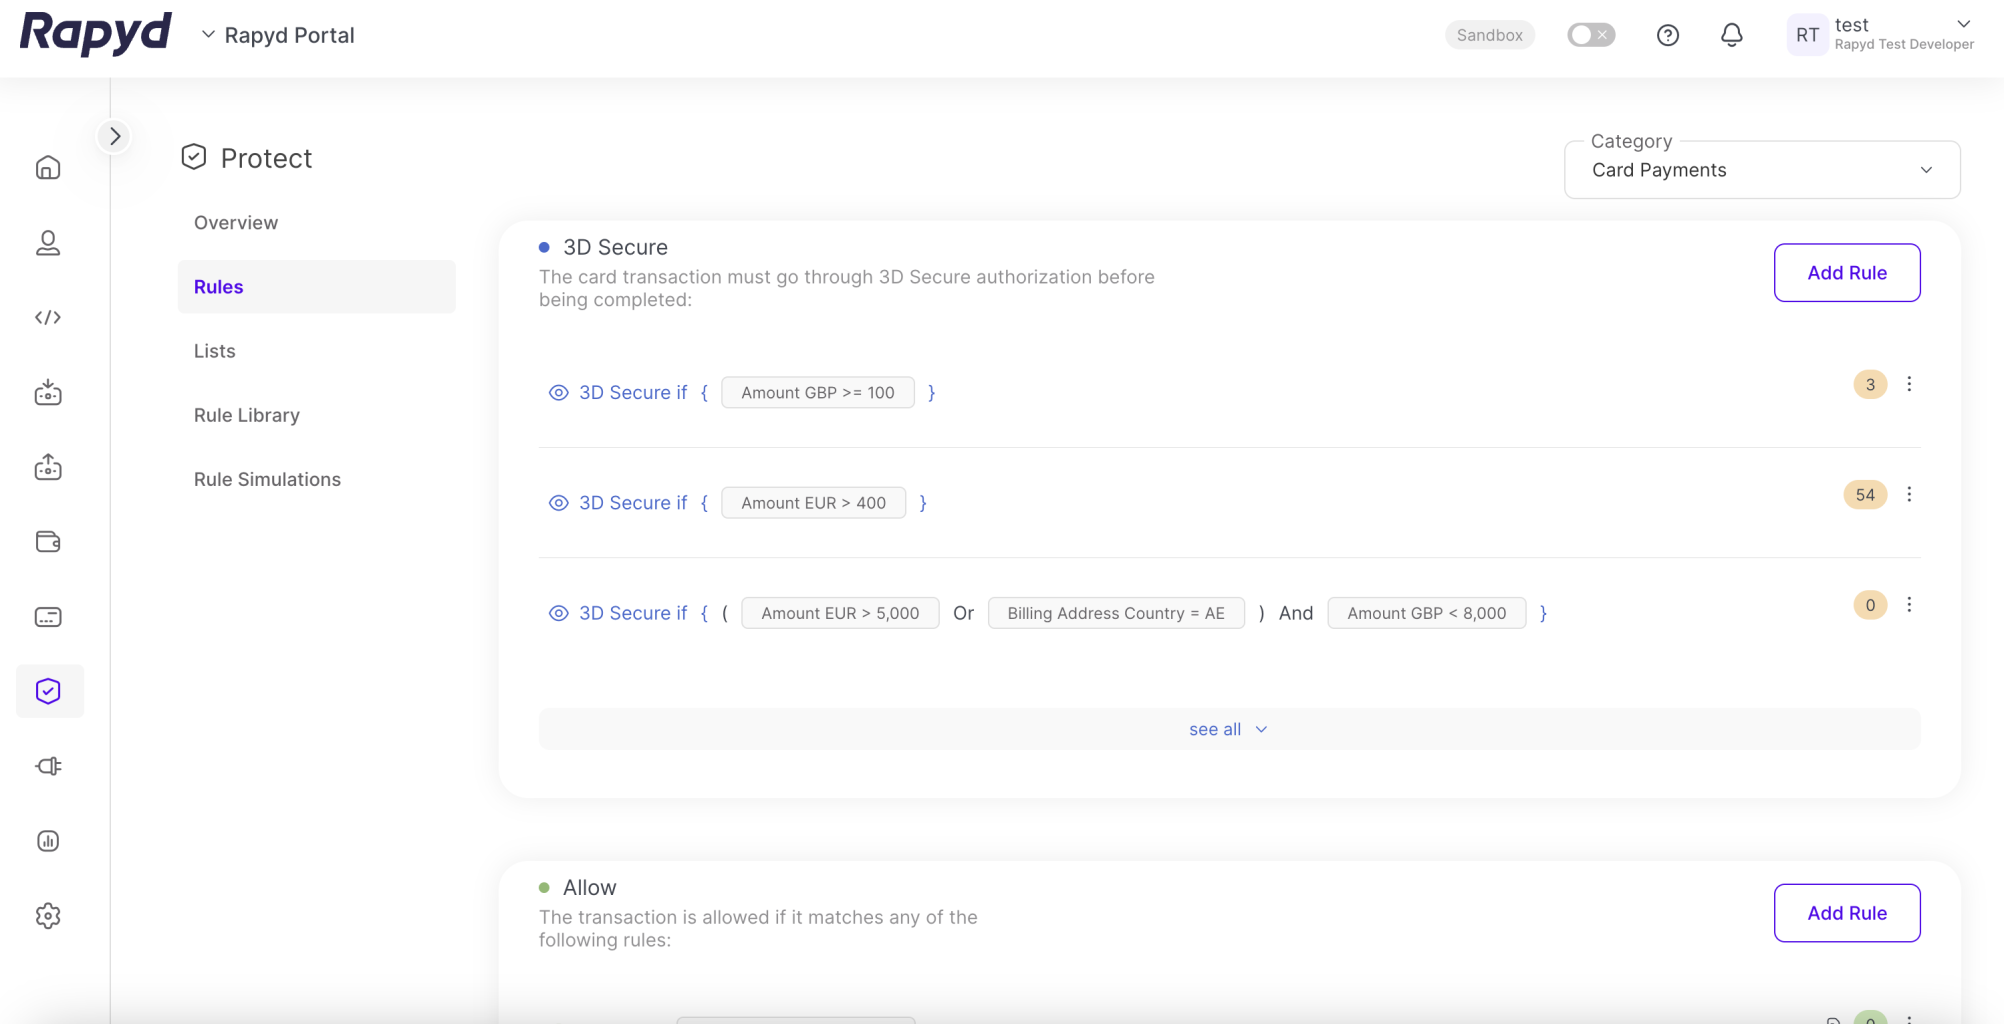
The Rules page is divided into sections for the type of rule: Allow, Block and Review. To view the Add Rule buttons for Block and Review rule types, scroll down.
Choose the section for the type of rule you want to create and click Add Rule.
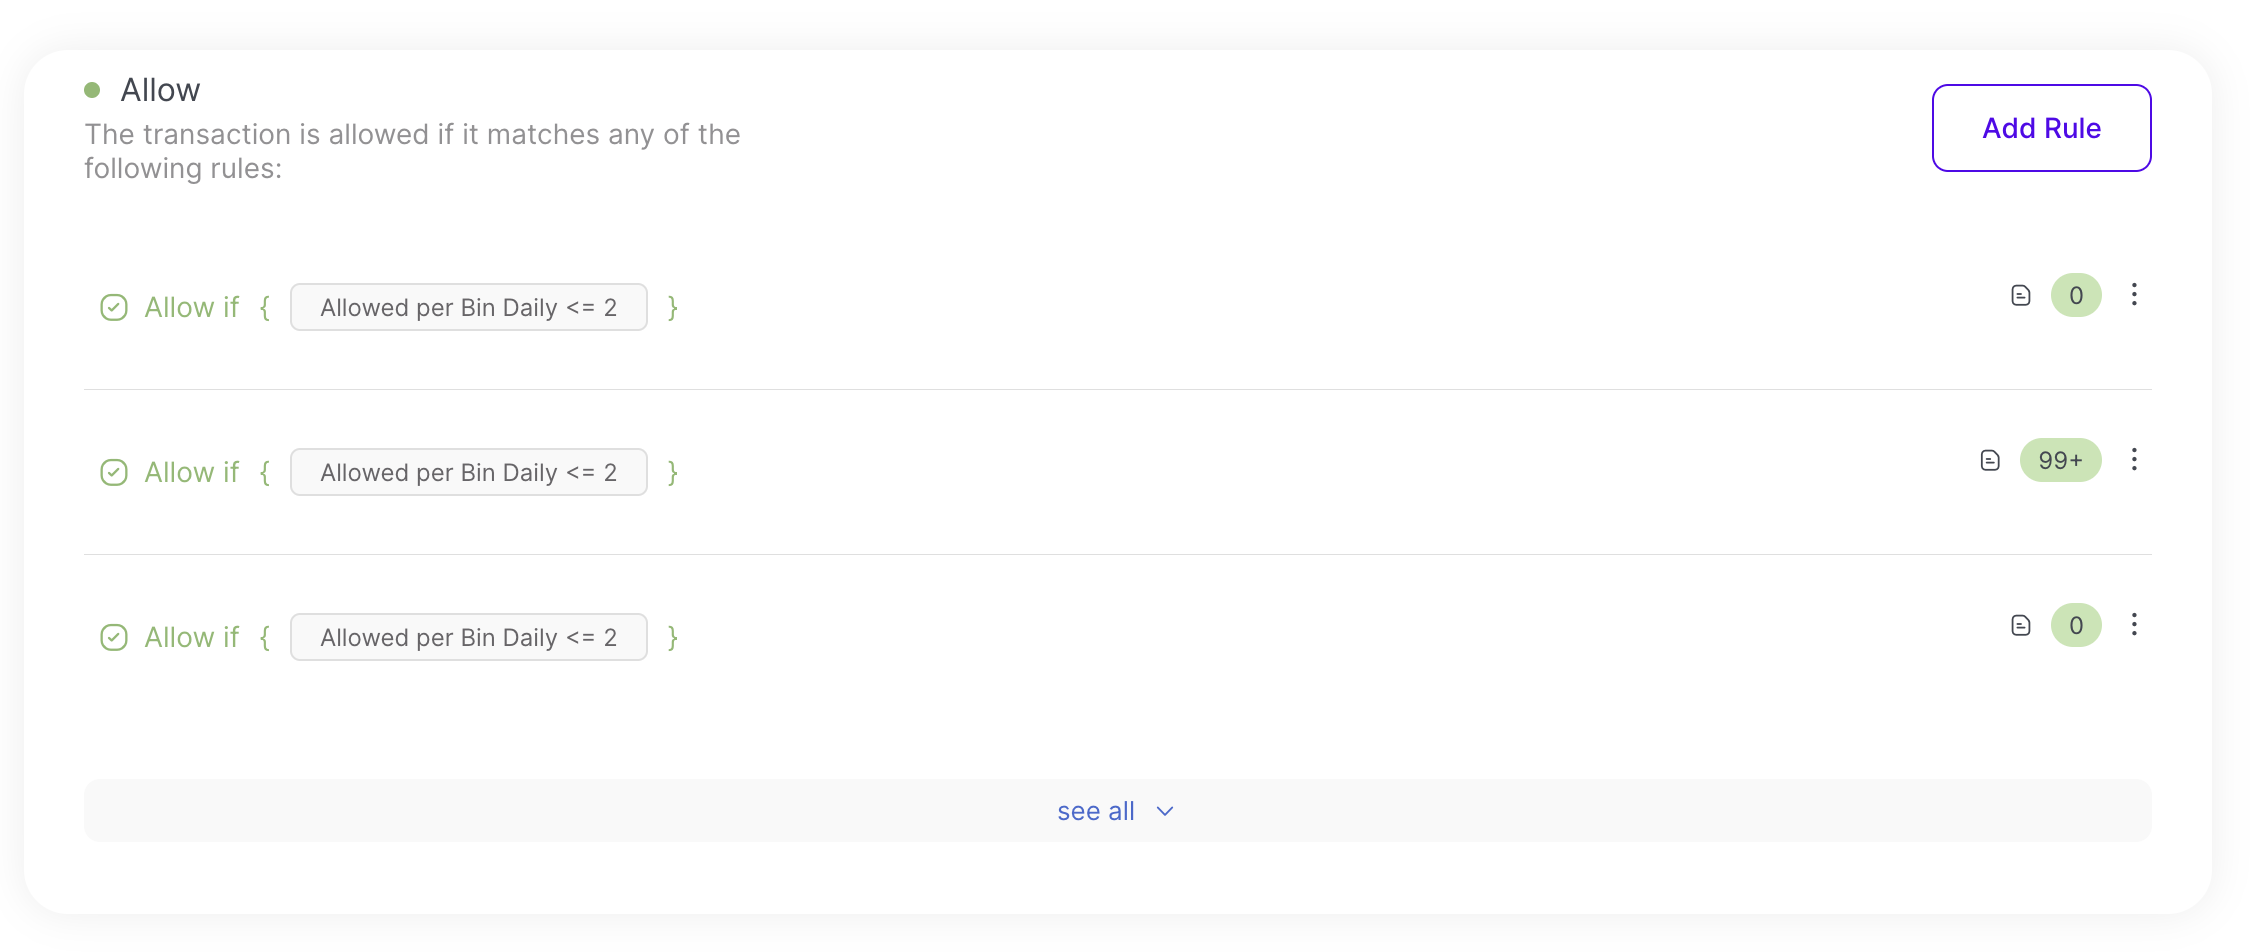
Note
In this example, an Allow rule is being added. Block and Review rule types are created in the same fashion.
The Create Rule page appears.
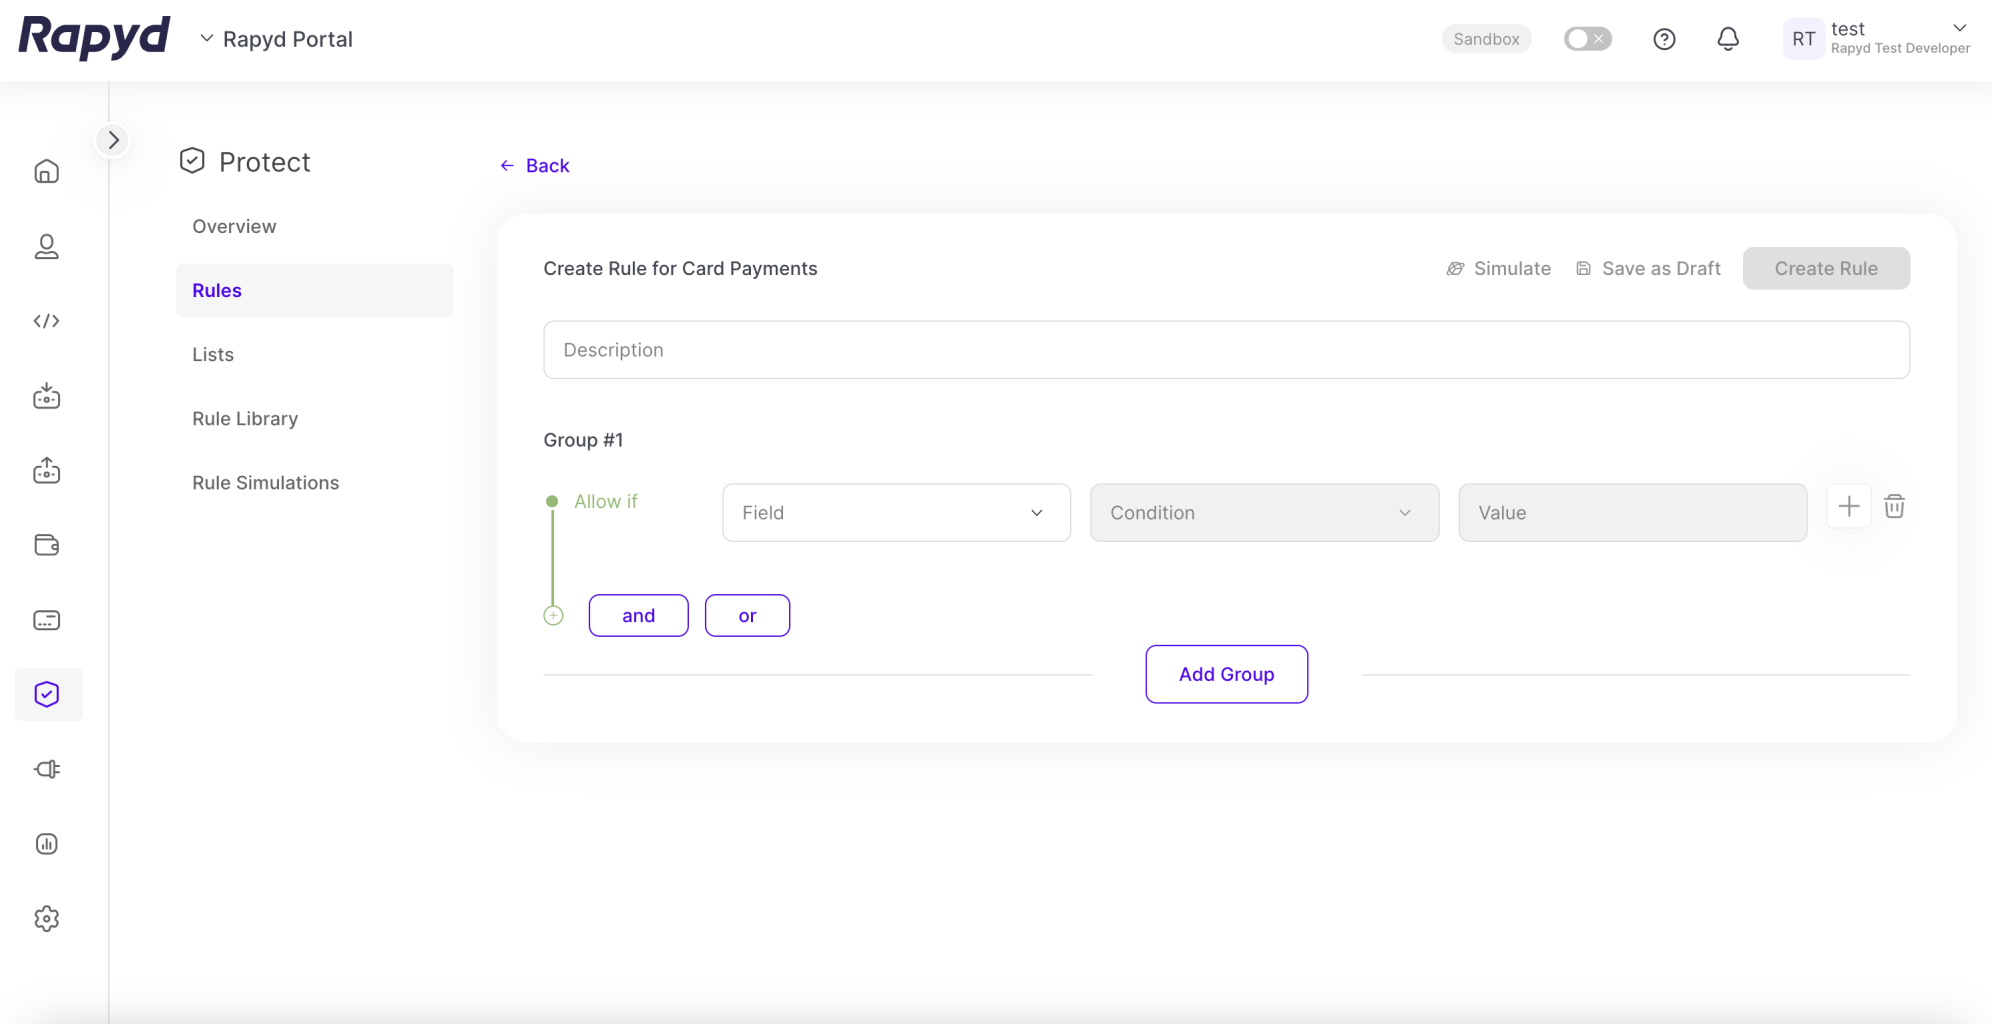
In the Field dropdown list, select the field that you want the first condition of the rule to evaluate. In this example, an amount in EUR is selected.
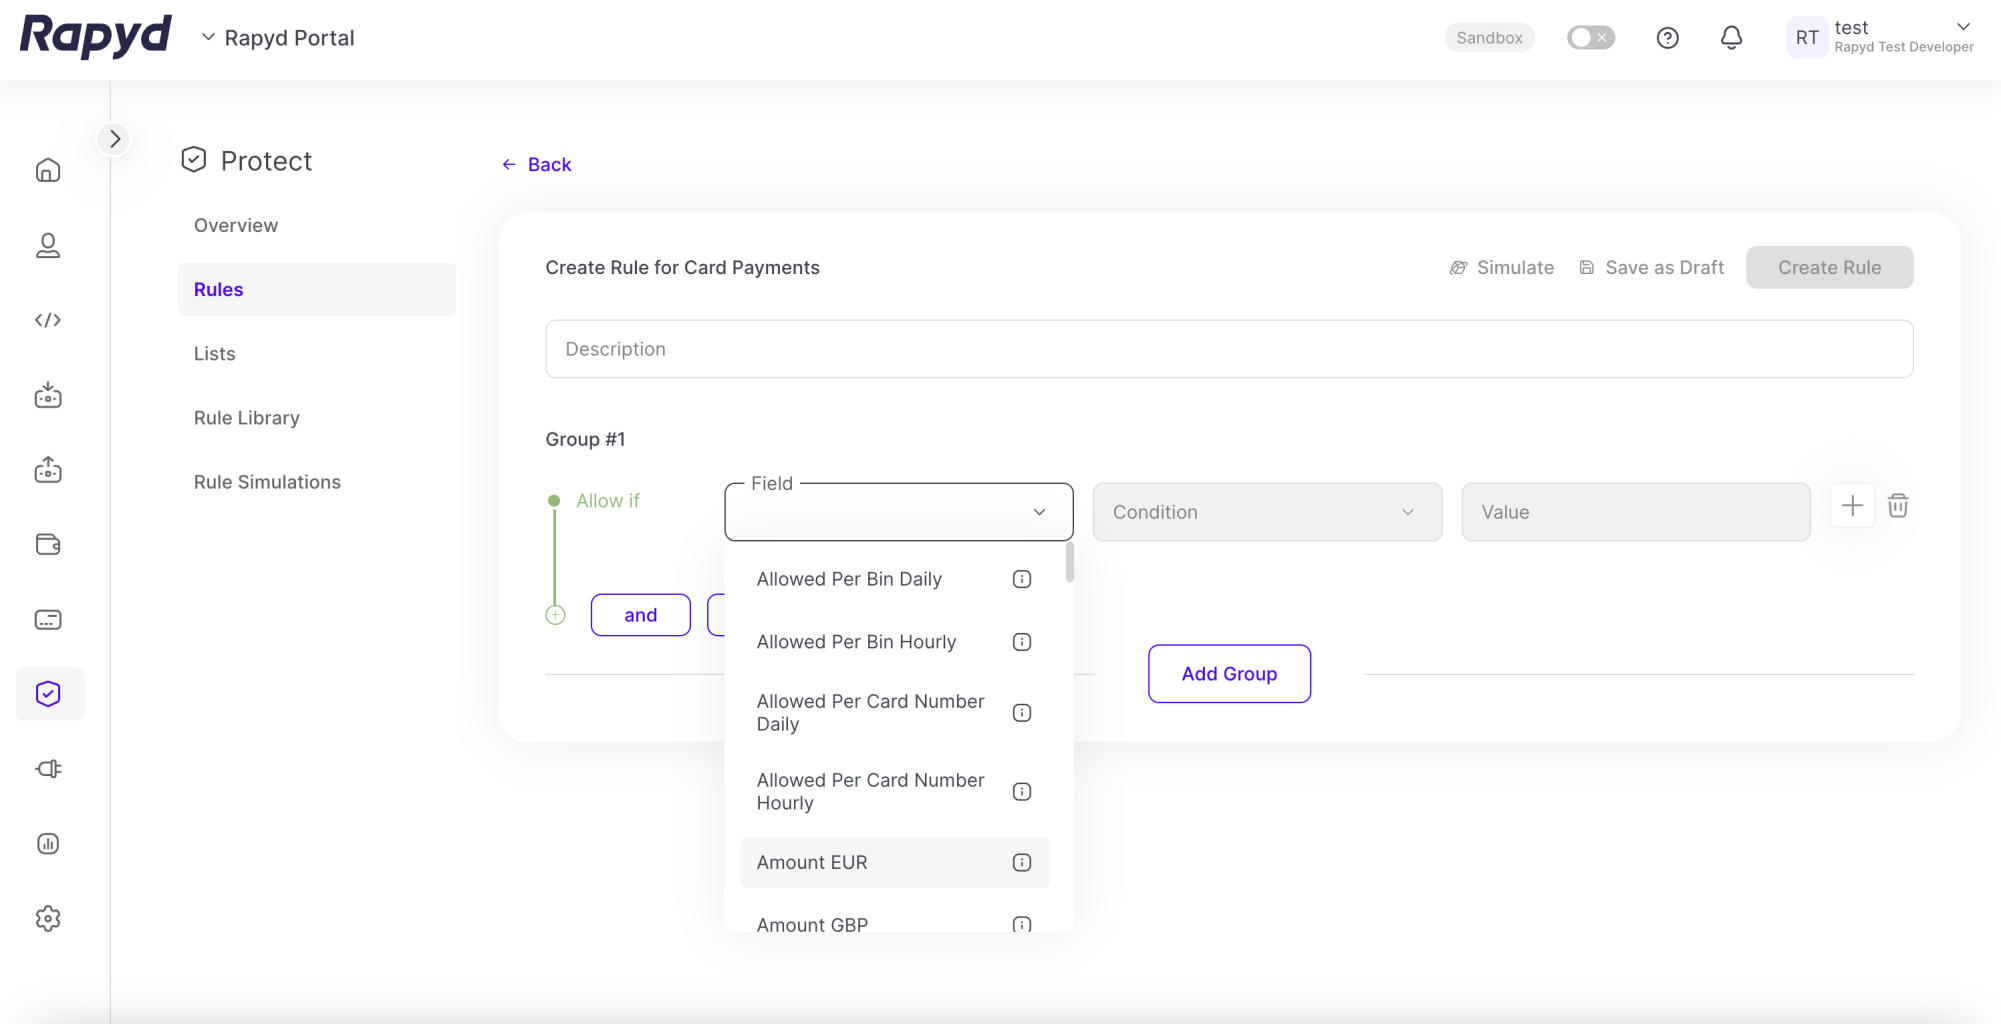
In the Condition dropdown list, select the condition that you want the rule to evaluate. In this example, a Less Than condition is selected.
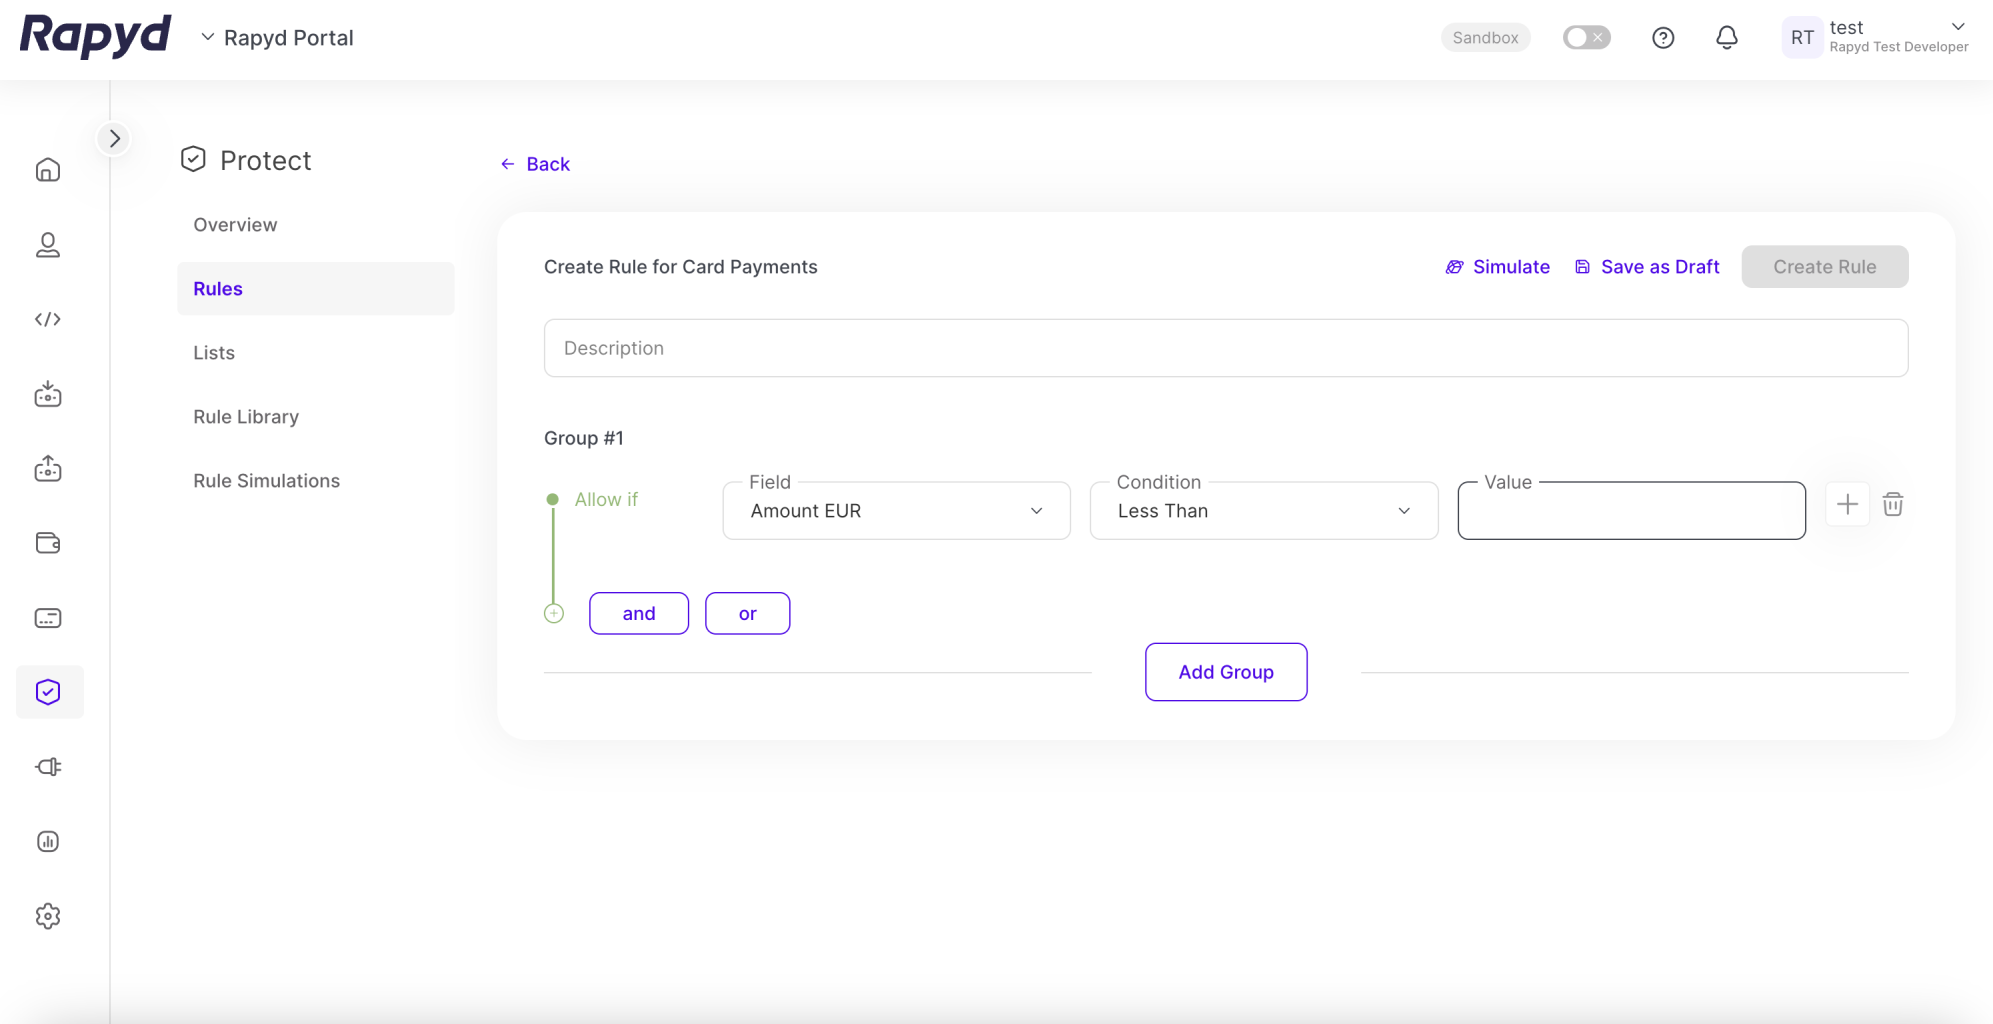
Enter a valid value in the Value field.
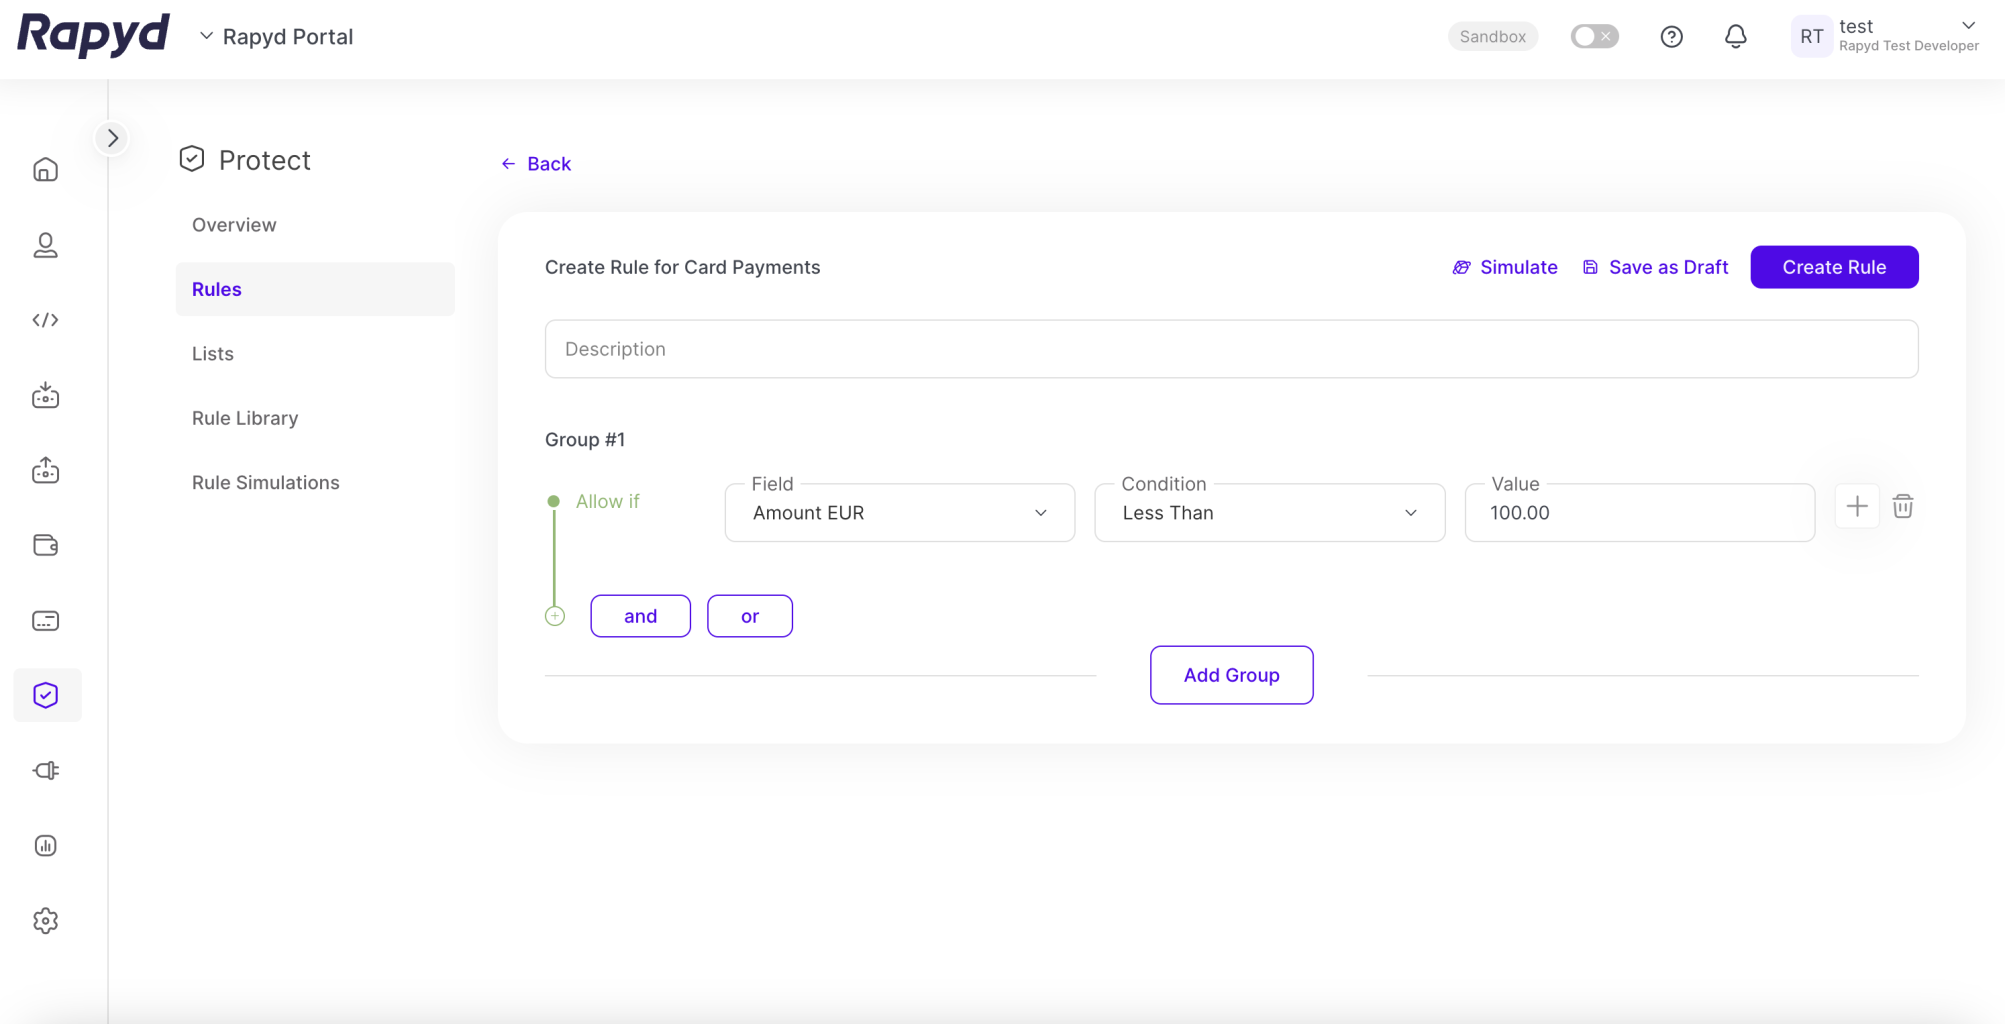
To add another condition to the rule, tap the and or or button next to the + sign. This choice will control all the conditions in the rule. In this example, the operator is Or. Tap the Or button.
A new condition line is added with an or operator to the previous condition.
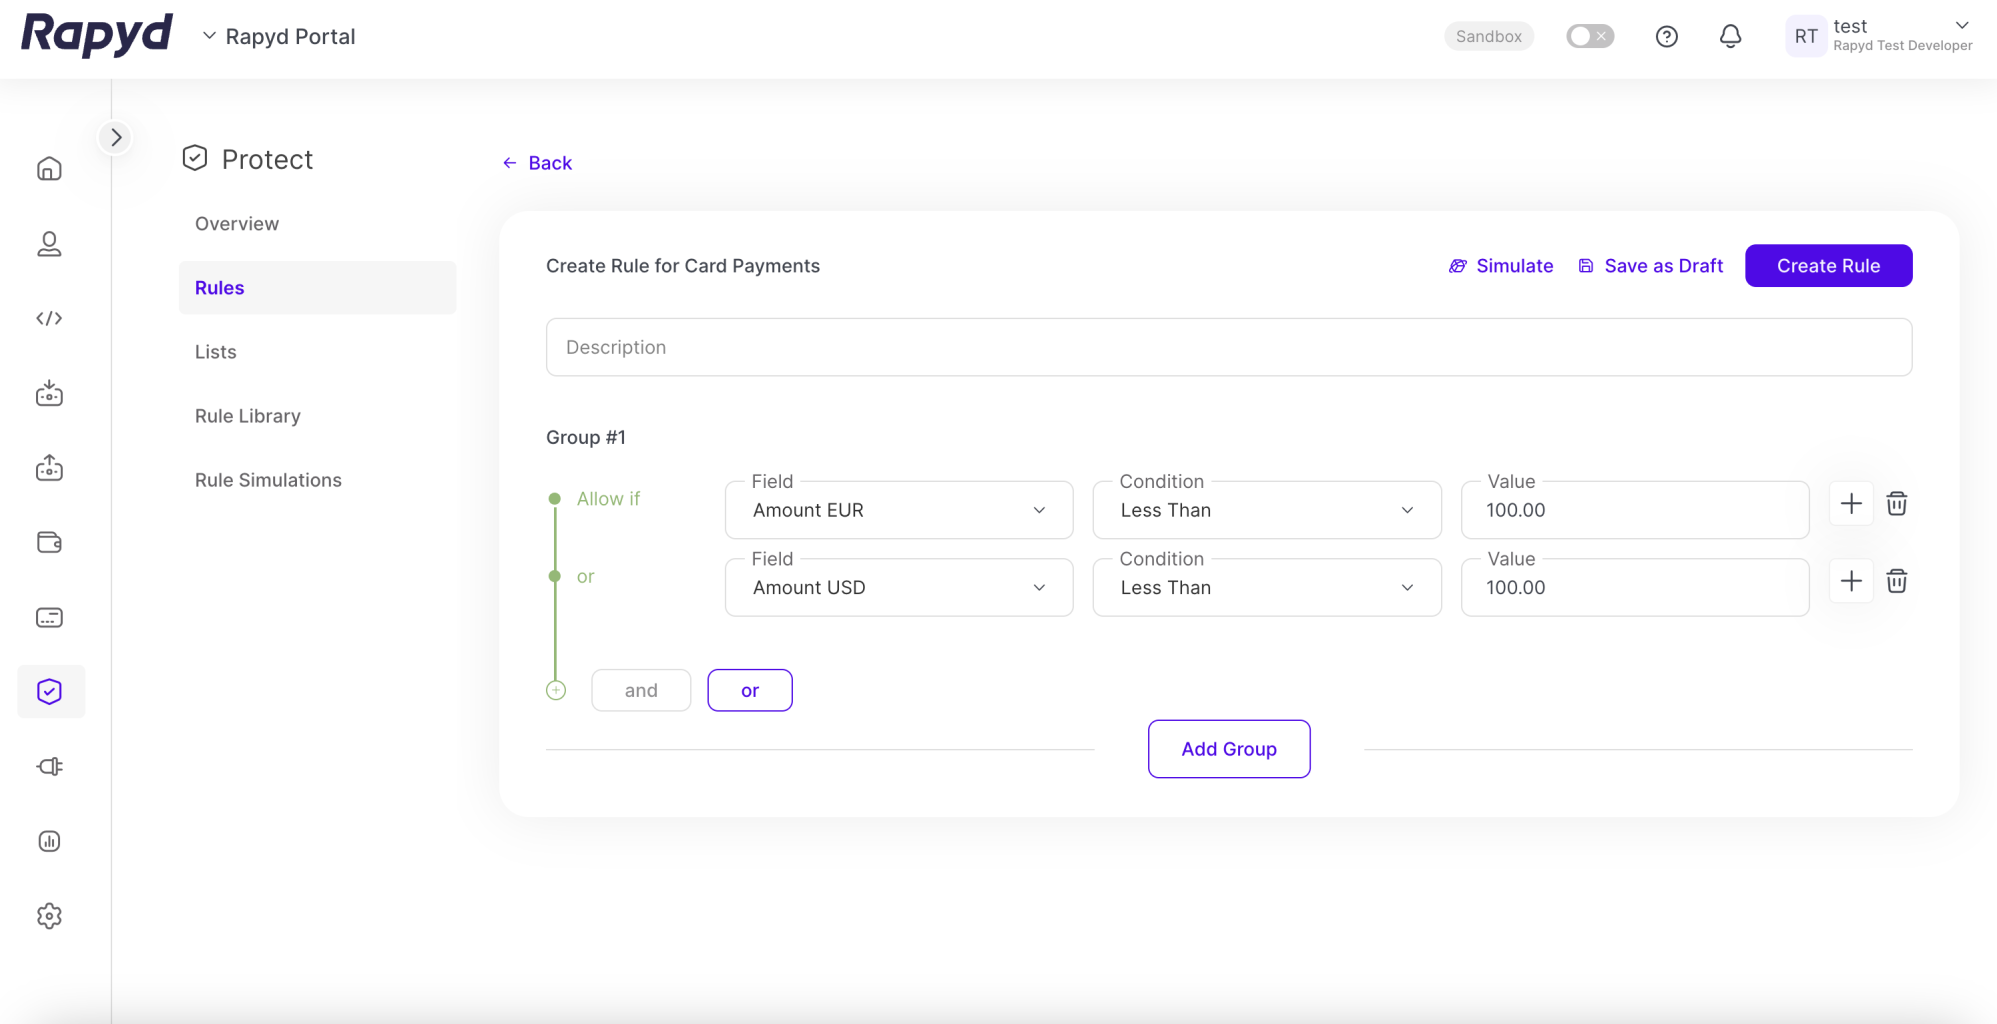
Repeat steps 3-6 as many times as you require. In this example, the new condition is an amount in USD that is less than 100.00.
To save a draft version of the rule, click Save as Draft. A draft rule is not validated and can be edited and enabled at a later time.
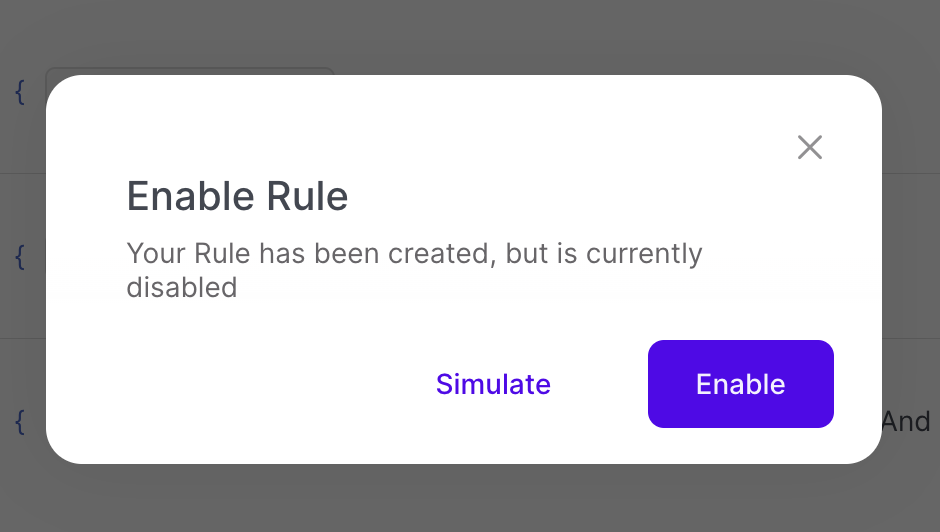
To activate the rule, tap Create Rule. The Enable Rule dialog box appears.
Note
Before you enable a rule, verify that it does not contradict existing enabled rules.
To simulate the rule, tap Simulate. The rule is sent to the simulation. See Simulate a Fraud Rule for more information.
To save the rule as enabled, tap Enable .
The rule is validated, enabled and used by Rapyd Protect. The rule appears on the Rules page.