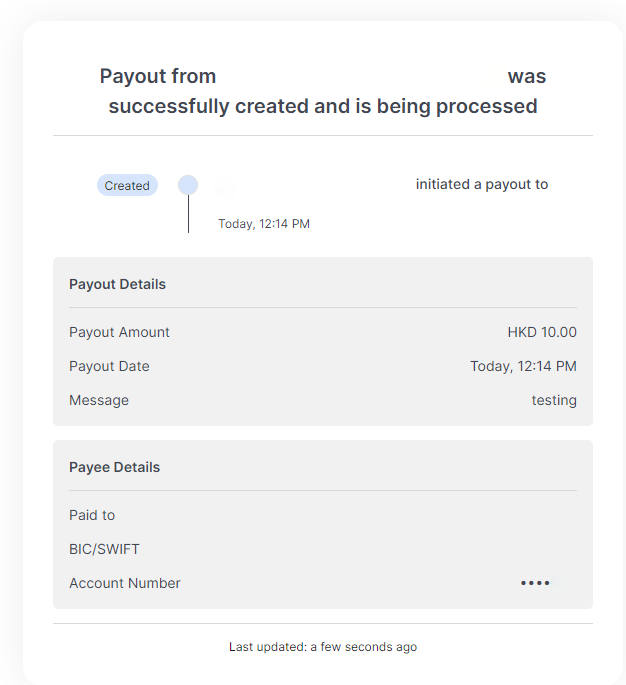
Rapyd Business Account User Guide
Learn how to complete important tasks for your Hong Kong Rapyd Business Account.
The Rapyd Business Account is managed through the Rapyd Client Portal. You can access a global payout platform that provides a reach into 100+ countries while incorporating a broad set of payout methods such as bank transfers, eWallets, cards, and cash.
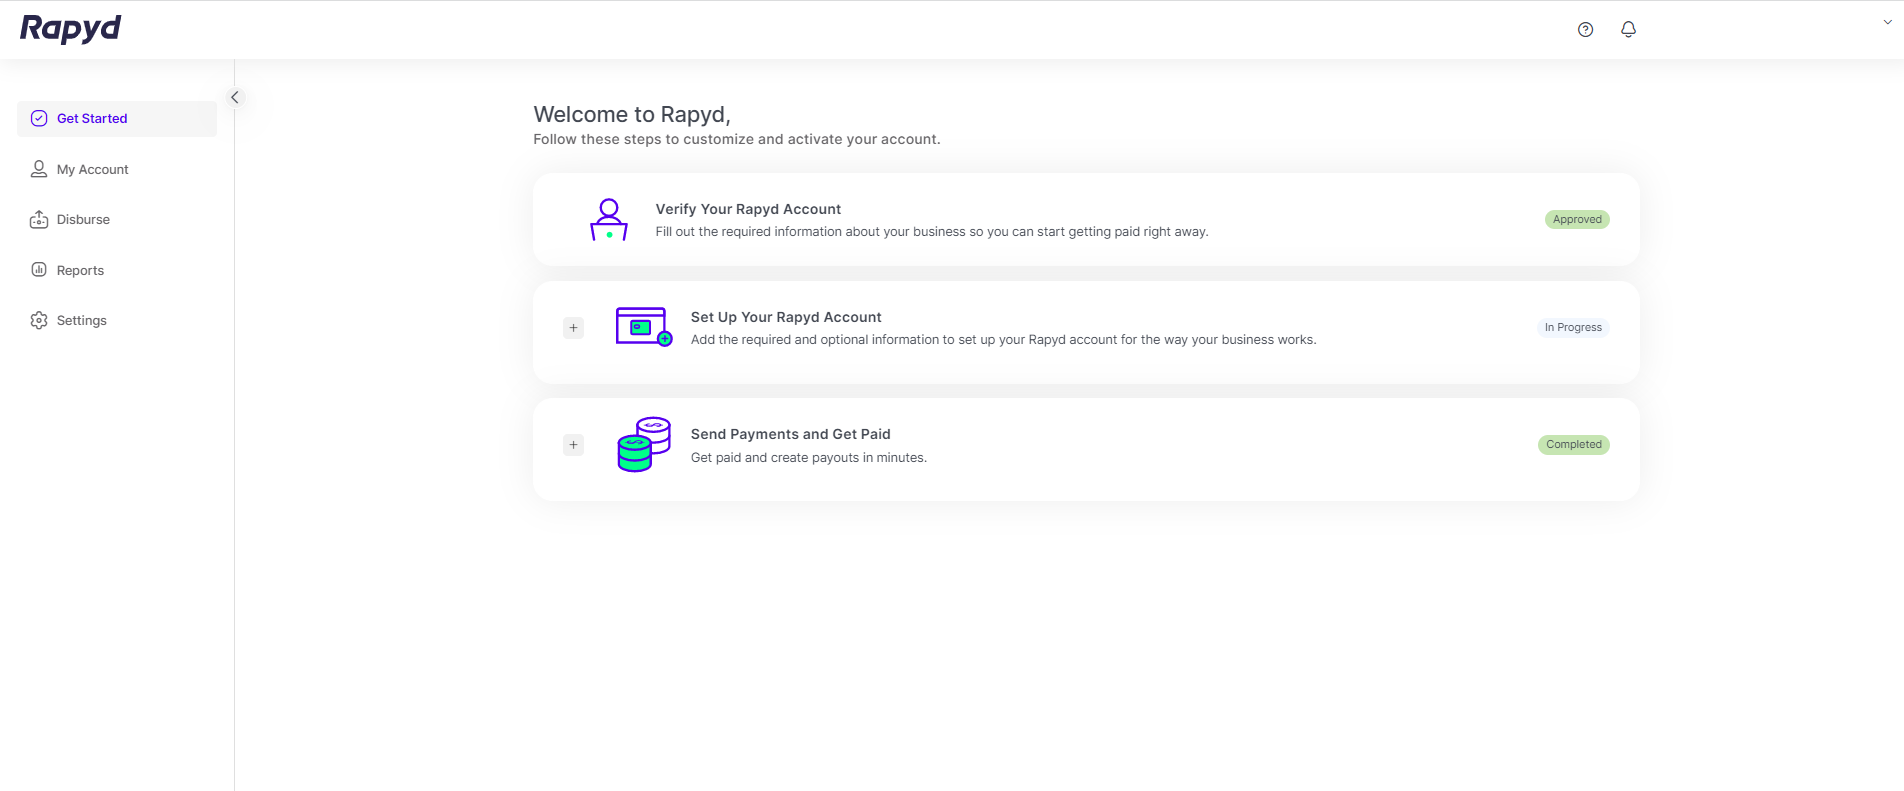
You get access to a local Hong Kong account for incoming transfers, local UK and Europe accounts for incoming transfers, HKD and USD virtual cards, and one consolidated balance for the following currencies: HKD, USD, EUR, and GBP.
The Get Started section offers you an option to set up your Rapyd Business Account. Don’t worry, we have already set it up for you.
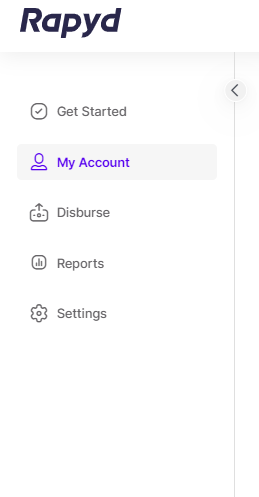
The My Account section offers you an end-to-end overview of your total balance by currency, all incoming and outgoing transactions you have performed, and your account information.
The Disburse section allows you to send out single payouts or mass payouts, monitor your payouts, and manage your default sender and beneficiary information.
The Reports section offers daily and monthly reconciliation reports with details of your payments, payouts, and transaction fees.
The Settings section offers you a variety of options to manage your account, such as: defining users and their permissions, creating notifications for yourself or others, and reviewing the audit log of your account usage, FX rates, and methods for outgoing payments.
The Get Started section offers you the option to set up your Rapyd Business Account.
Don’t worry, we have already set it up for you. Your account is approved and ready to go!
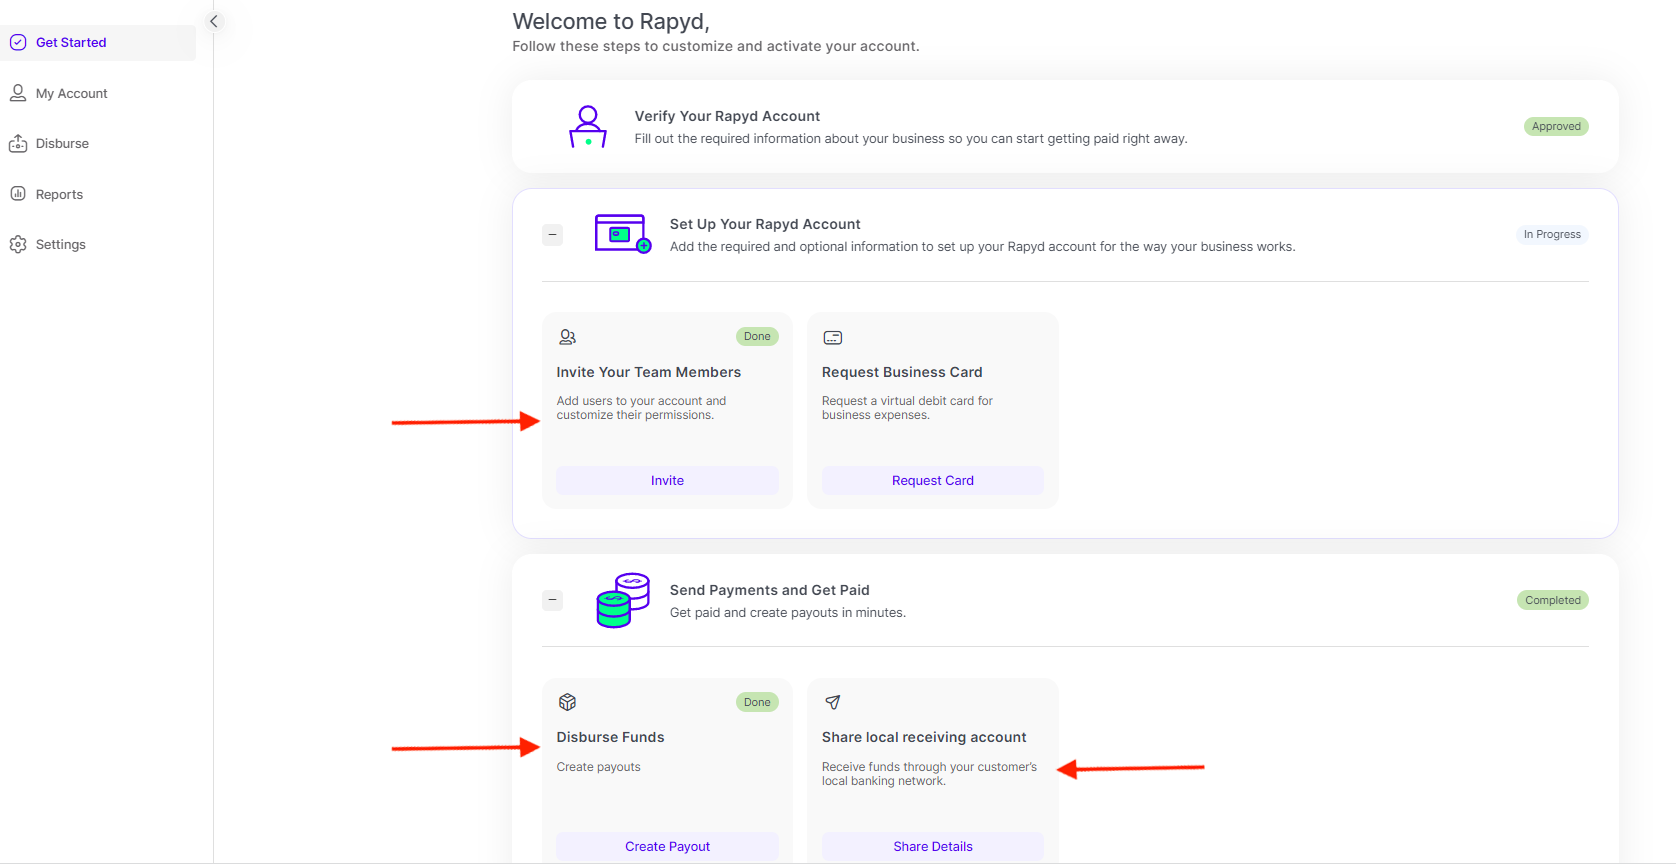
You can accomplish additional tasks such as:
Inviting new team members to share your account management.
Get Your Account Information to receive funds.
Create a payout by using the quick links in the Get Started page.
The My Account section offers you an end-to-end overview of your total balance by currency, all incoming and outgoing transactions you have performed, and your account information.
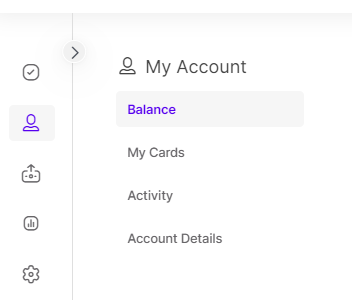
The Balance section offers you a total view of your overall account balance in HKD, USD, EUR, and GBP currencies.
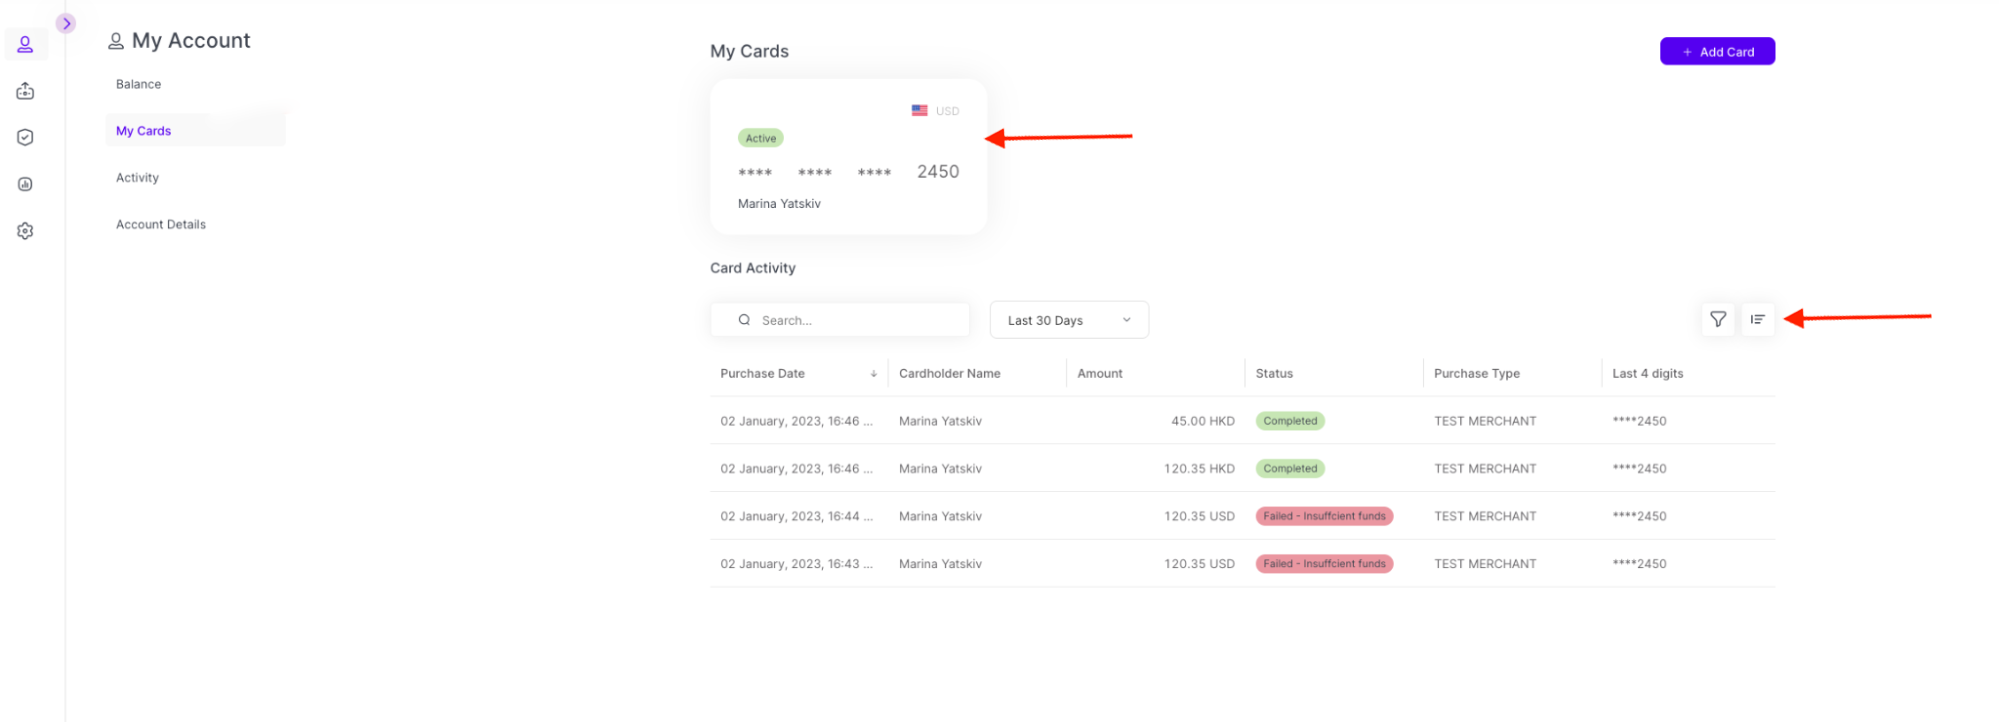
The My Cards section includes your issued virtual card information and performed card activities by time period.
The Activity section includes all of your payments, payouts, and fee transactions by time period.
The Account Details section includes account information for accepting funds, self-managed thresholds for your account, and the contact information of additional Rapyd Business Account users.
The Balance page shows the balance of your HKD/USD/EUR/GBP accounts and its balance status.
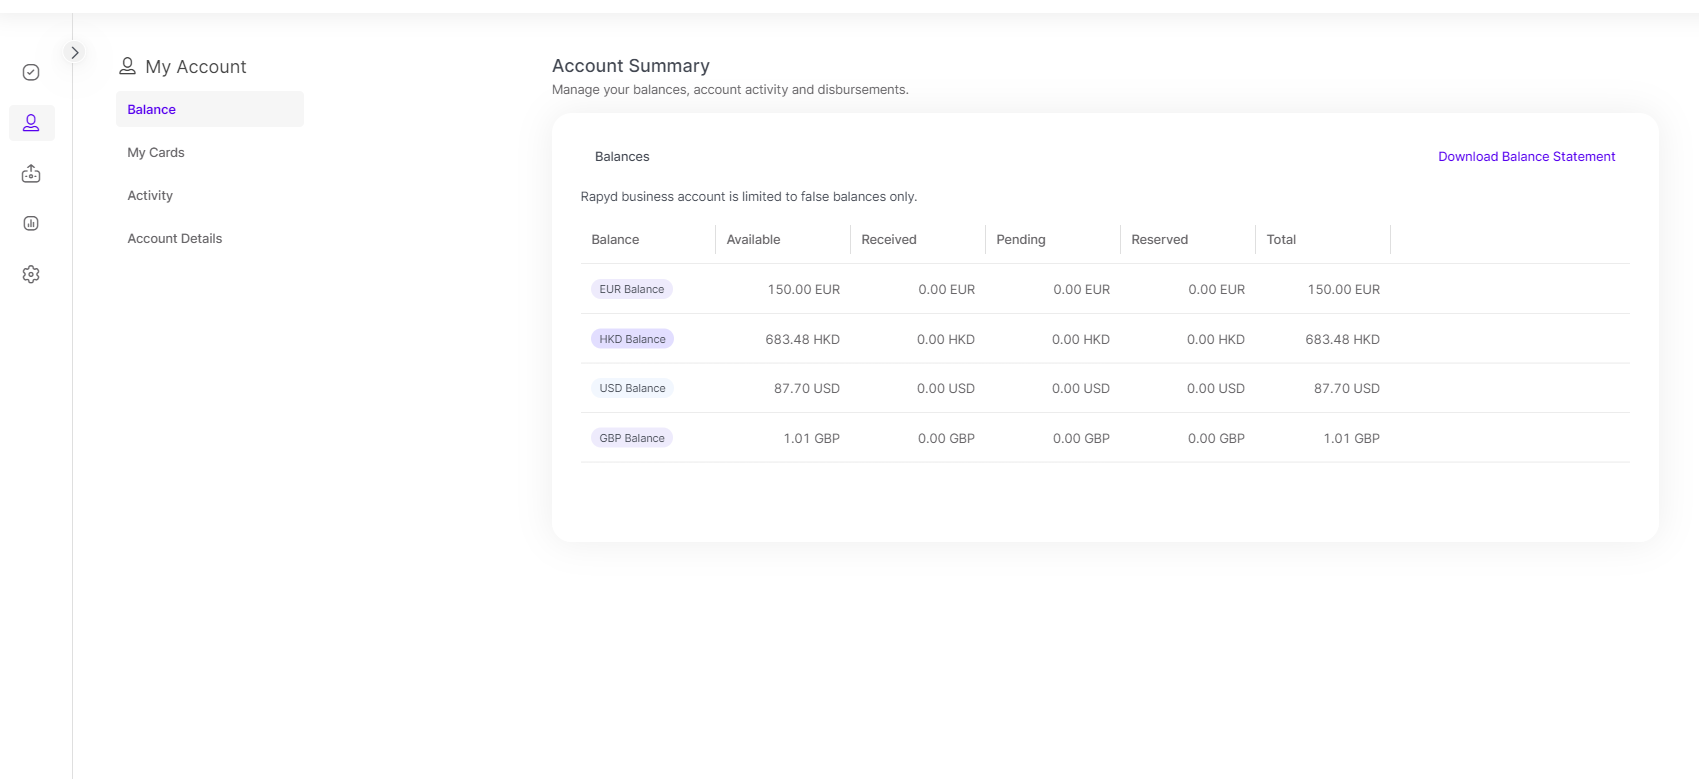
The Balance section displays the following fields:
Available balance - the balance that is available to be used.
Received balance - the balance that is received from your customer.
Pending balance - the received balance that is being processed by the bank.
On hold balance - the balance that is being held for final authorization by Visa and Mastercard. Relevant for card transactions.
Reserved balance - the balance being reserved for compliance and regulatory purposes.

The Next Payments section displays the following:
Flat fee - provides information about the flat fee subscription payments, next fee payments, and payment fee history.
The My Cards details can be viewed by clicking on a card at the top of the page.
The Card Details page appears.
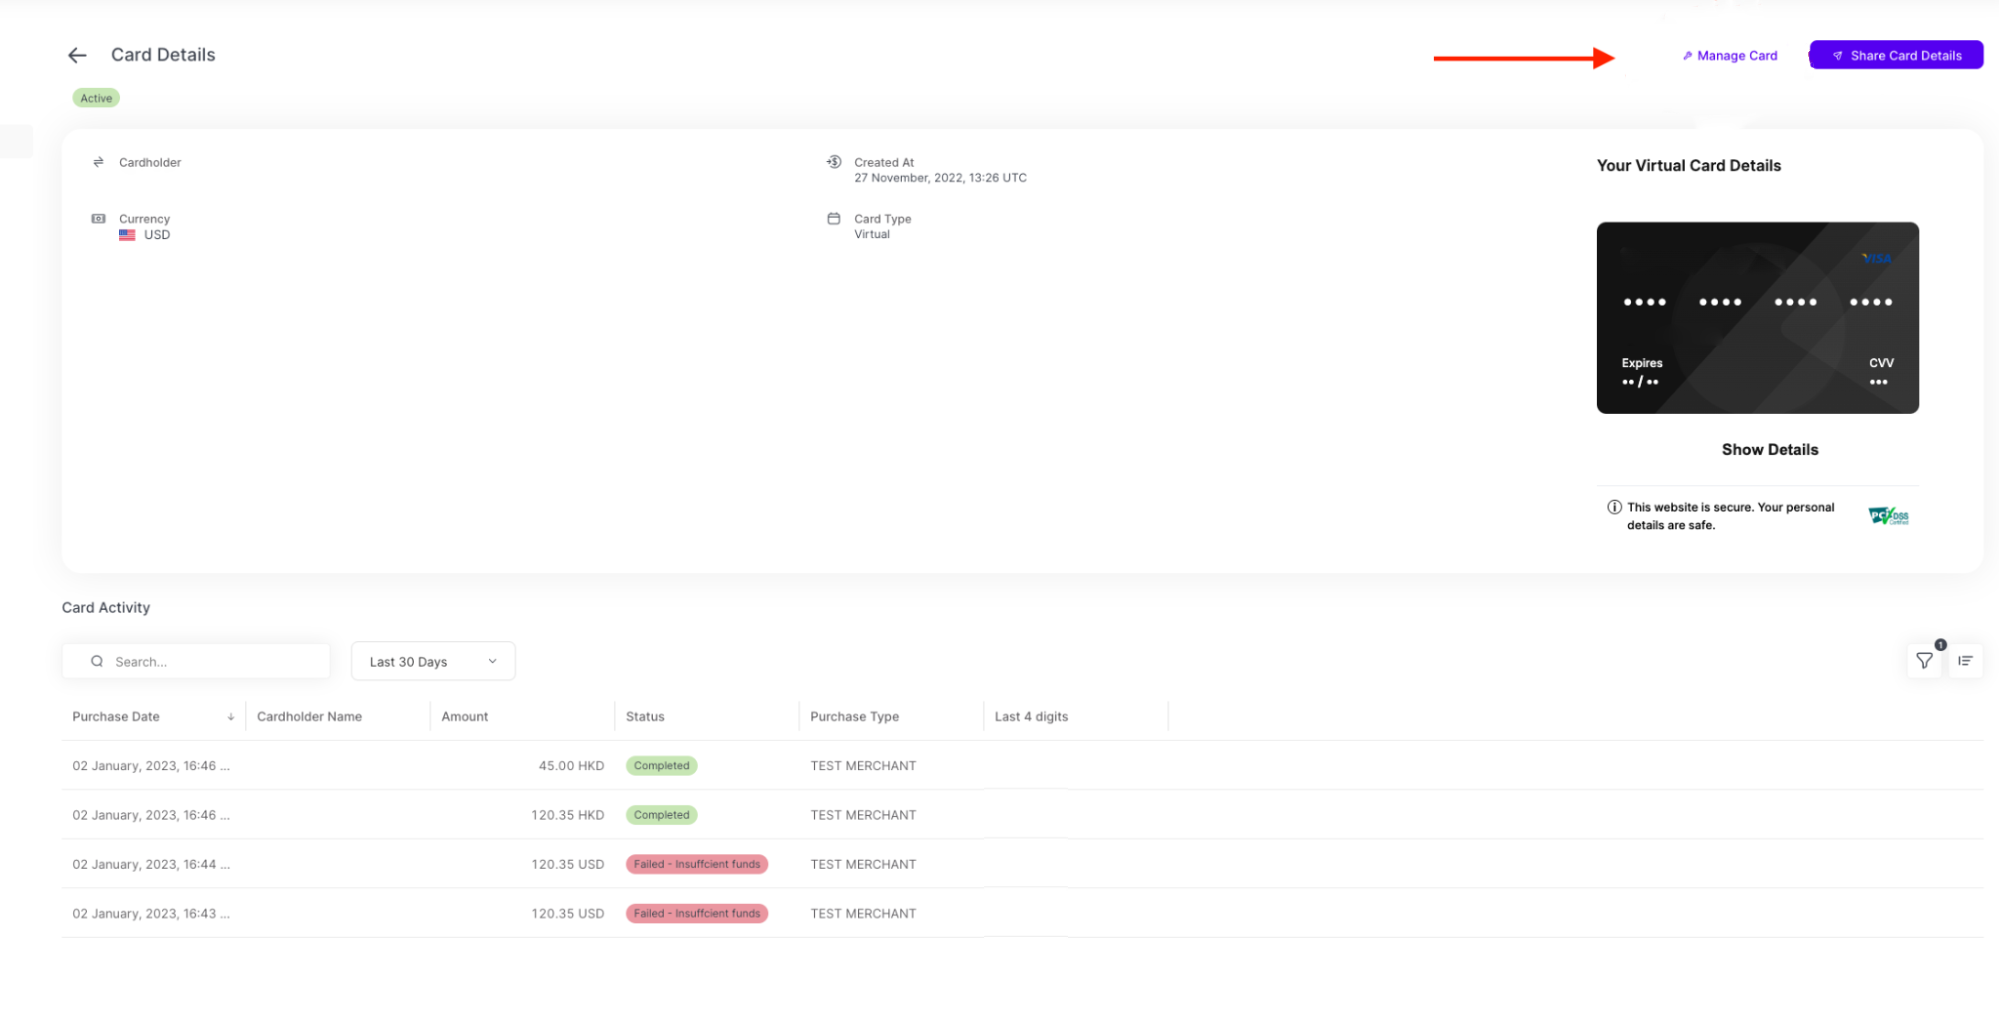
You are eligible for one virtual card. You can manage your card limits and block your card in case of suspicious activity. You can view your card transactions and add additional information if required.
The Activity page includes all of the activities made in your Rapyd Business Account.
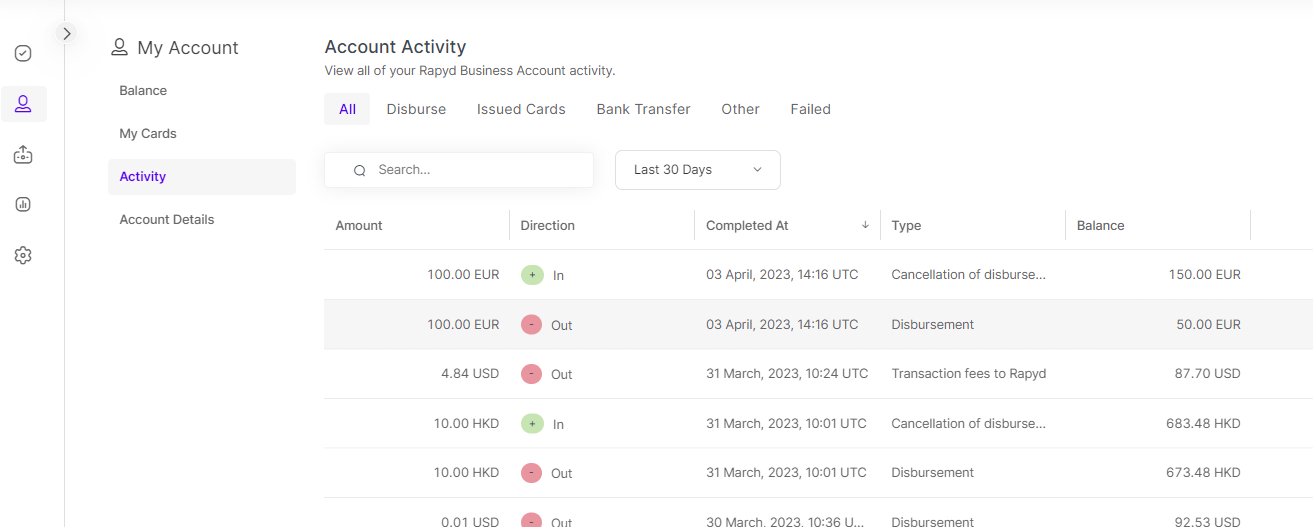
The Account Activity page displays the following tabs:
All - includes incoming transactions, outgoing transactions, cards, and fee transactions.
Disburse - includes all outgoing transactions. For more details about the outgoing transactions please refer to the Disburse - Payout section.
Issued Cards - includes all card transactions. For more detail please refer to the My Account - My Cards section.
Bank Transfer - includes the incoming transactions.
Other - includes the transaction fees and transaction adjustments if applicable.
Failed - includes failed transactions. You may also refer to My Account > Activity > Account Activity > All or Disburse > Payouts for failed or uncompleted transactions.
The Account Details page includes account information for accepting funds, self-managed account thresholds, and contact information of additional Rapyd Business Account users.
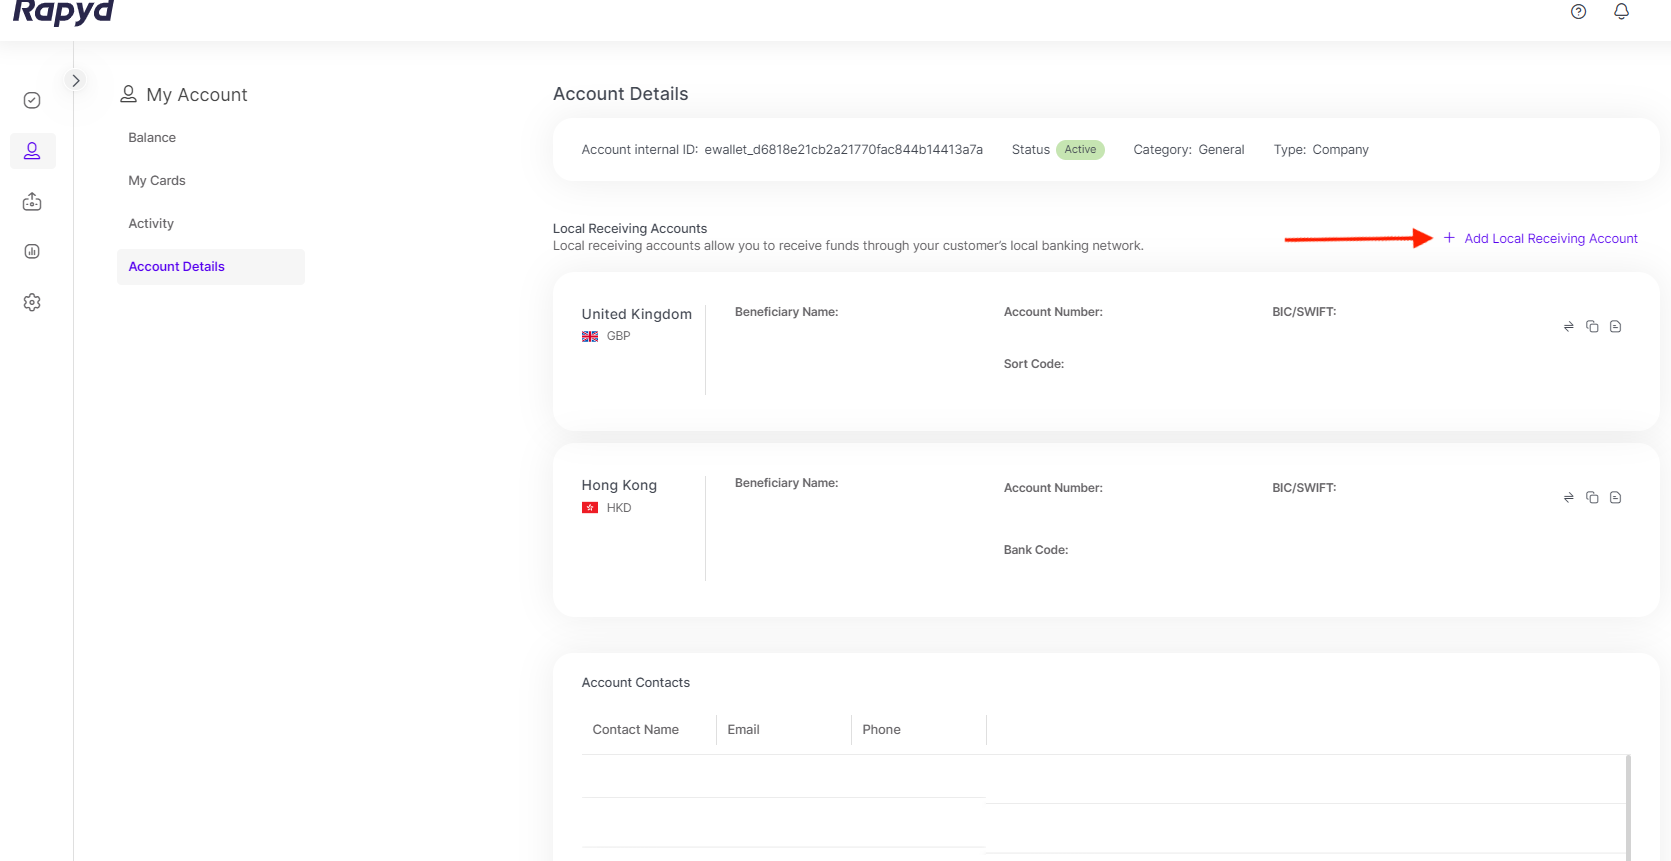
The Account Details page contains the following sections:
Account Details - Your account information, which is relevant when you open a Support ticket.
Local Receiving Accounts - includes the account information to receive funds using a local network of HKD, EUR, and GBP. You get a Hong Kong account for accepting funds in HKD, USD, GBP, and EUR. You can issue a local Europe or UK account to receive EUR and GBP by clicking on + Add Local Receiving Account.
Account Contacts - Additional contacts with a verified identity and are eligible to be a card holder. You can add a contact when issuing a virtual card.
Balance Thresholds - You can add a balance threshold to your account balance and get notified when the threshold is reached.

The following icons appear on the right side of your Local Receiving Accounts (from left to right):

The View Transactions icon allows you to view transactions relevant to a local receiving account.
The Copy icon allows you to copy account information.
The View Details icon allows you to view additional account details.
The Disburse section allows you to send out single payouts or mass payouts, monitor your payouts, and manage your default sender and beneficiary information.
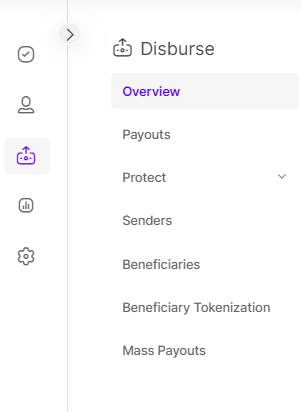
The Overview section includes a quick glance at the outgoing transaction status.
The Payouts section allows you to initiate a payout and see all your outgoing transaction activities and its status.
Protect is a compliance engine that includes blocked transactions due to regulatory/compliance issues. Blocked transactions are under review of the Rapyd compliance team.
The Senders section allows you to manage your sender information. A default sender with your information is created for you during the setup process. You have the option to send a payout on behalf of another sender.
The Beneficiaries section allows you to manage your beneficiary information.
The Beneficiary Tokenization section offers you the ability to create and upload a number of beneficiaries in bulk.
The Mass Payouts section offers you to send out multiple payouts at once.
Navigate to Disburse > Payouts.
The Payouts page allows you to initiate a payout, and view all payout transactions and payout details.
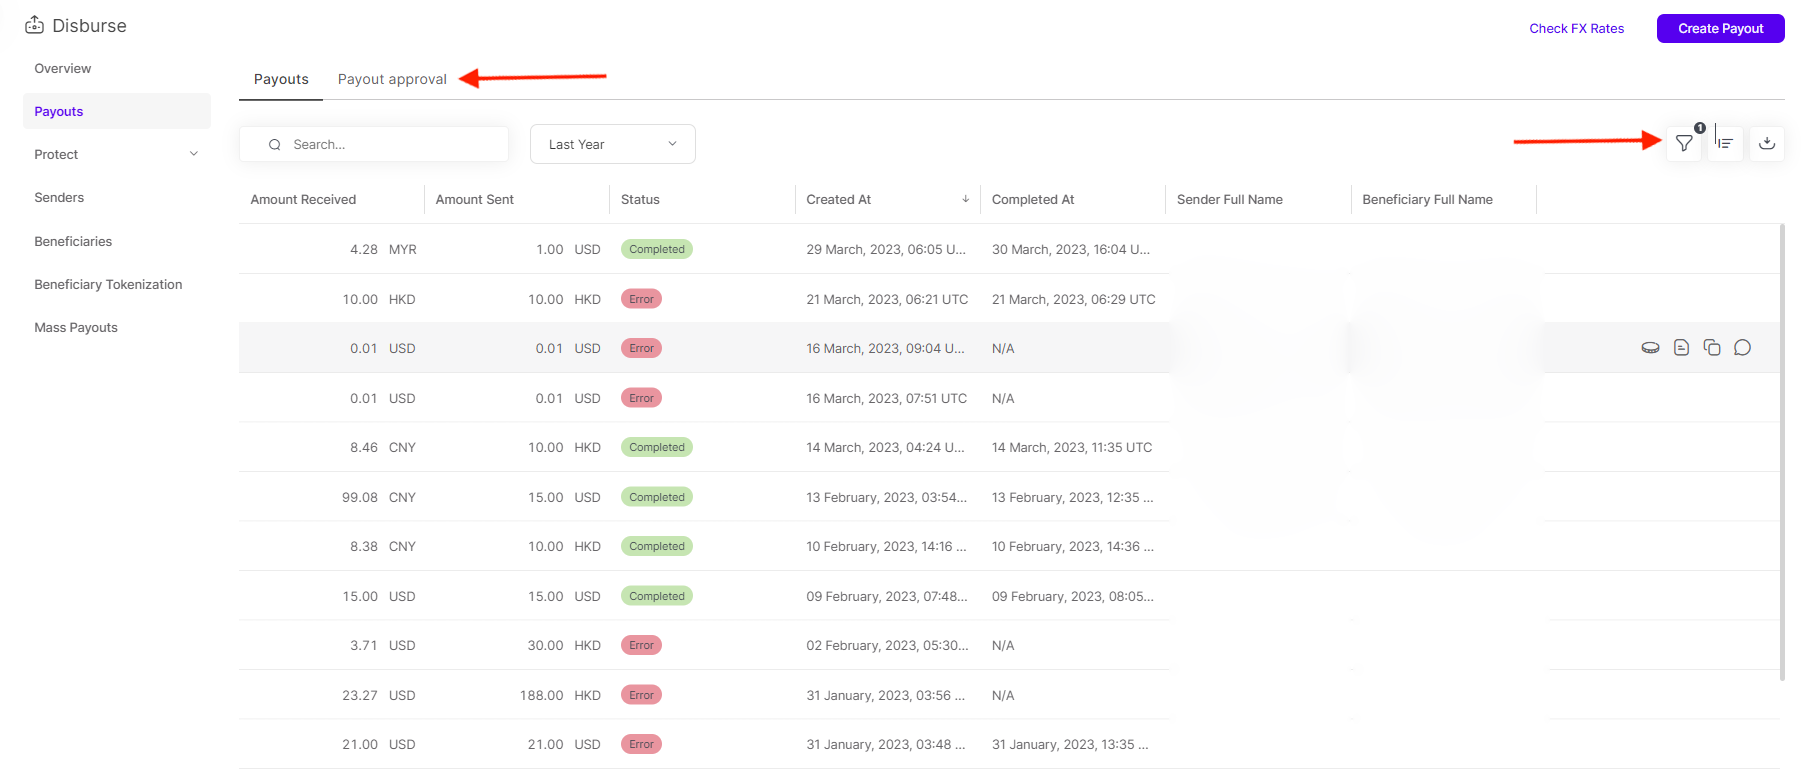
The Payout approval tab includes the status of the transactions.
The following icons appear on the right side of a payout row (from left to right):
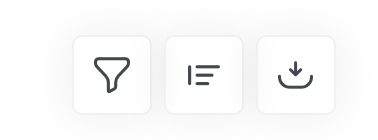
The Filter icon allows you to filter transactions by status, amount, etc.
The Customize Columns icon allows you to customize the transaction details view.
The Export icon allows you to download your transactions as a CSV.
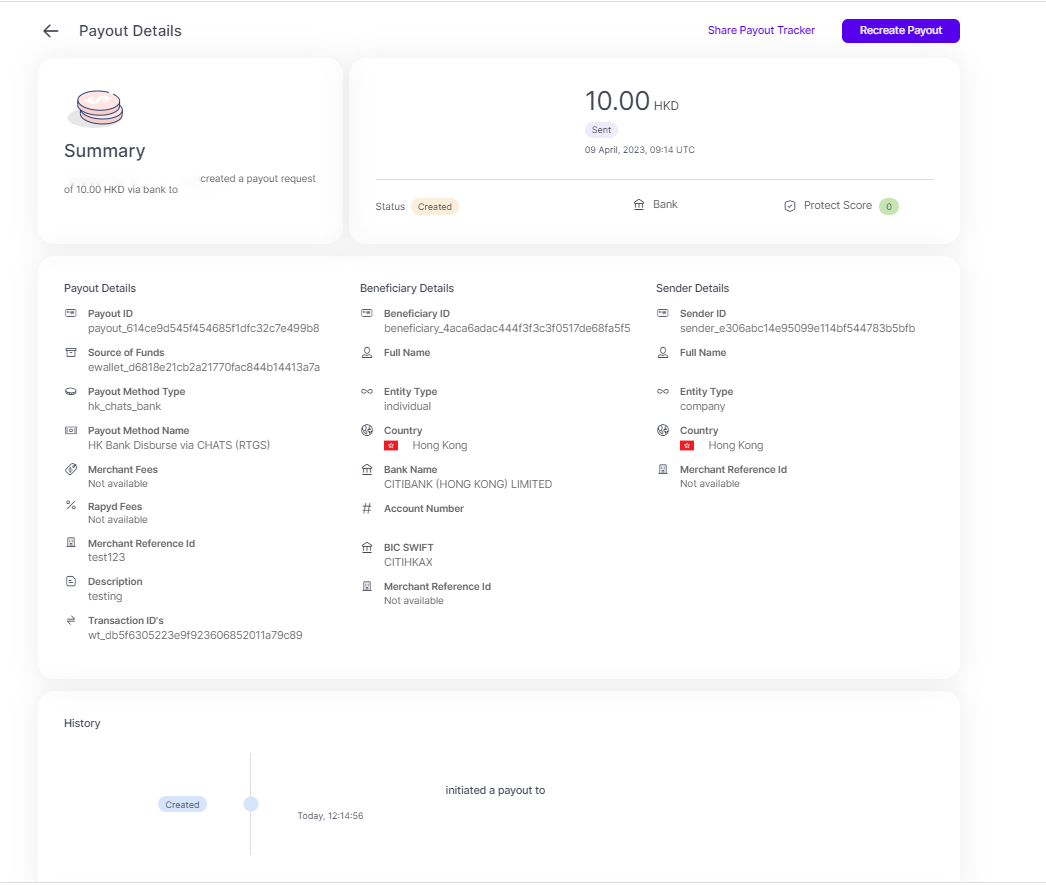
Click on a payout to view the details. The Payout Details panel appears, and includes all of the details about a single payout.
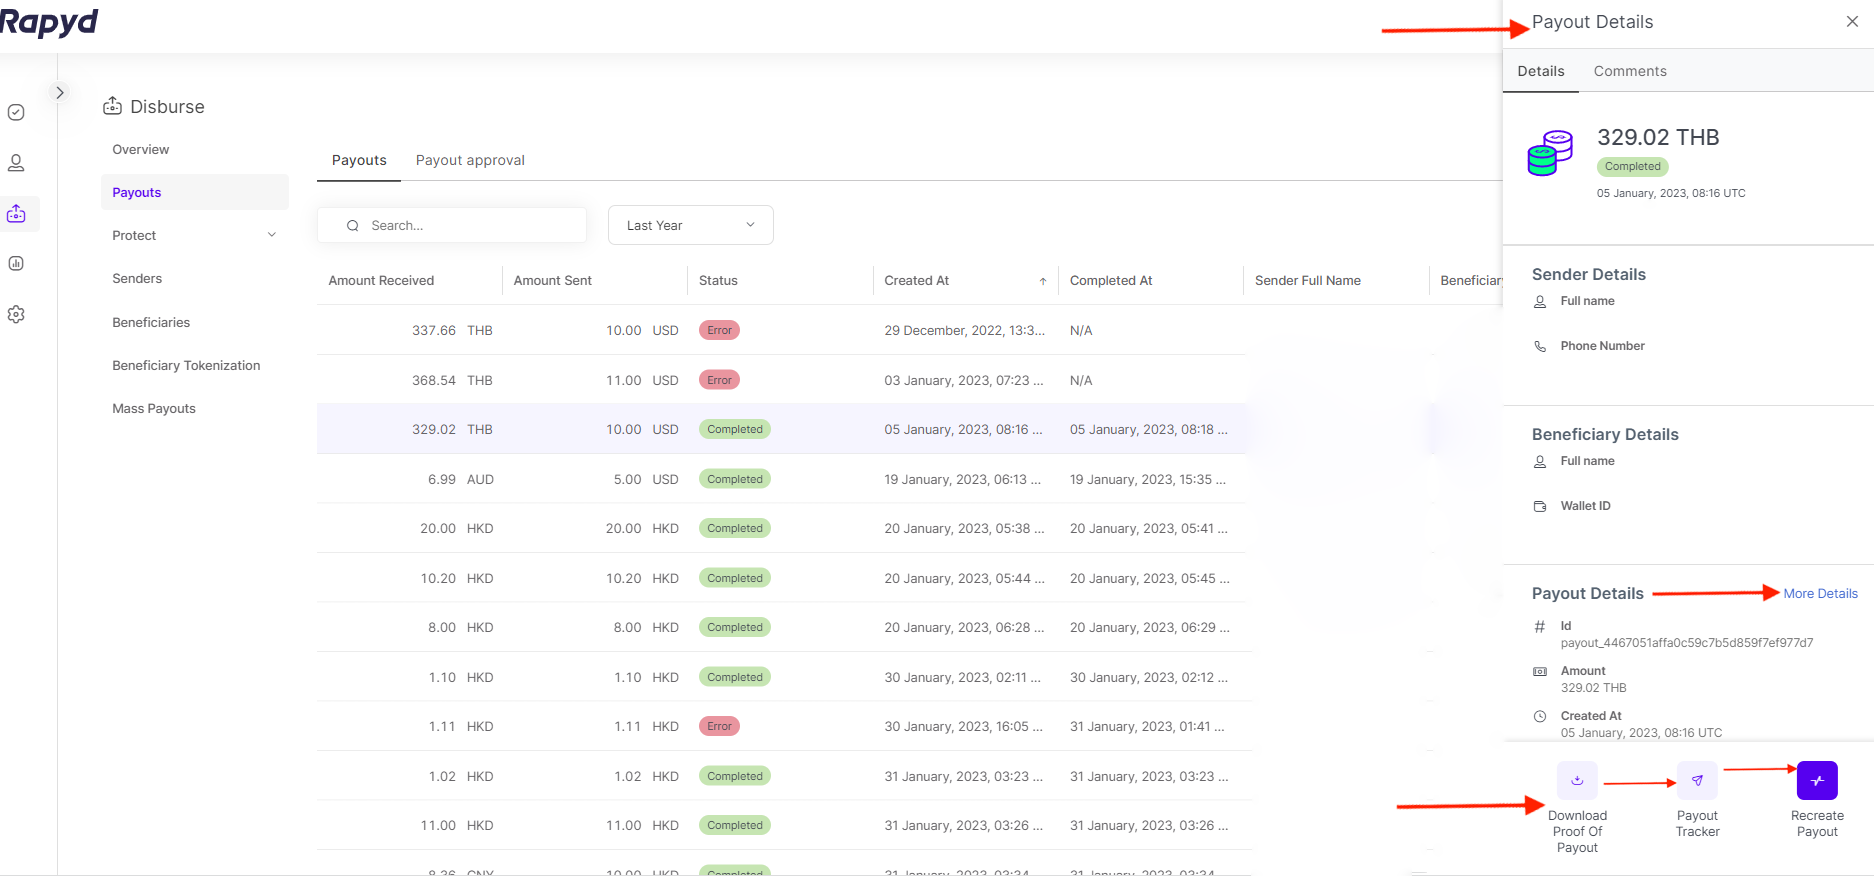
From the panel icons at the bottom, you can:
Download Proof of payment.
Click on the Payout Tracker icon, which shows the current payout status.
Click on the Recreate Payout icon, which offers an option to recreate a payout to the same sender with the same details, but a different amount.
The More Details link to the right of the Payout Details section of the side panel offers you a complete view of your payout, including a transaction status, compliance check, etc.
You can create a payout using your Rapyd Business Account.
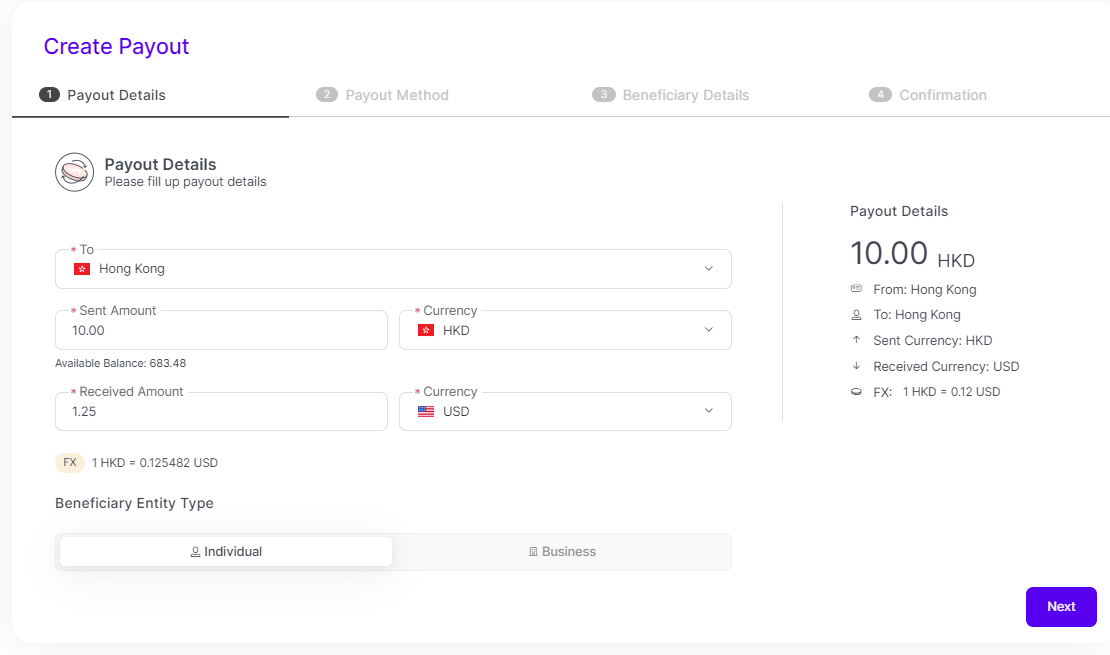
List where you want to disburse your funds.
Enter the disbursement amount in the Sent Amount field.
Select the currency (for Sent Amount) from the Currency drop-down.
Enter the funds the beneficiary accepts in the Received Amount field.
Select the currency (for Received Amount) from the Currency drop-down.
Check the FX rate below the Received Amount field.
Click Next.
The Payout category is listed as Bank.
Select the Payout Method Type from the drop-down.
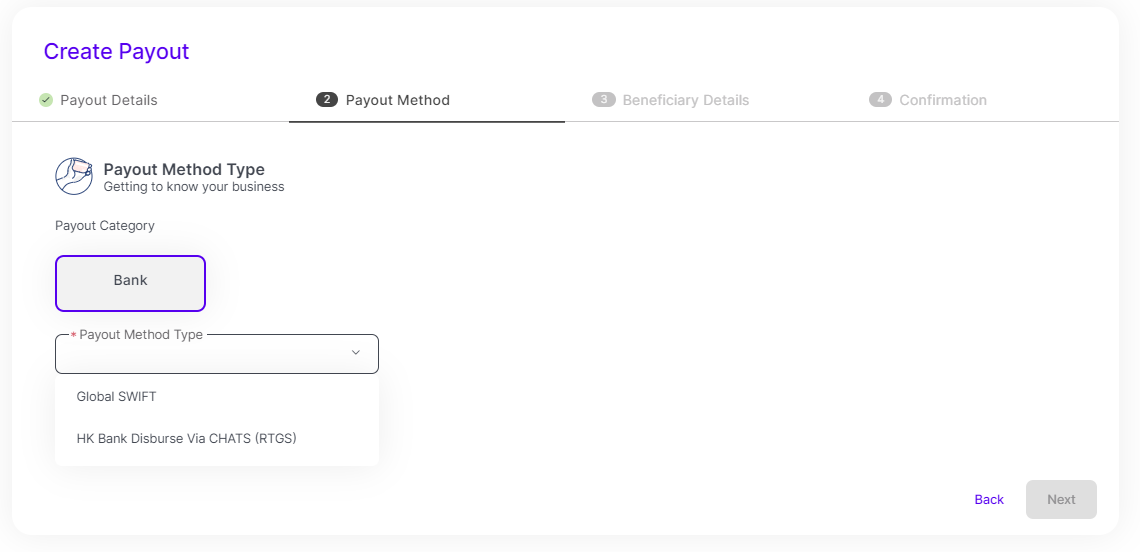
Note: The Payout Method Types available depends on what you select for the To field and the Currency (Received Amount) field.
Click Next.
Fill in the Sender required fields. The required fields may differ depending on the selected payout destination in Step 1 and the payout method in Step 2.
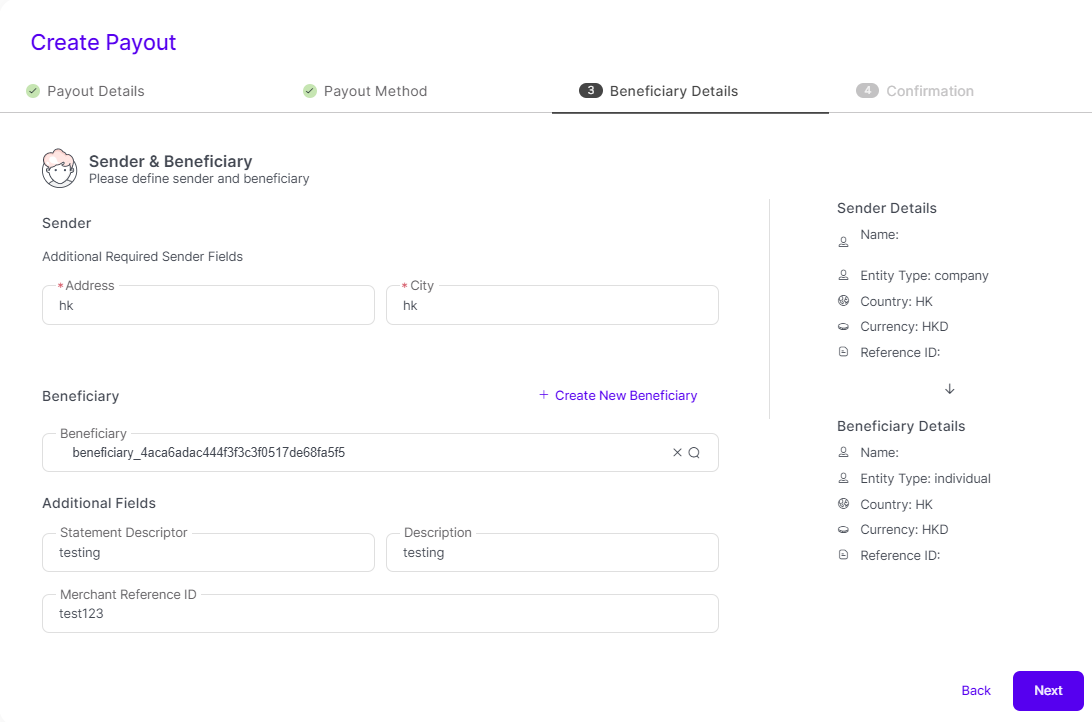
Search for a Beneficiary. You can search by Beneficiary ID, Name, or Reference ID. After selecting the Name search option, type the name of the beneficiary in the search bar.
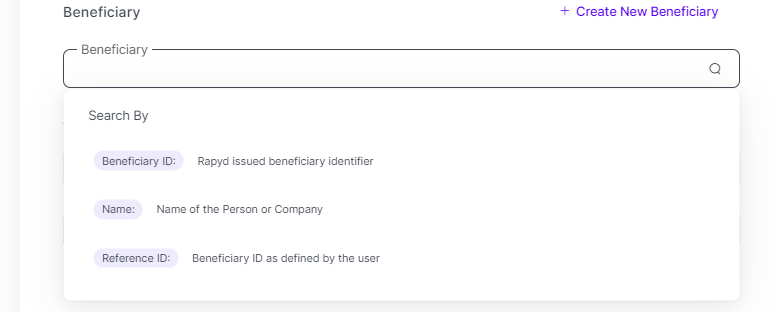
Note: You can create a new beneficiary by clicking + Create New Beneficiary in the upper right corner.
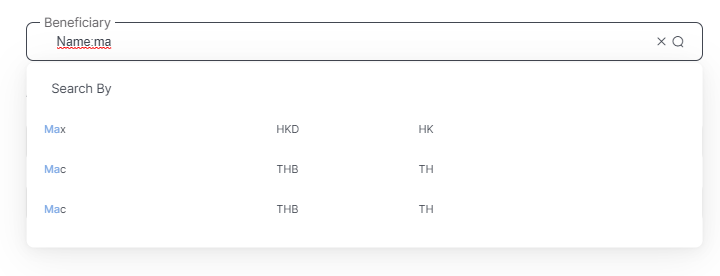
The Beneficiary country and currency must match the Currency (Received Amount) field and the country the payout is disbursed to in Step 1.
Check the payout details.
Click Next.
Confirm your payout details.
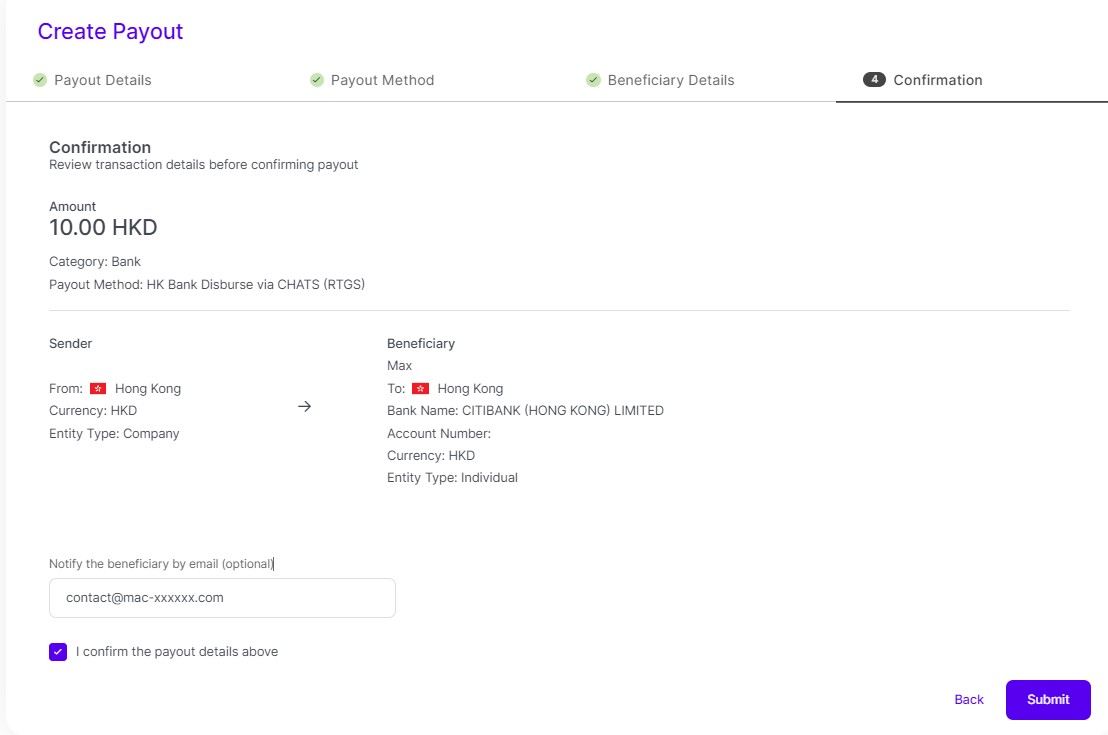
Optional: Add the beneficiary’s email to send them a notification of the payout.
Approve the confirmation of the payout.
Click Submit.
The Notification is received.
The Payout Success window appears.
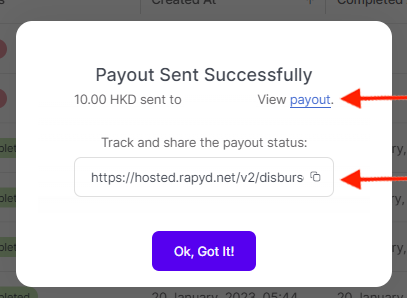
Click the payout link to go to a payout summary page.
Click the tracker link field below to copy the link to your clipboard.
Paste the link in a browser window to view the payout tracker page.
