Rapyd Payments Plugin for Wix
Accept cross-border payments from your OpenCart store.
Offering more payment methods drives increased conversions and customer loyalty. Rapyd offers this plugin for over 50 countries.
Rapyd Account Connection Limit
You can only connect one store per Rapyd Account.
You must be domiciled in one of the following countries in order to accept payments.
Belgium, Cyprus, Hong Kong, Iceland, Mexico, Norway, Romania, Singapore, Switzerland, United Kingdom.
How to Activate Wix
With a Rapyd Client Portal Account, you can:
Activate and set up your plugin.
Optionally, create a transaction in your store.
View supported payment methods.
View payment reports.
Invite team members.
Complete KYB steps to fully activate your account.
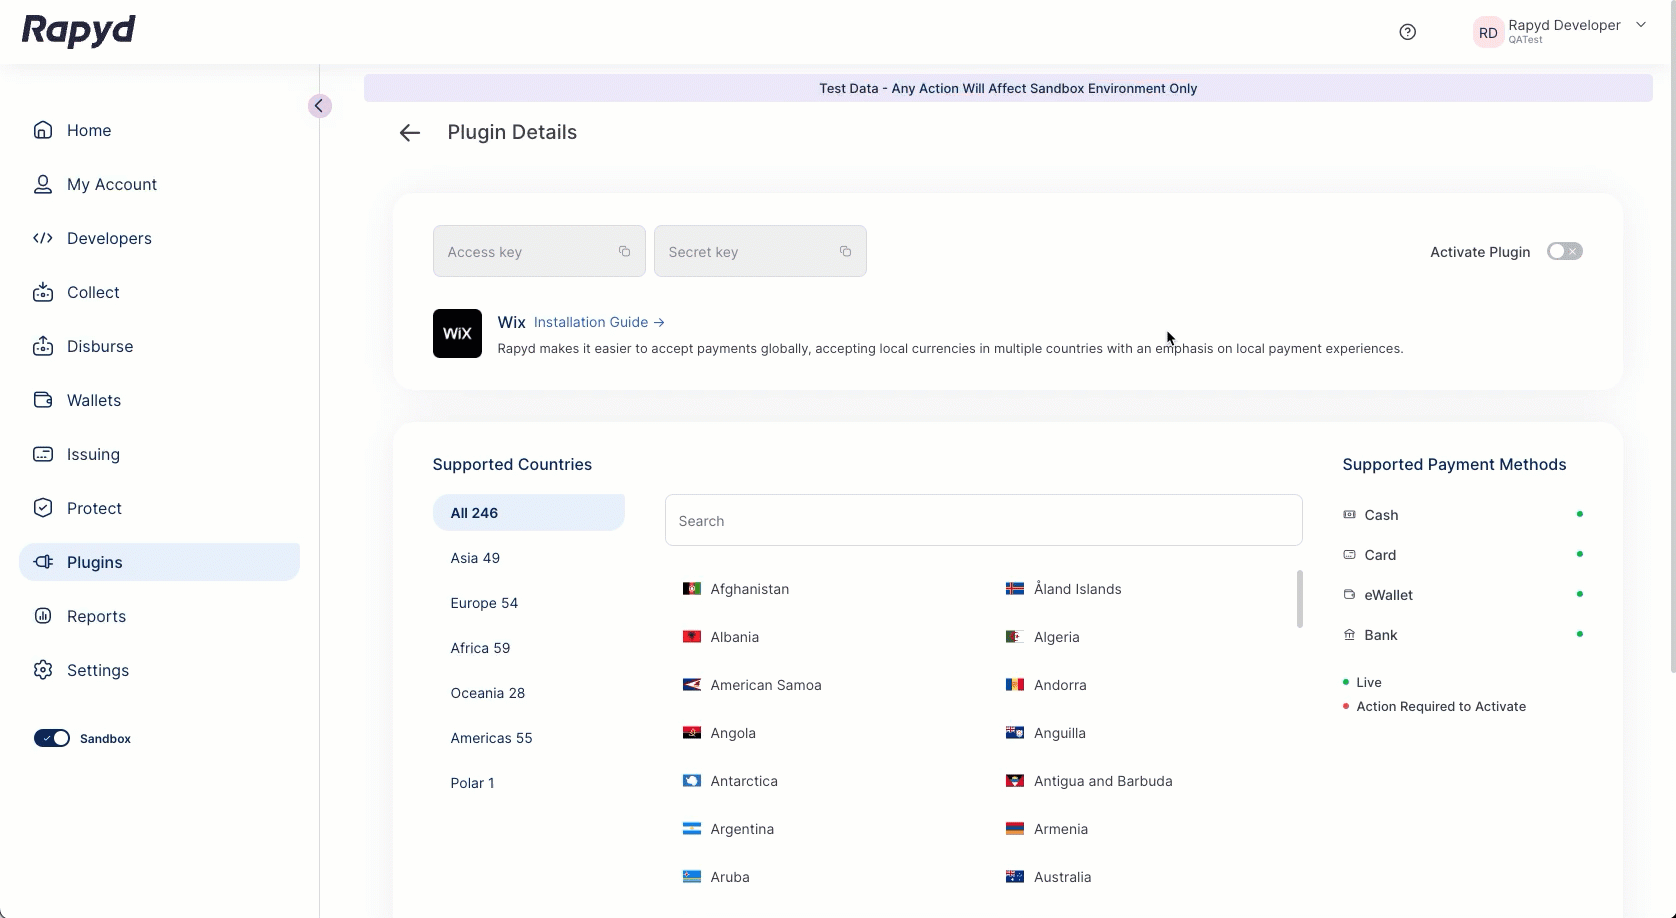
Sign in to Client Portal and navigate to Plugins. Select the Wix panel.
On the Wix page, click the Active toggle button.
Note
The Client Portal must be in production mode.
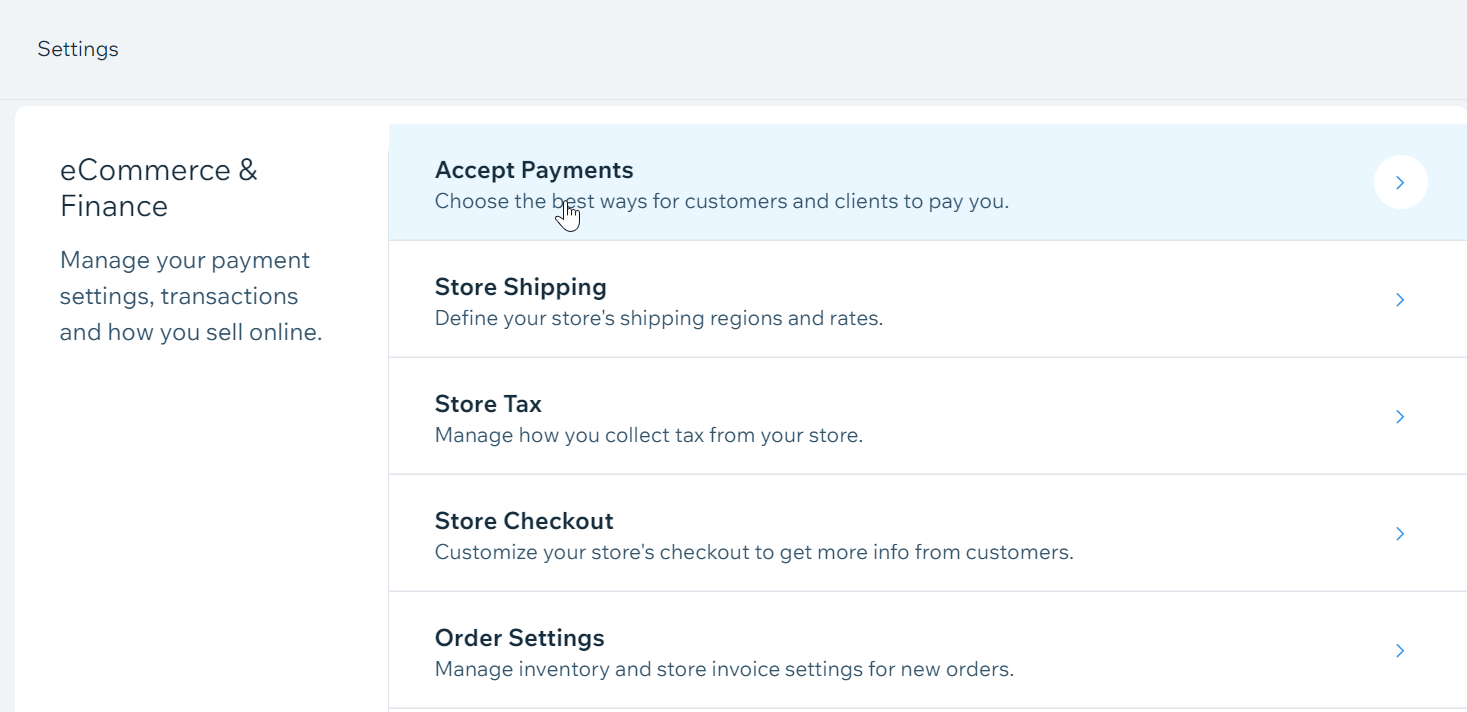
Sign in to your Wix dashboard and go to Settings > eCommerce and Finance.
Click on Accept Payments.
Apple Pay
European customers with an Apple account may use Apple Pay for purchases when using Safari. See supported countries here.
Scroll down to Rapyd Payments, and click Manage Account.
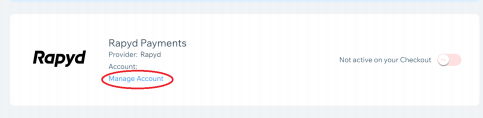
The Manage Your Account window appears.

Enter your Rapyd Access Key and Secret Key for the production environment in the Access key and Secret key fields. See also Plugins and Add-Ons.
Click the ‘Save’ button. F. To fully activate your account for production mode you’ll need to complete the KYB form for compliance review in the Rapyd Client Portal.
Listing Payments in Client Portal
In circumstances where the paid amount is less than the original amount, use the Client Portal to verify the actual amount that was paid, and not the store's admin portal.
After the checkout process completes, the customer can be forwarded to a landing page. This may be the main URL of the ecommerce site or any other landing page that you may want to define. To set the landing page URL:
Sign in to the Client Portal and navigate to Settings > Branding.
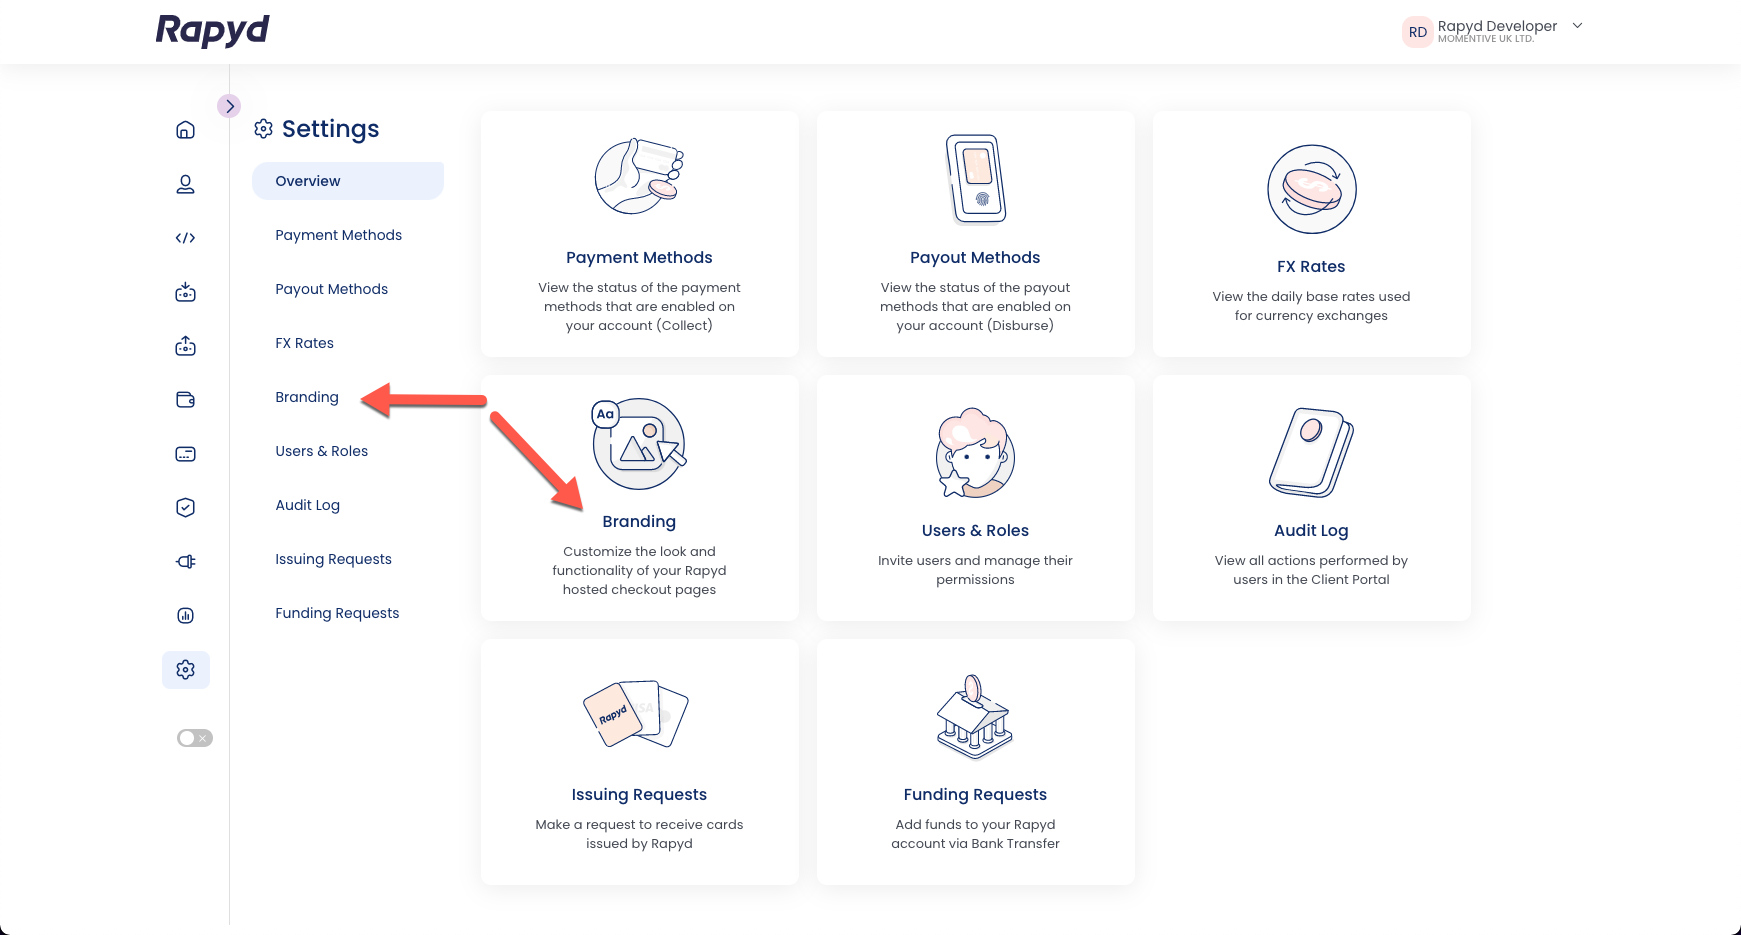
Click on the link icon and enter the URL of the landing page in the Fallback URL field.
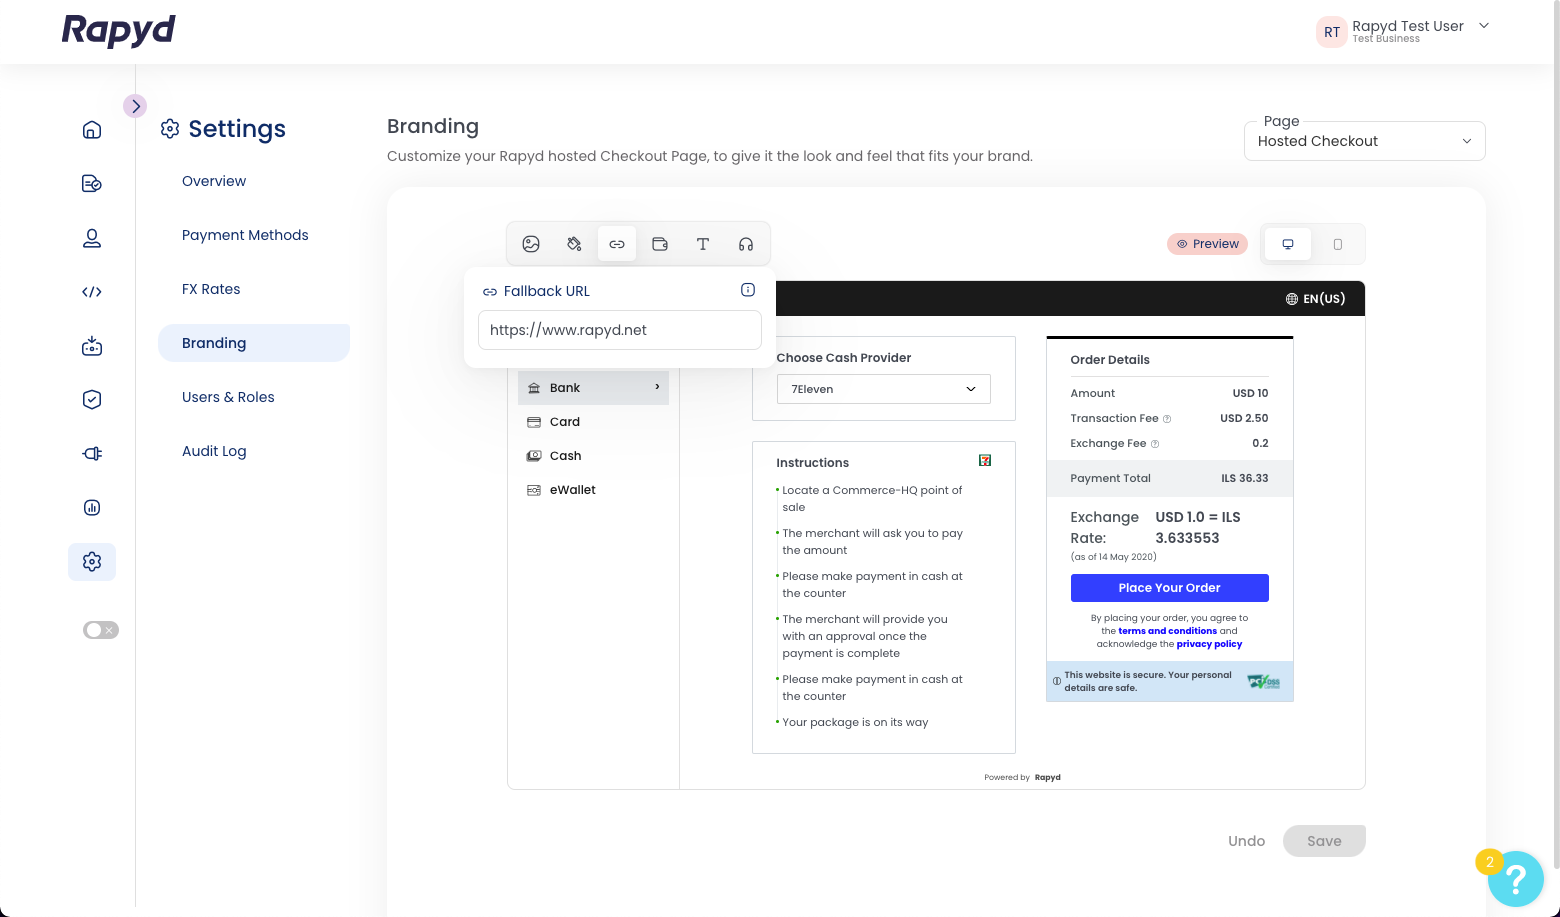
Click Save.