Viewing Virtual Accounts
You can view Virtual Accounts that have been created on your Rapyd Wallets. Your company can use Virtual Accounts to collect, hold, and move funds.
Activate Your Virtual Account
To successfully create your first Virtual Account, Contact Support for your request.
To view a virtual account:
Note: To see how to view Virtual Accounts created on top of your Client Wallet refer to Creating a Virtual Account.
Sign in to Client Portal as described in Signing in to the Client Portal and navigate to Wallets > Accounts.
Click on the See more details icon on the row of the wallet account you would like to see.
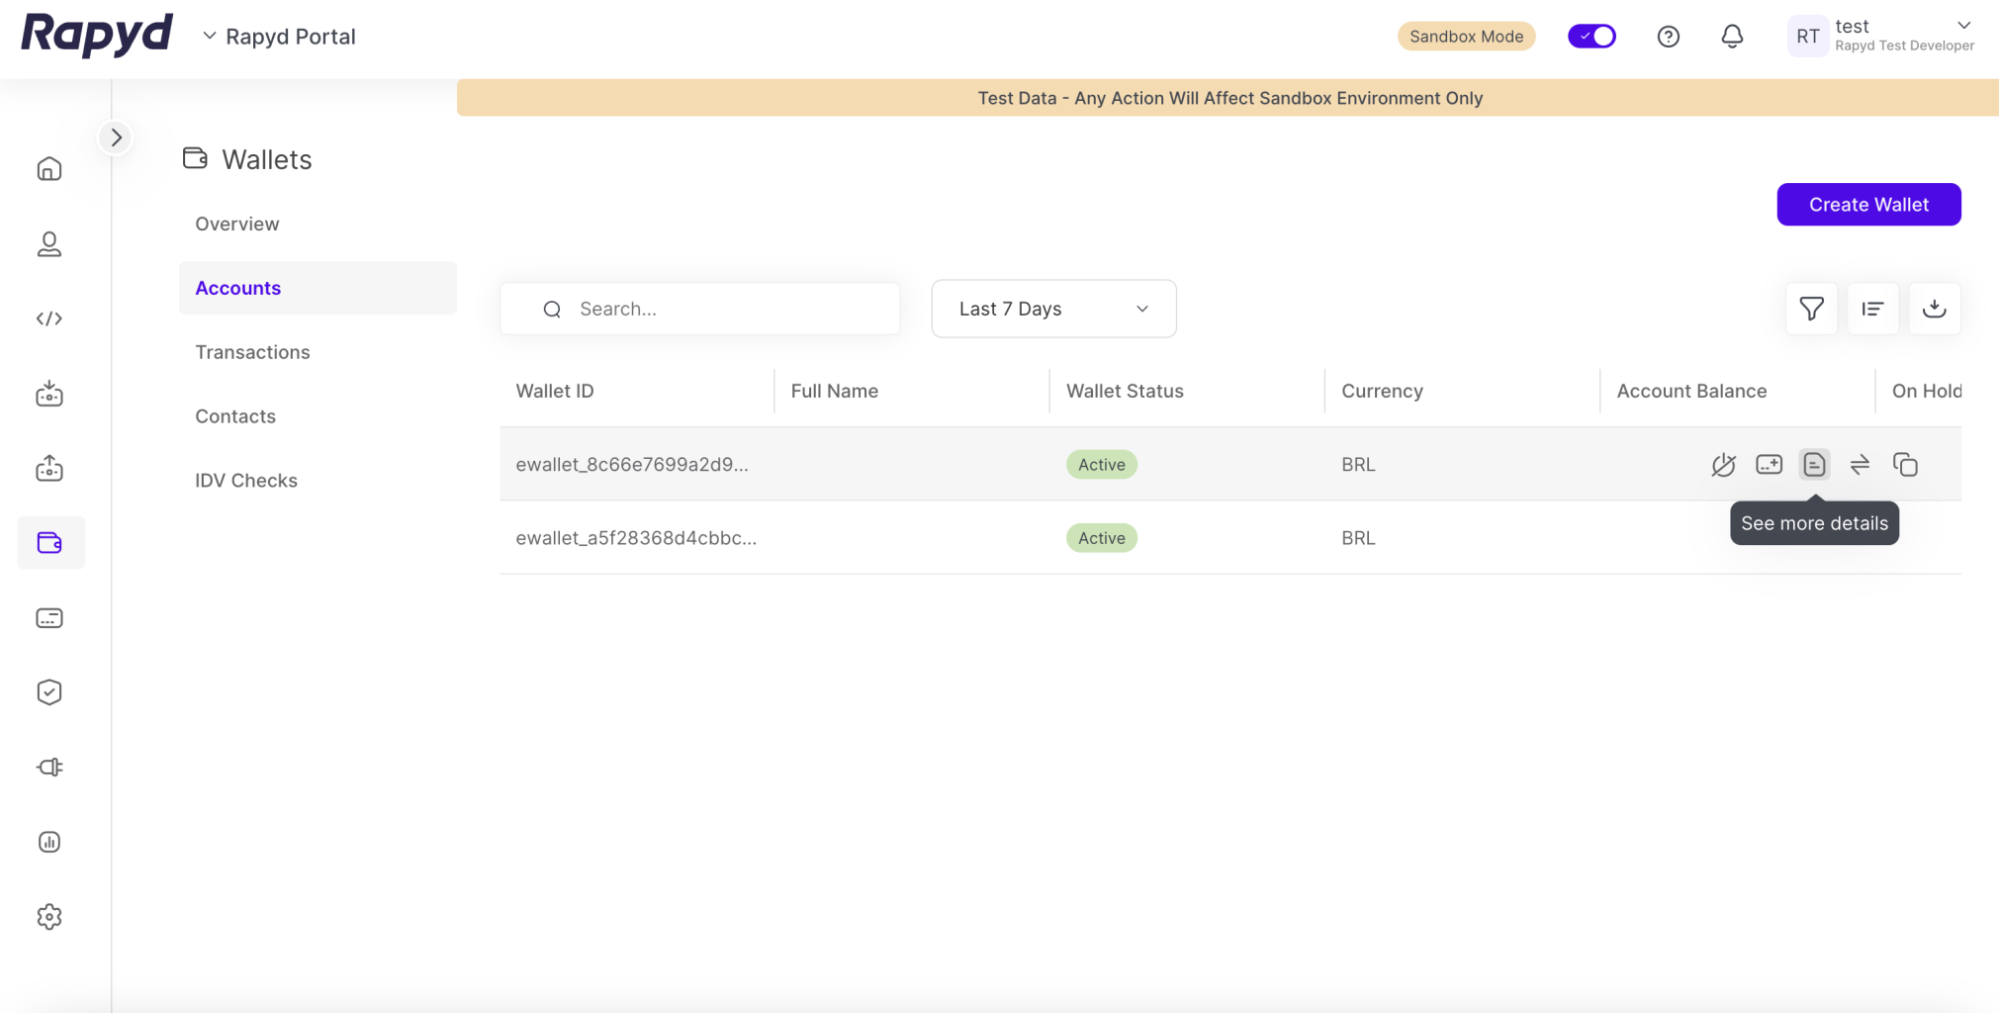
The Wallet Details page appears.
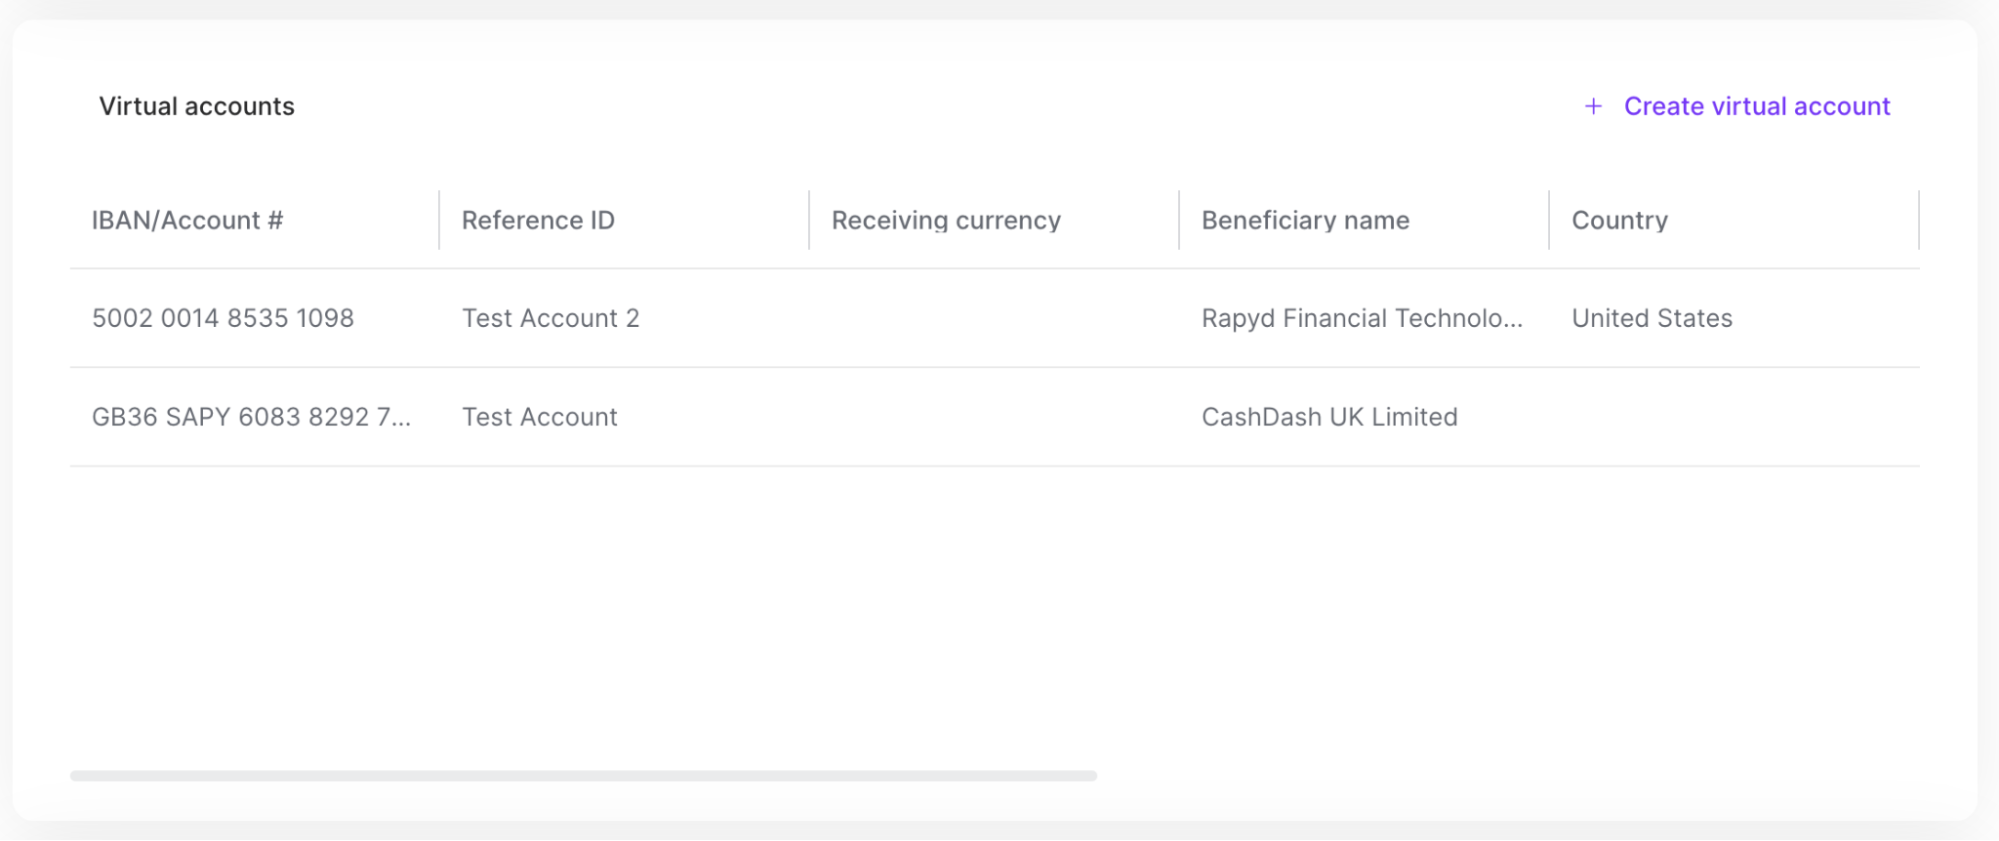
Scroll down to the Virtual Accounts section.
To add your virtual account, tap + Create virtual account in the Virtual Accounts section.
The Add virtual account dialog box appears.
Enter the account name.

Note: Your account will need to be activated to successfully create a Virtual Account.
Click Next.
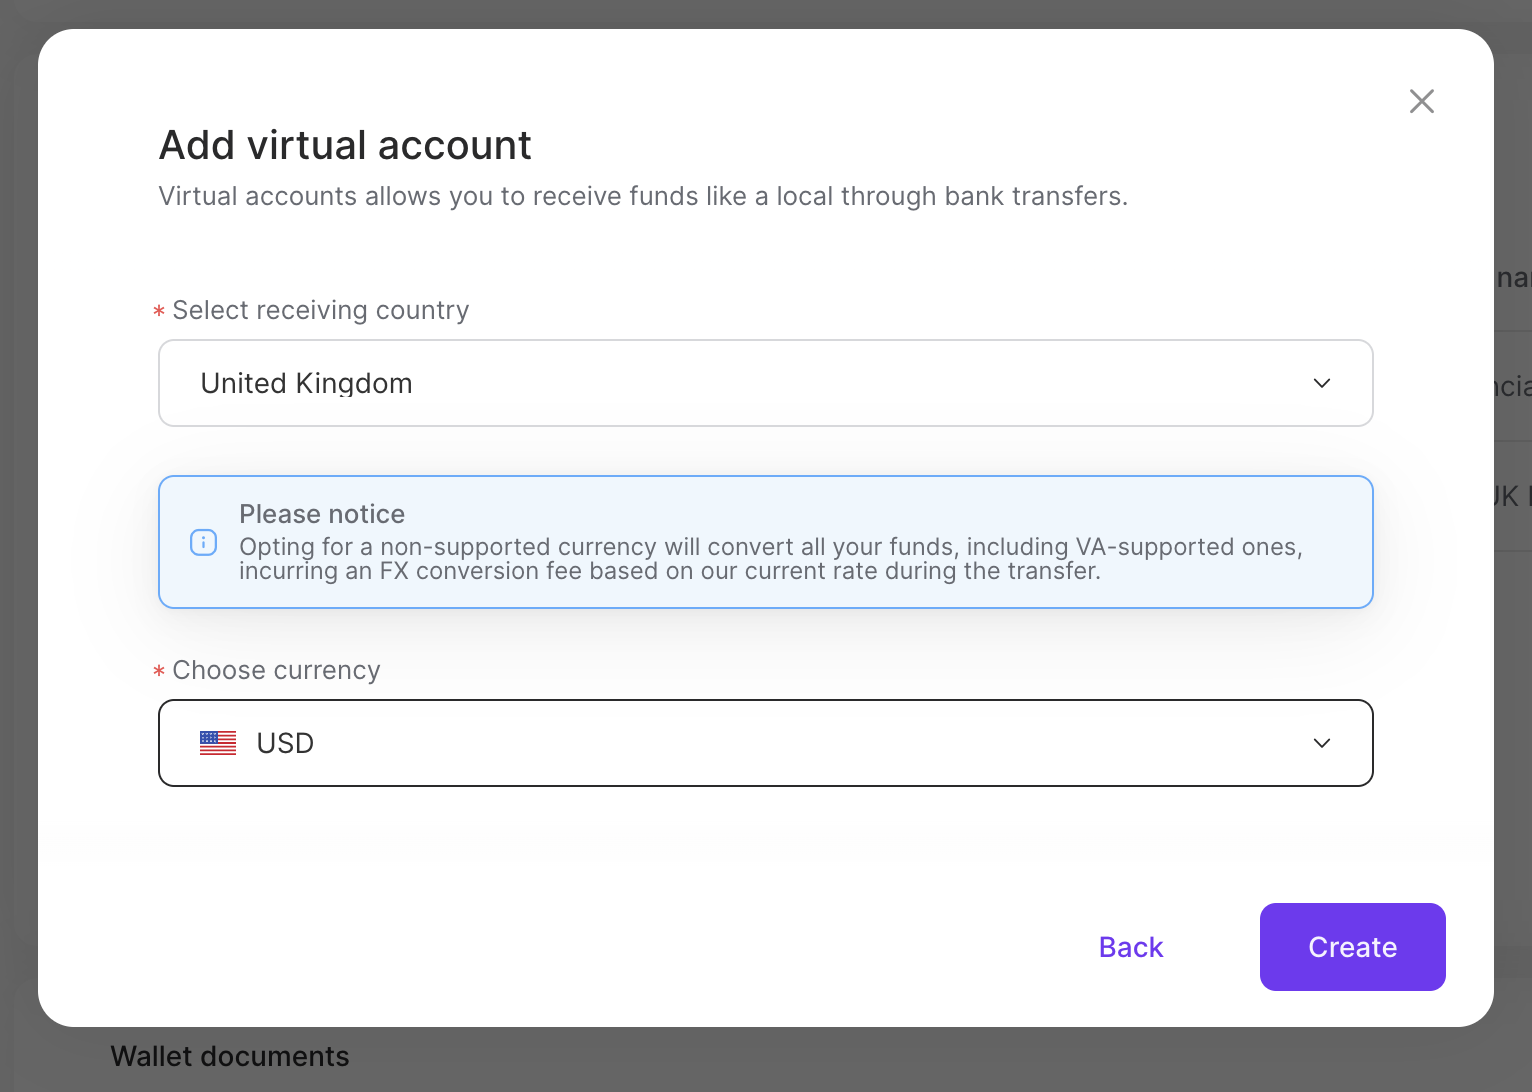
Select the country for your virtual account in the drop-down menu.
Select the requested currency from the drop down menu.
Click Create.
Requested Currencies for Virtual Accounts
The funds transferred to Virtual Accounts can now be automatically converted using FX (Foreign Exchange) into a different currency. All supported currencies can be converted with FX.
An FX conversion fee will be applied during the transfer.
Selecting a requested currency has no impact on the currencies the Virtual Account can receive.
The funds transferred to a Virtual Account can be converted using FX through the requested currency. The requested currency is what the funds will be converted into during the transfer. The requested currency can be edited for existing Virtual Accounts.
To edit the requested currency:
Sign in as described in Accessing the Client Portal and navigate to Wallets > Accounts.
The Account page appears.
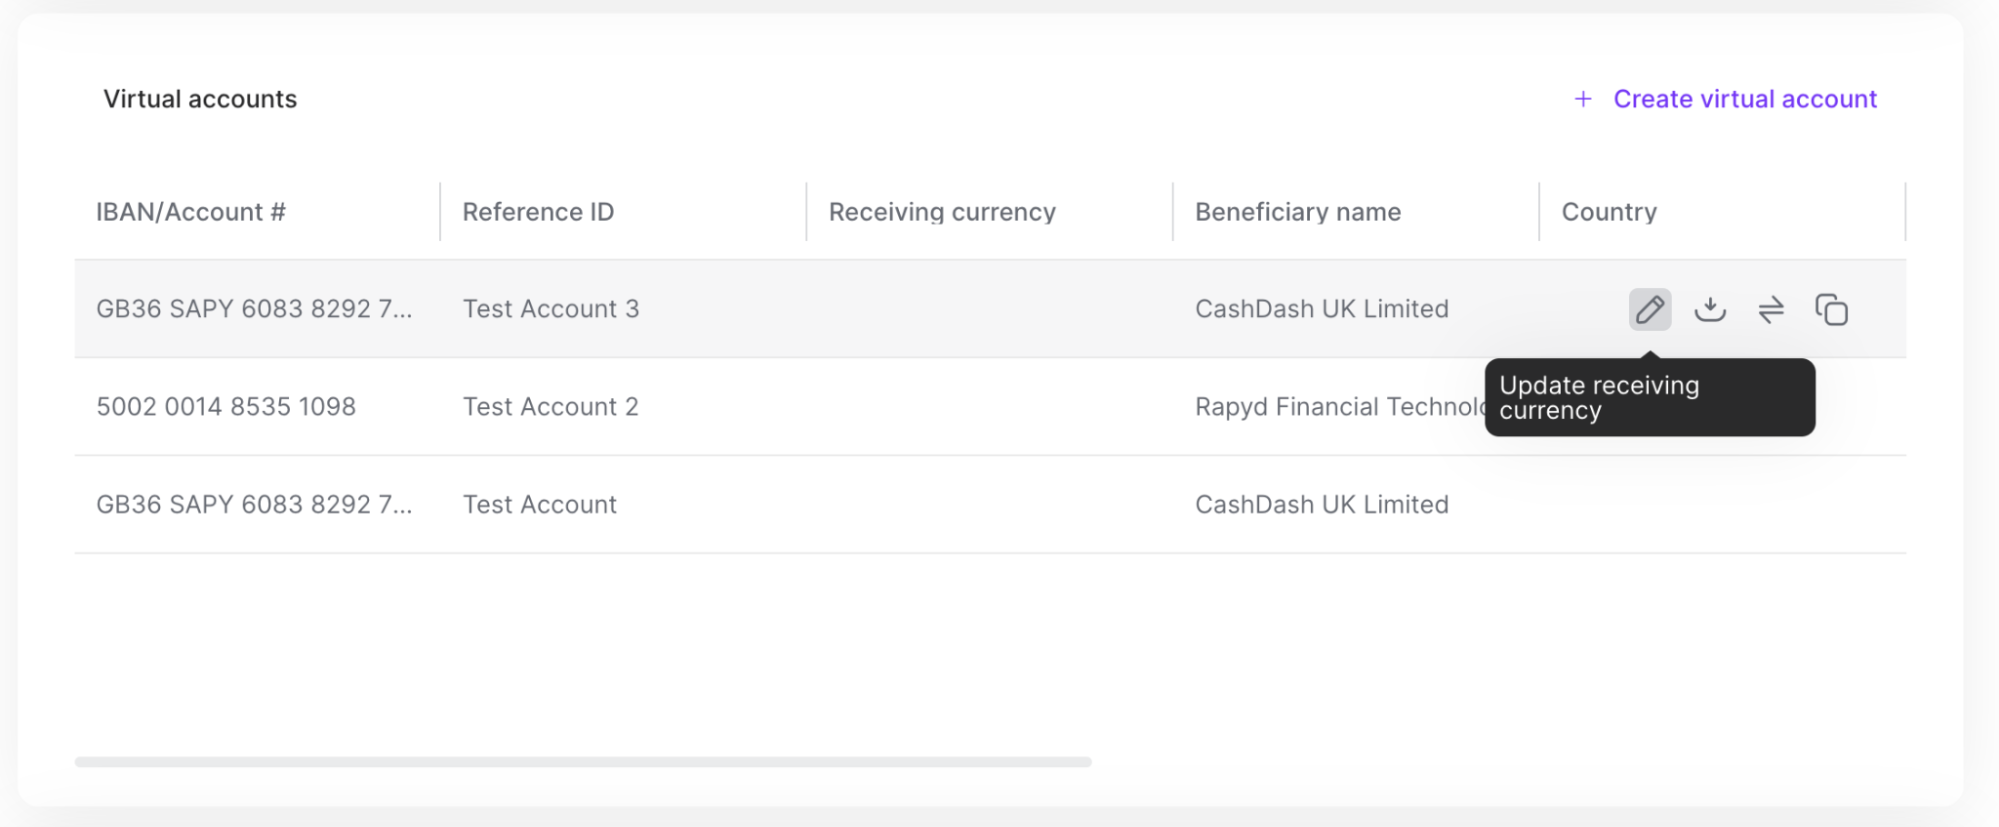
Hover over a wallet row in the Accounts section.
(Optional): Click on the See more details icon.
(Optional): Select a virtual account from the Virtual Account section.
(Optional): Click the Update receiving currency icon.
Click on the row. The Wallets details panel appears.
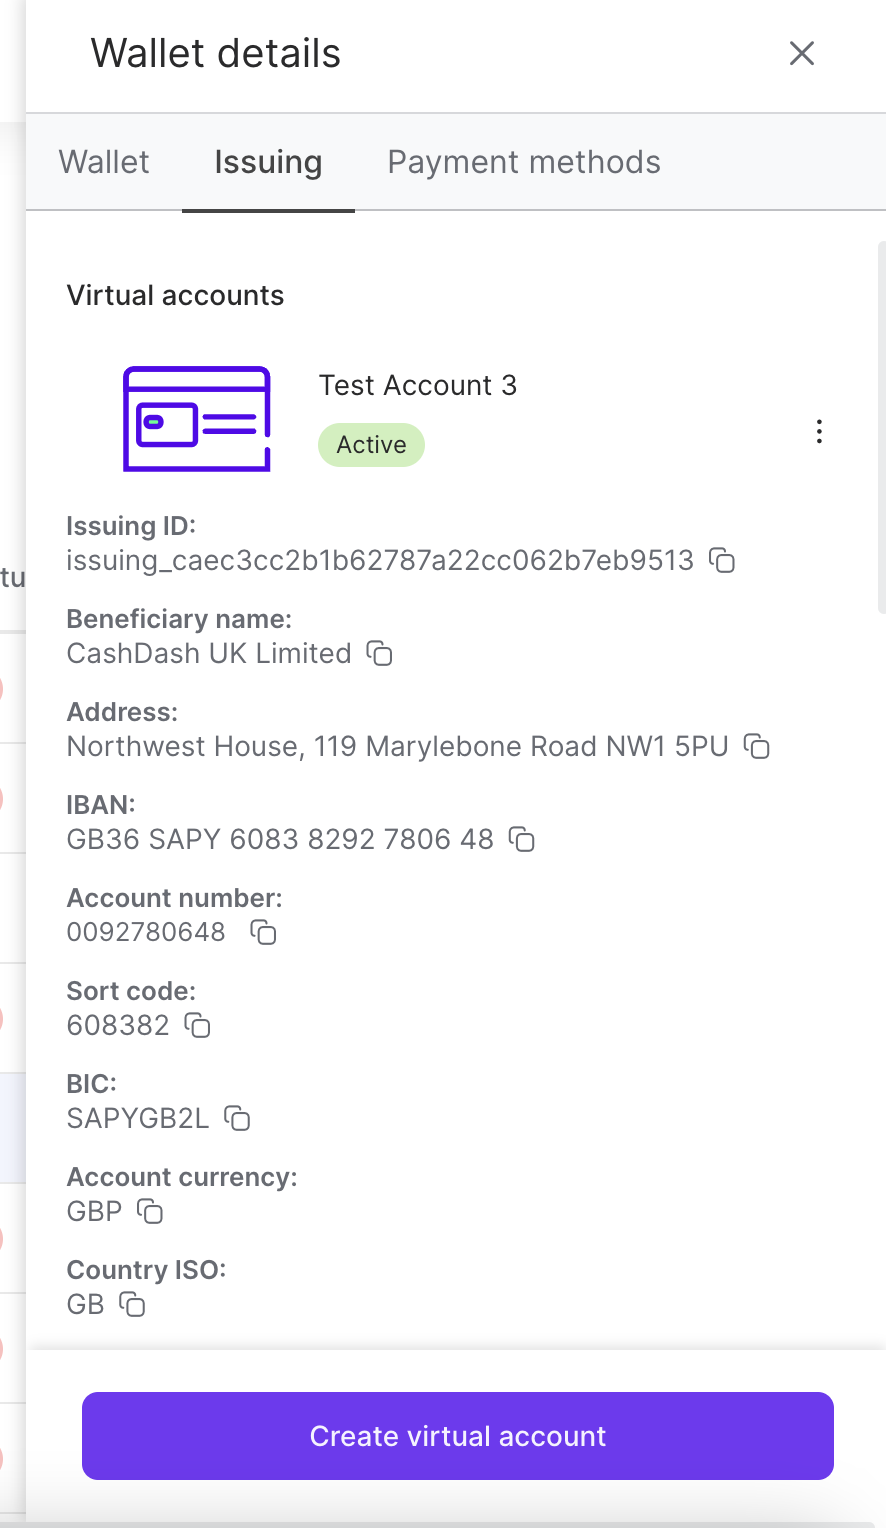
Click on the Issuing tab.
Click the three vertical dots next to the account name.
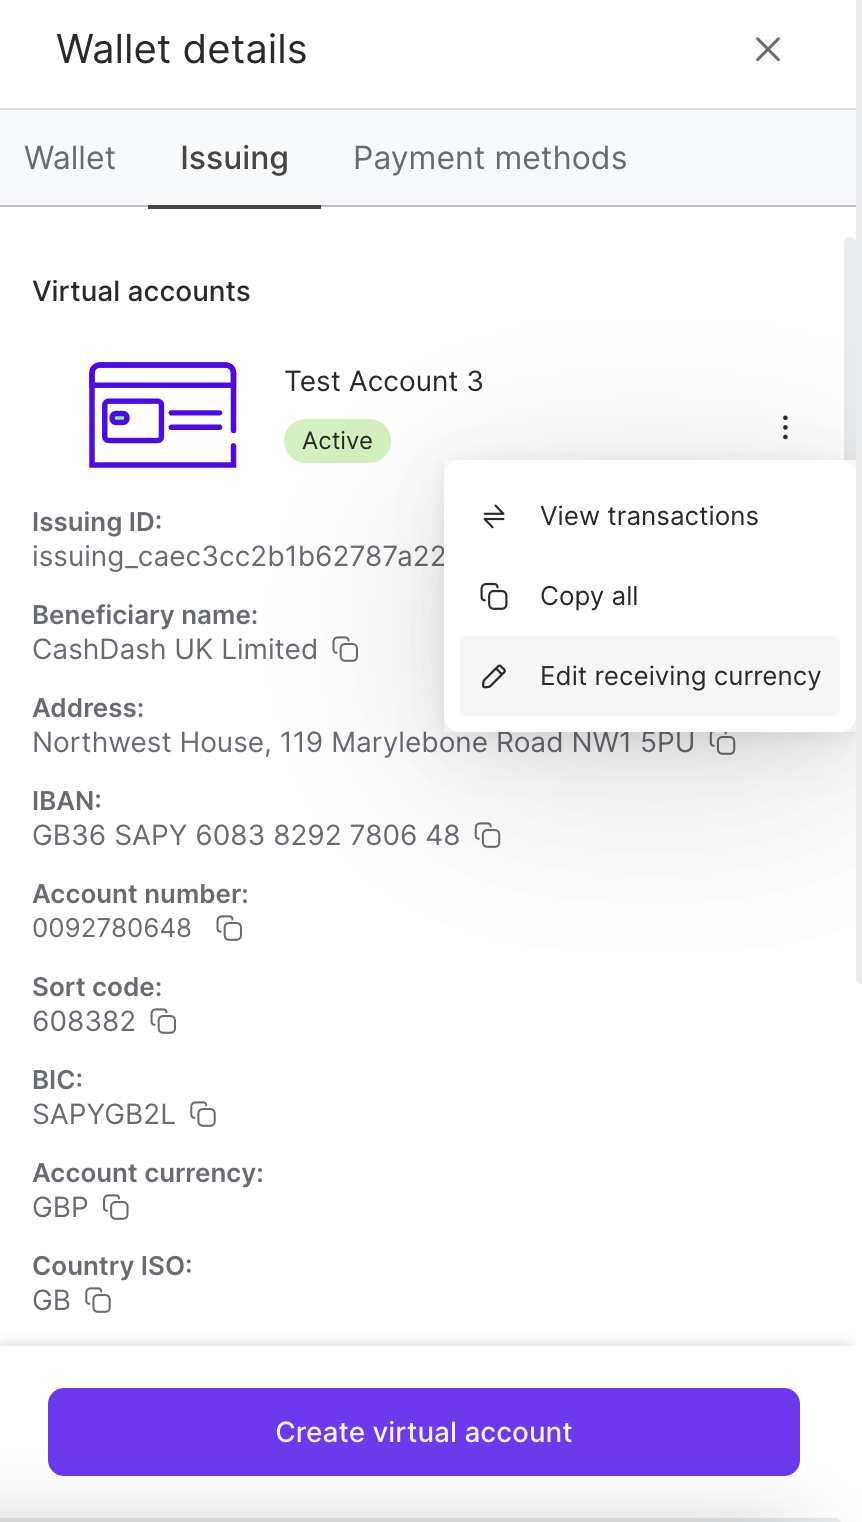
Select Edit receiving currency.
The update receiving currency window appears.
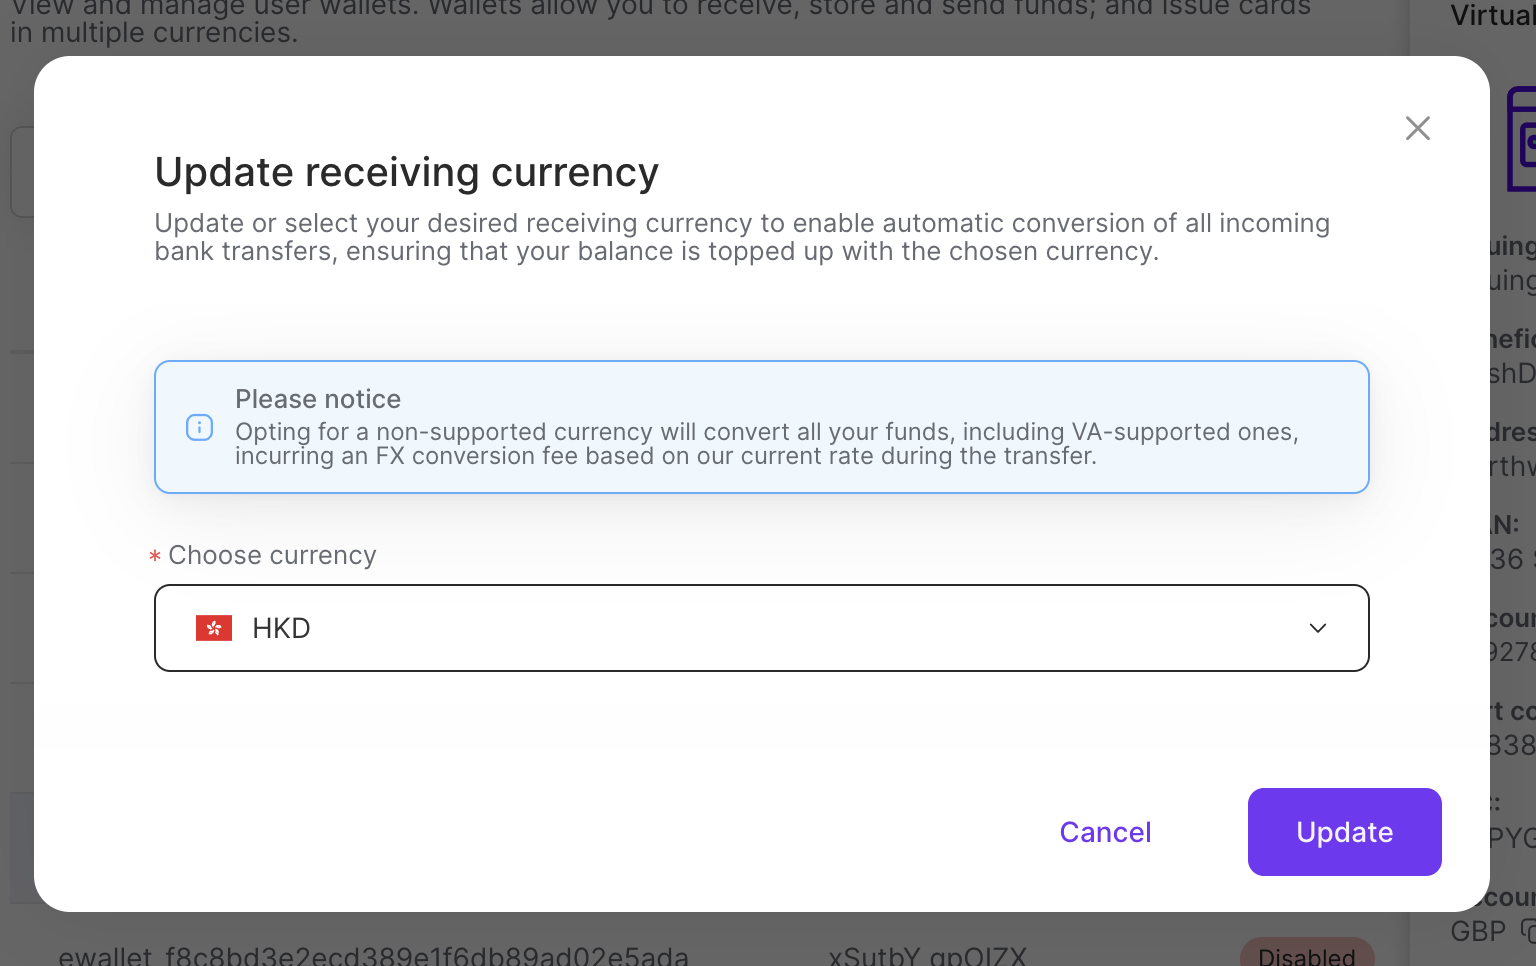
Select your currency from the drop-down menu.
Click Update.
Sign in as described in Accessing the Client Portal and navigate to My Account > Account Details.
The Account Details page appears.
Hover over a Virtual IBAN row in the Virtual Accounts section.
The Download PDF, Transactions and Copy icons appear
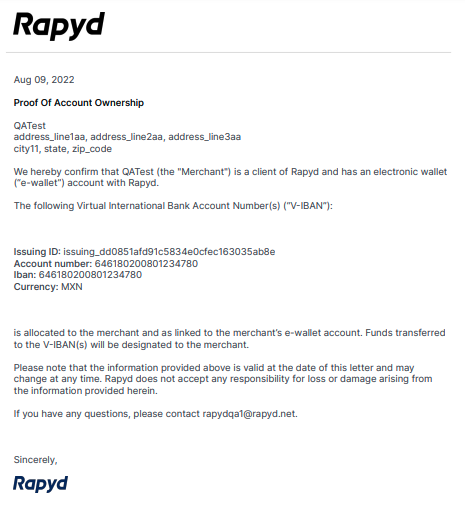
Go over to the right in the row of a Virtual IBAN > select Download Proof of Account Ownership.
The PDF downloads to your local storage.
Double click the PDF for the file.