Creating a Customer
You can create a customer directly from client portal.
Sign in as described in Accessing the Client Portal and navigate to Collect > Customers.
The Customers page appears.
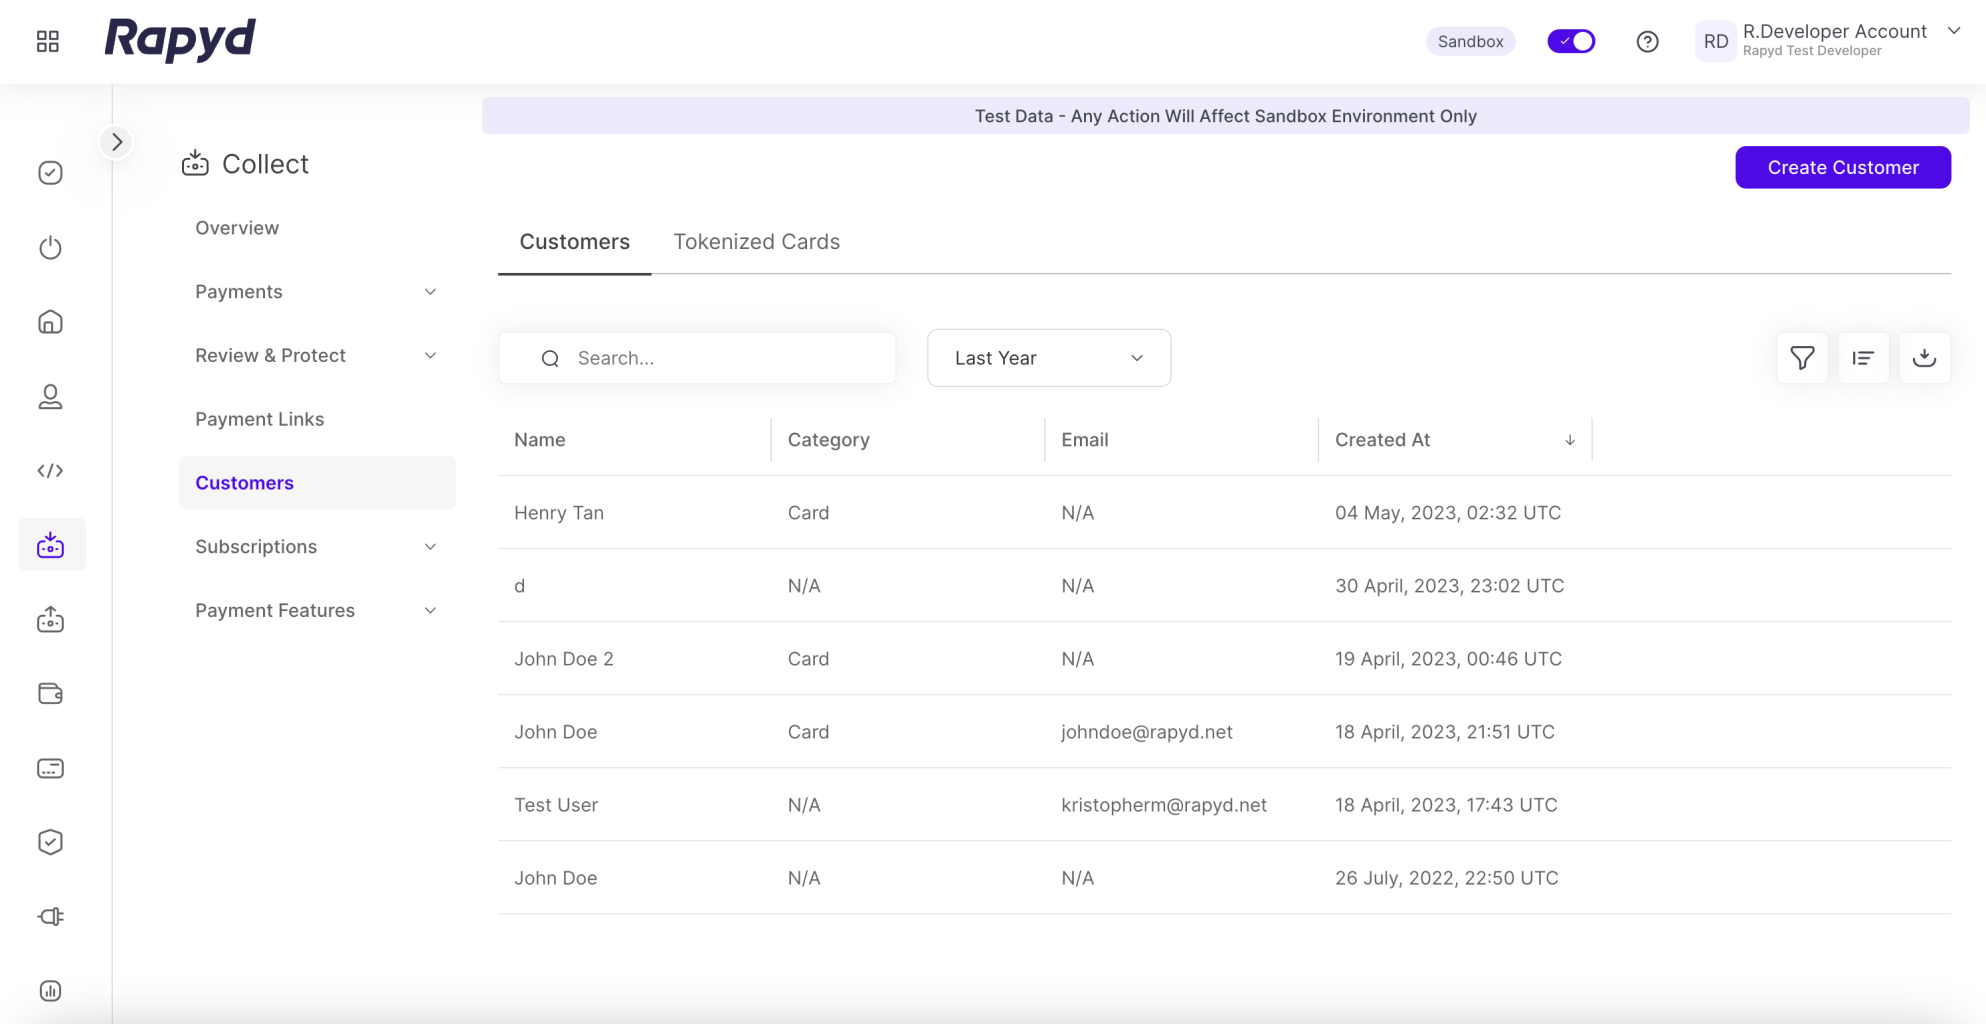
Click the Create Customer button at the top right.
The Create Customer dialogue box appears.
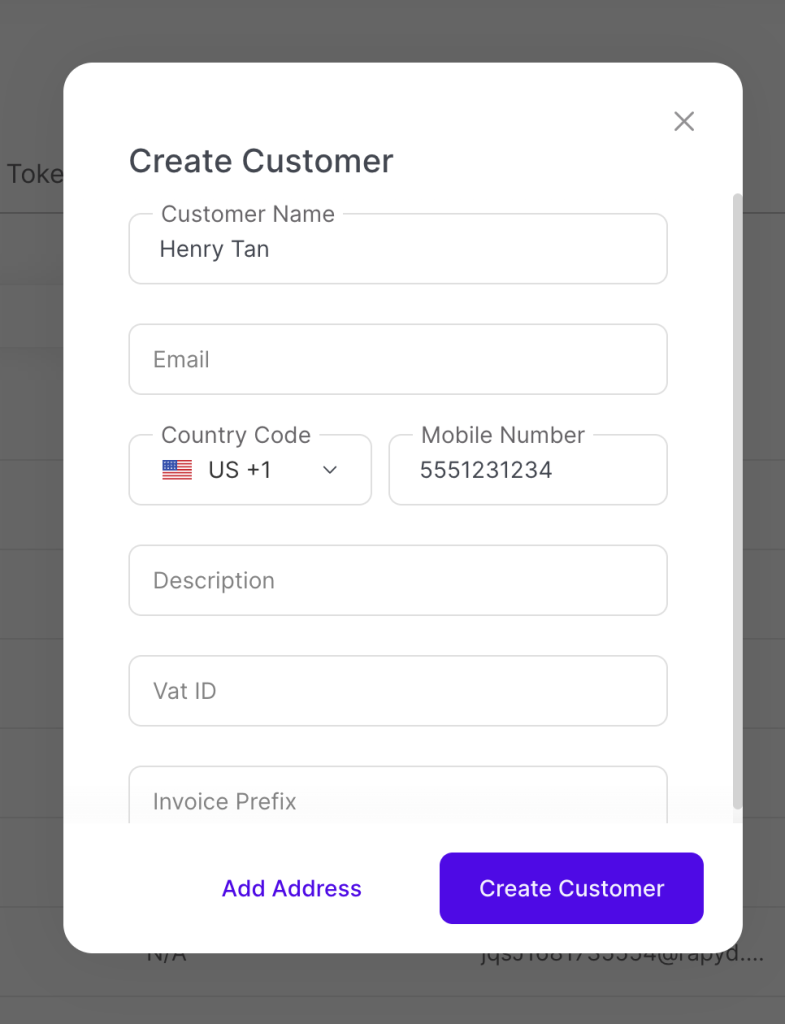
For a description of the information displayed, see Listing Customers.
Complete the Required Fields in the dialogue box and select Create Customer to finish, or Add Address to add more customer information.

The New Customer dialogue box appears.
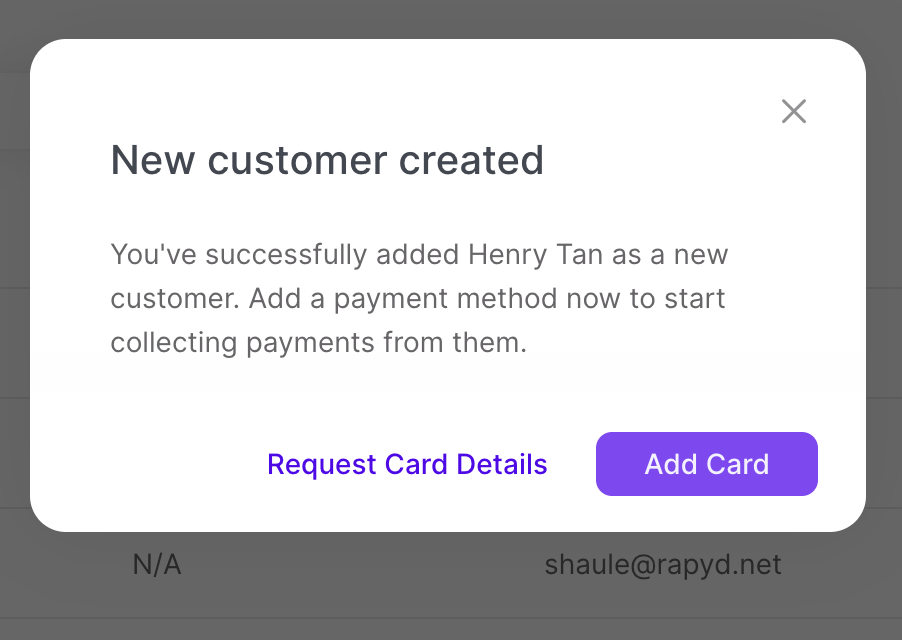
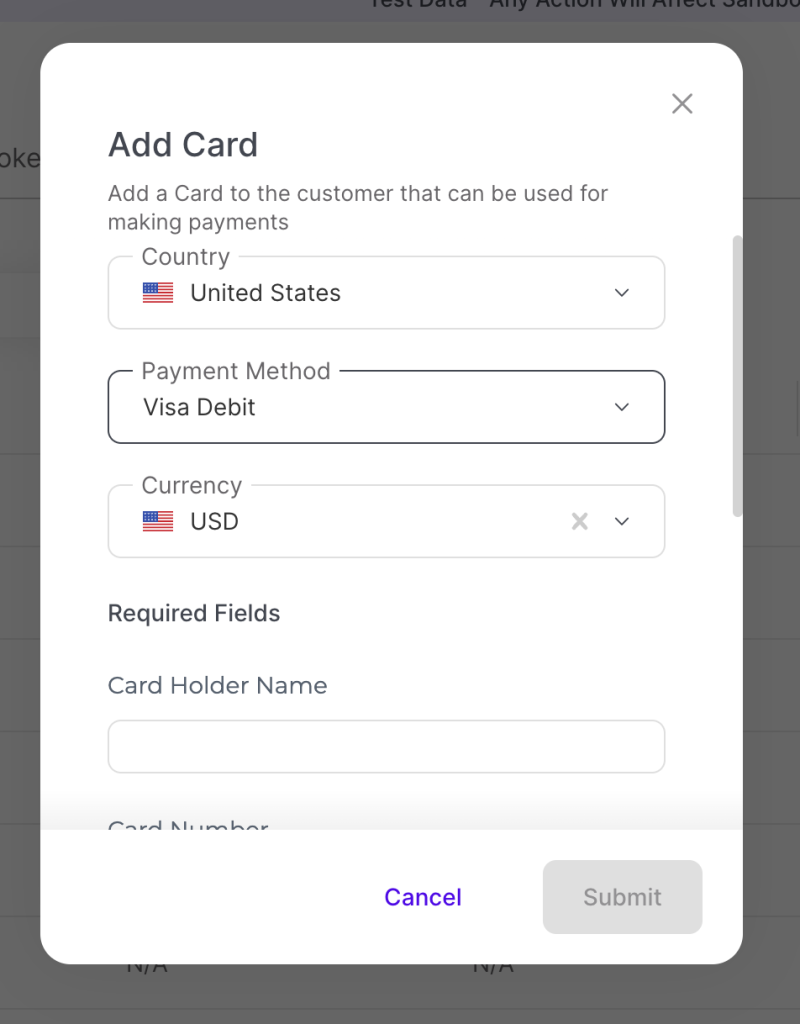
To add a card, you can select Add Card and complete the card details > select Submit.
The Card Added dialogue box appears
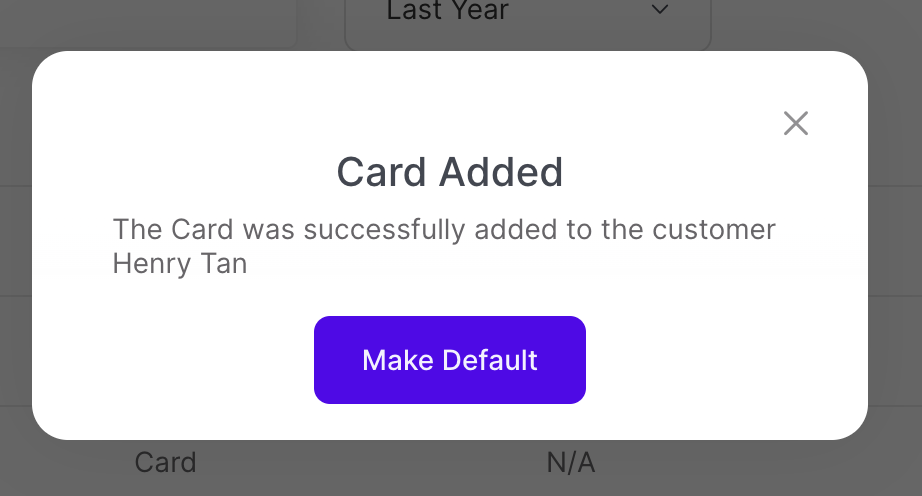
Click Make Default to make the card the default payment method or X to close.
The Successful Action dialogue box appears
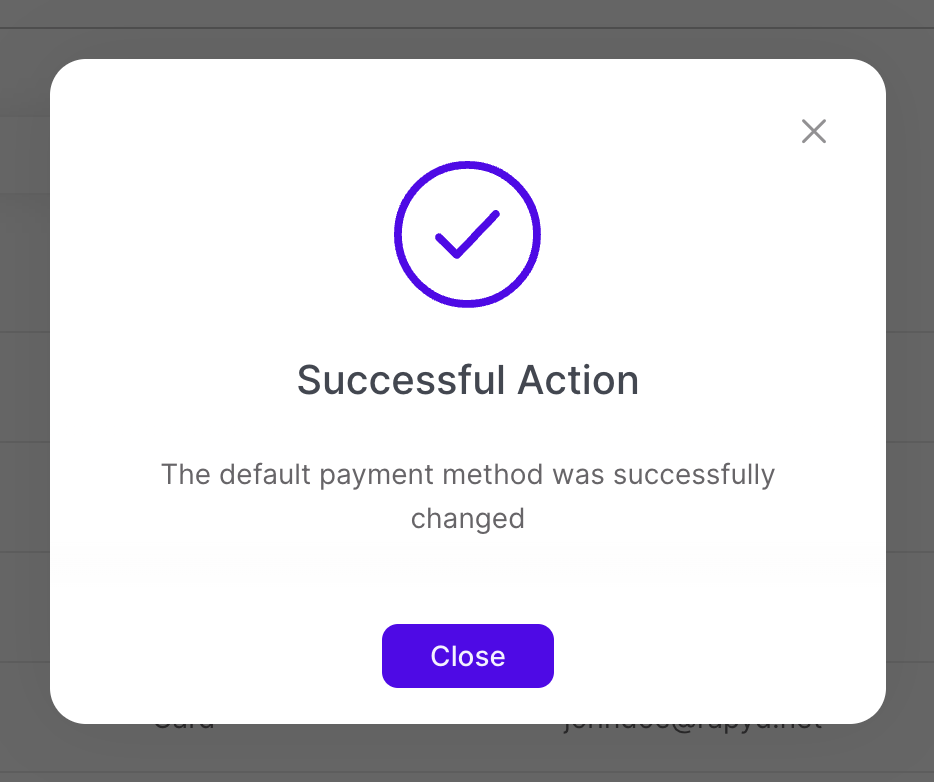
Click Close.
The Card will now appear in Collect > Customer > Customer Details. Refer to Viewing Customer Details for more details.
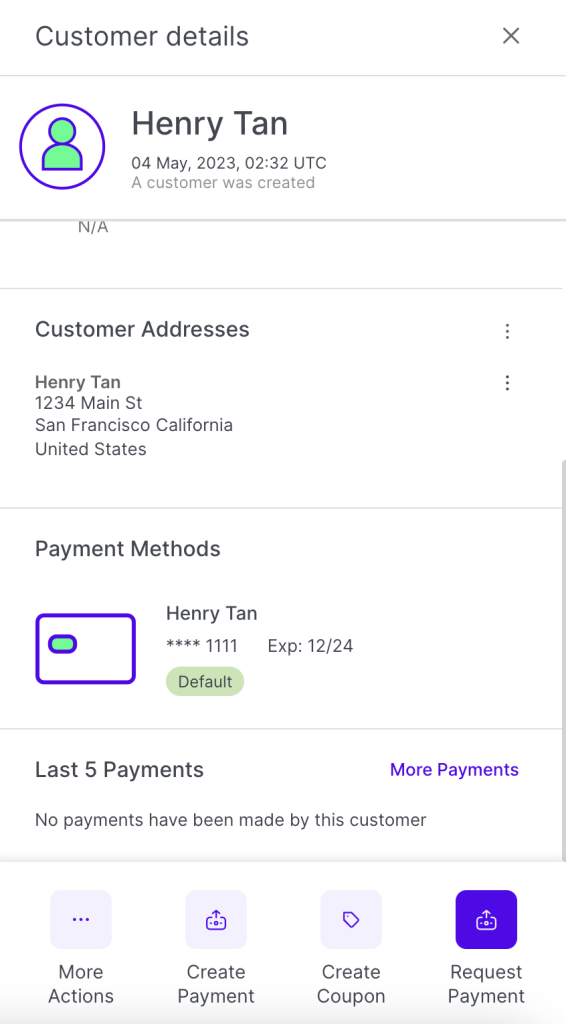
To charge the card in the Virtual Terminal with the card details added, within the Customer Details panel you can go to to More Actions > Create Payment > add the amount > Next > Create Payment. See Viewing Customer Details or Listing Customers for more information.