Disburse to Self
Use this procedure to move funds from your Rapyd wallet to your own company bank account. Unlike a standard payout to a third party, both the sender and the beneficiary represent your own business — the difference is the country: the sender's country is your country of incorporation, and the beneficiary's country is where your bank account is held.
Note
This procedure requires Owner or Administrator privileges.
To begin, log in to the Client Portal, and navigate to Disburse > Payouts > Create Payout:

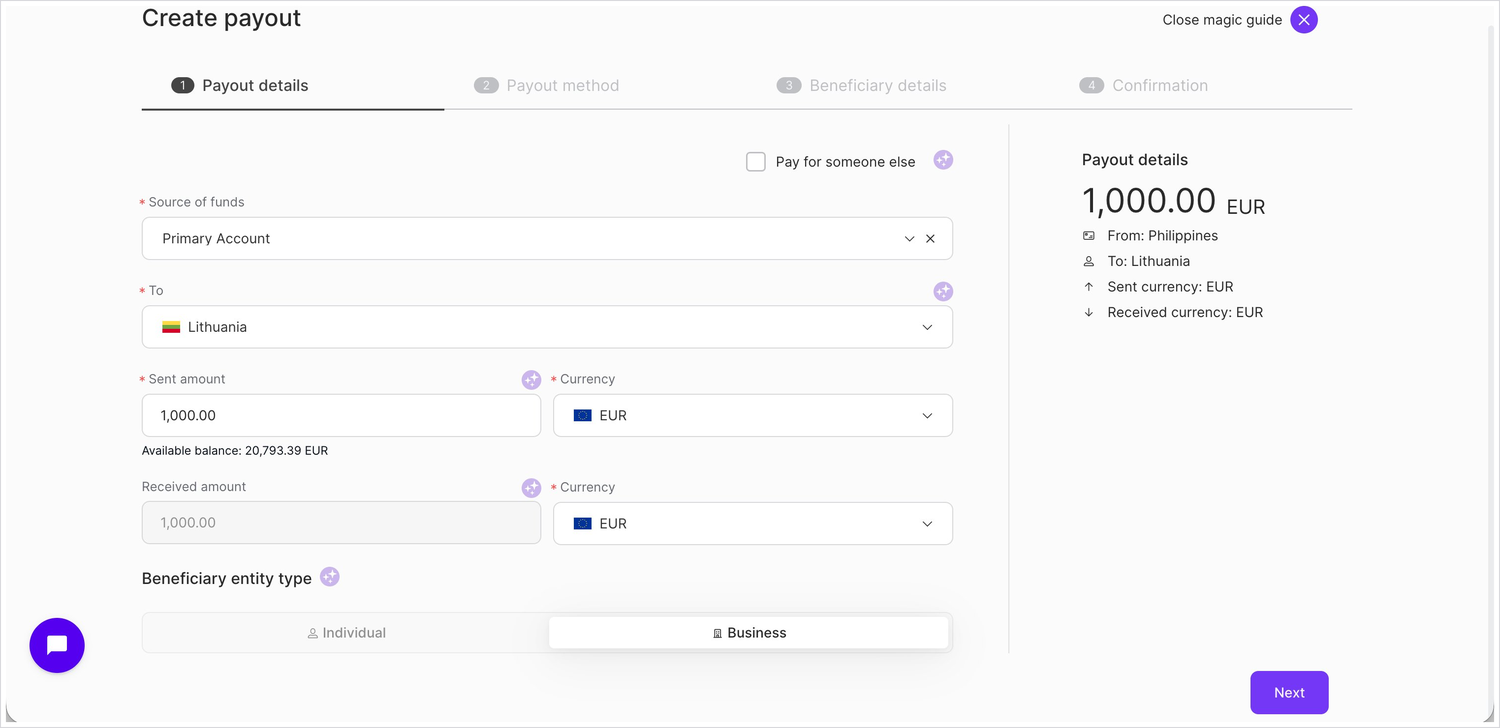
Step 1 - Payout Details
Define the amount you are settling and where it is going.
Field | Description |
|---|---|
Source of Funds | Select the wallet that holds the funds you want to settle. This field appears when you have more than one wallet; if you have a single wallet, it is selected automatically. |
To | The destination country — the country where the bank account you are settling to is held. |
Sent Amount & Currency | The amount to settle and the currency it will be sent in. The amount cannot exceed your Available balance, displayed below the field. |
Received Amount & Currency | The amount your bank account will receive. If the send and receive currencies match, then this mirrors the sent amount. If they differ, then the converted amount is displayed. |
Beneficiary Entity Type | Select Business. You are settling to a company bank account. |
Click Next.
Step 2 - Payout Method
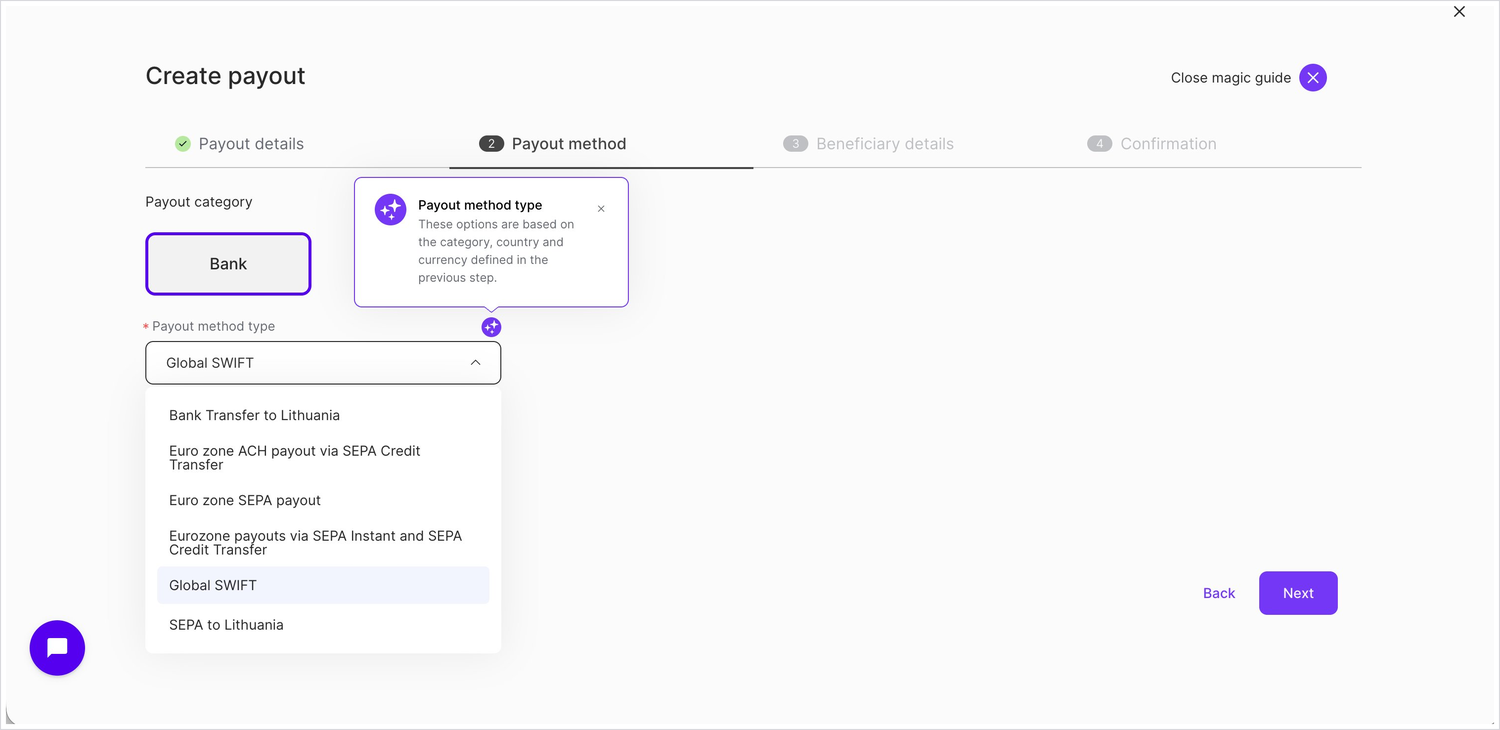
Choose how the funds are delivered to your bank account.
Field | Description |
|---|---|
Payout Category | Select Bank. Only payout categories available to your account are displayed. |
Payout Method Type | Select the method that matches the destination country and currency. Options are filtered automatically based on your selections in Step 1. For a EUR currency settlement this is typically Euro zone ACH payout via SEPA Credit Transfer. |
Click Next.
Step 3 - Sender & Beneficiary
For a disburse-to-self settlement, both the sender and the beneficiary represent your own business. Select existing records or create new ones as described below.
Note
Sender vs. Beneficiary country: The sender's country is your country of incorporation. The beneficiary's country is the country where your bank account is held. These countries may not be the same.
Creating a new sender
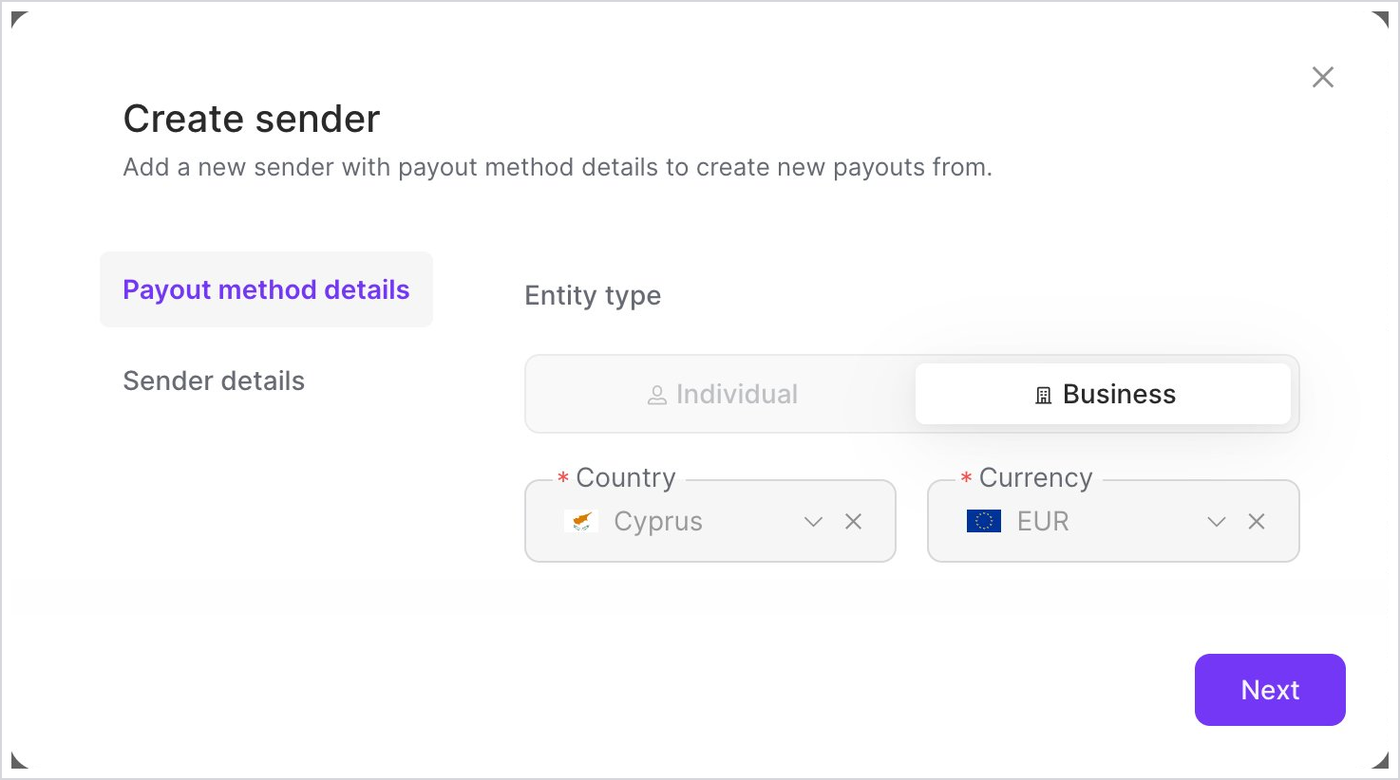
Click + Create New Sender. A two-tab window opens.
Payout method details — set Entity type to Business, Country to your country of incorporation, and the Currency. Click Next.
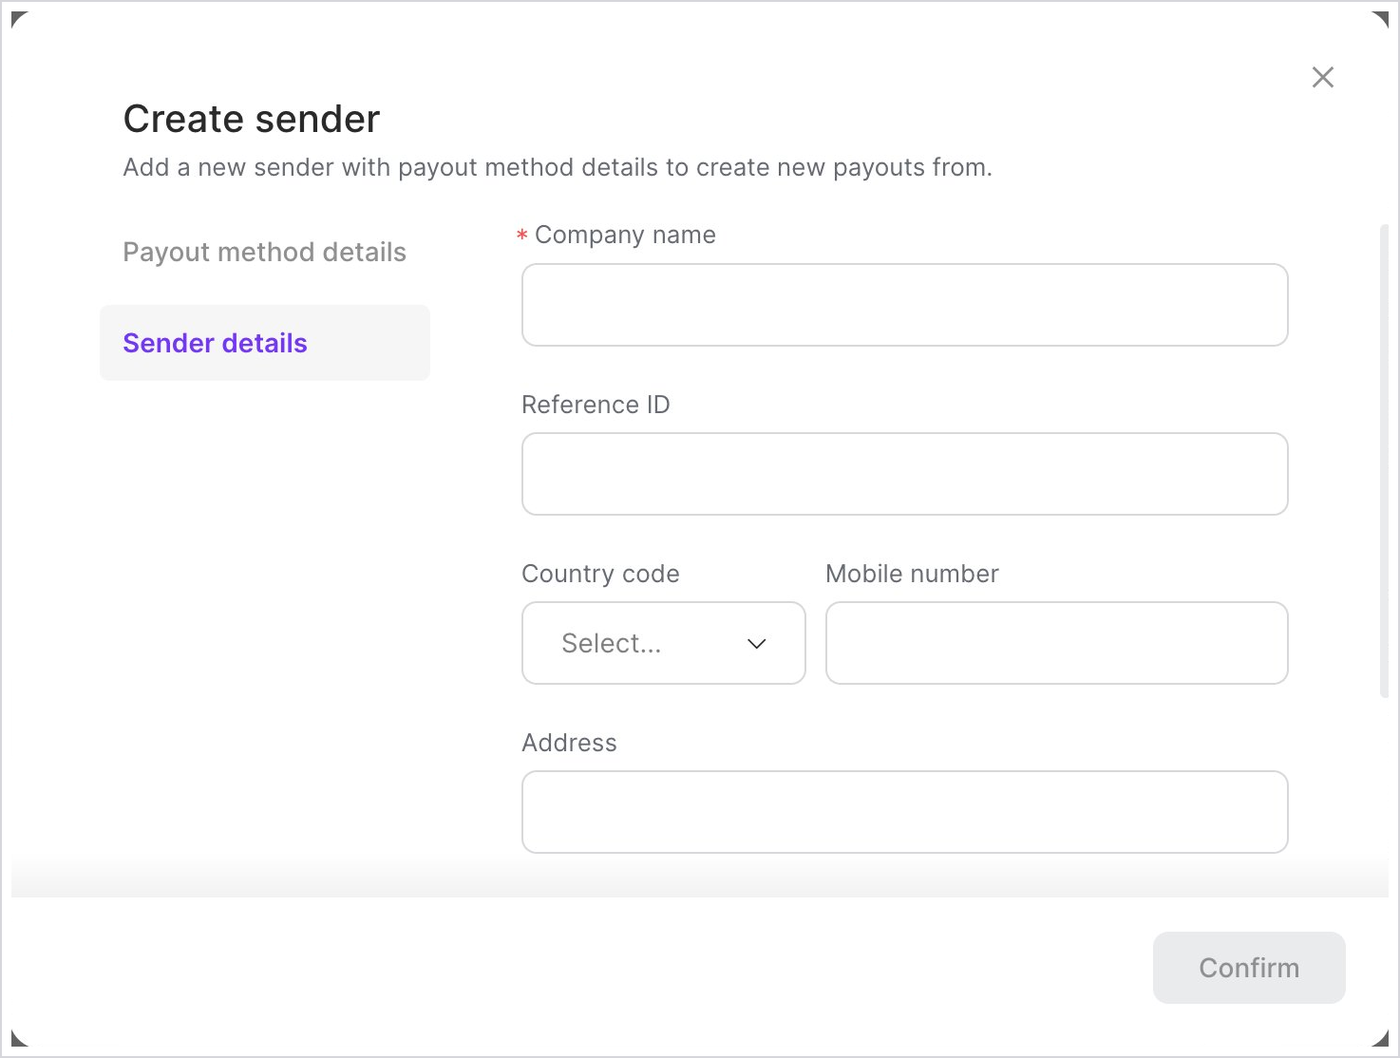
Sender details — enter your business details: Company name and Address. In the Reference ID field, enter your company registration number. Click Confirm.
Creating a new beneficiary
Click + Create New Beneficiary. A two-tab window opens.
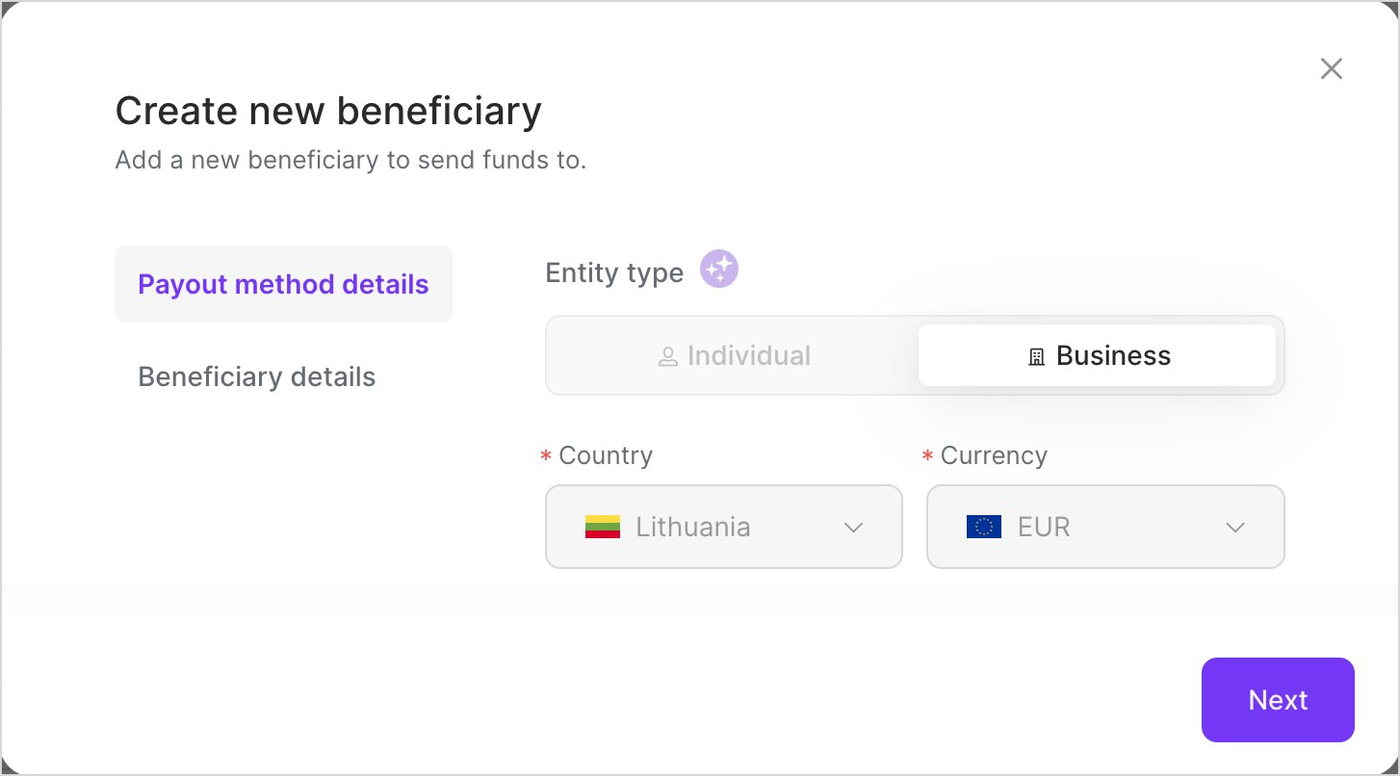
Payout method details — set Entity type to Business, Country to the country where your bank account is held, and the Currency. Click Next.
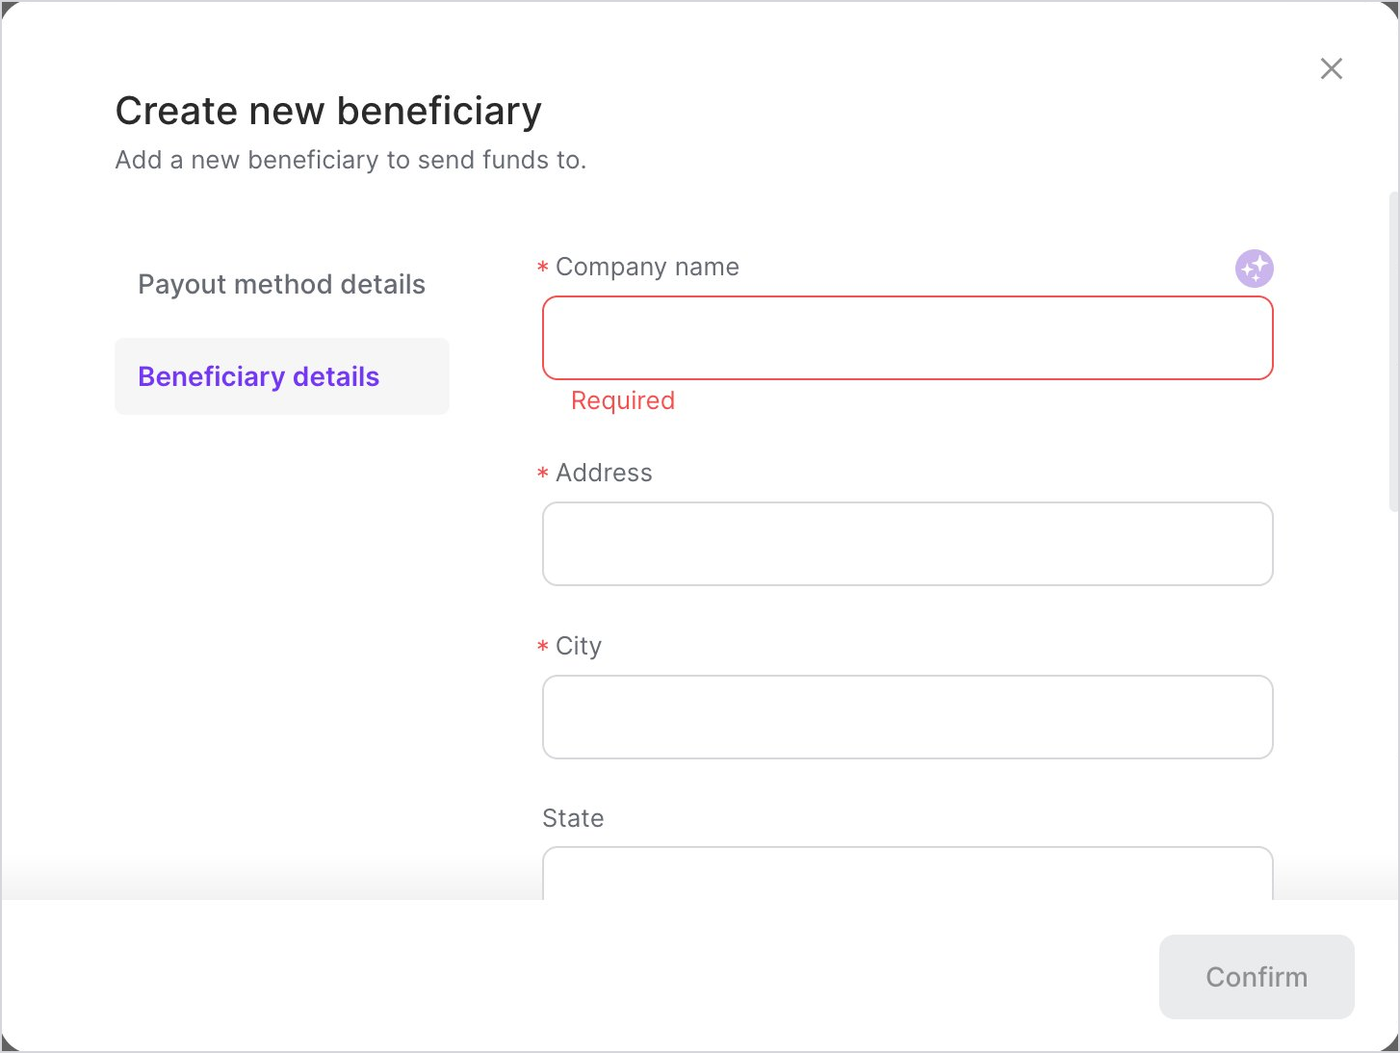
Beneficiary details — enter the account-holder details: Company name, Address, and City. Click Confirm.
Additional fields
Note
Required fields: If the sender or beneficiary you selected is missing required fields, then you will be prompted to fill them in before proceeding. A new record is created with the updated details.
Once the sender and beneficiary are set, complete the following optional fields:
Description — the purpose of the payment, for example "Settlement". This text helps you identify the payout later on.
Merchant reference ID — recommended. Add your own reference to track this settlement against other payout methods in the Rapyd portal.
Statement descriptor — optional text displayed on the bank statement.
Click Next.
Step 4 - Confirmation
Review the transaction details before the payout is created.
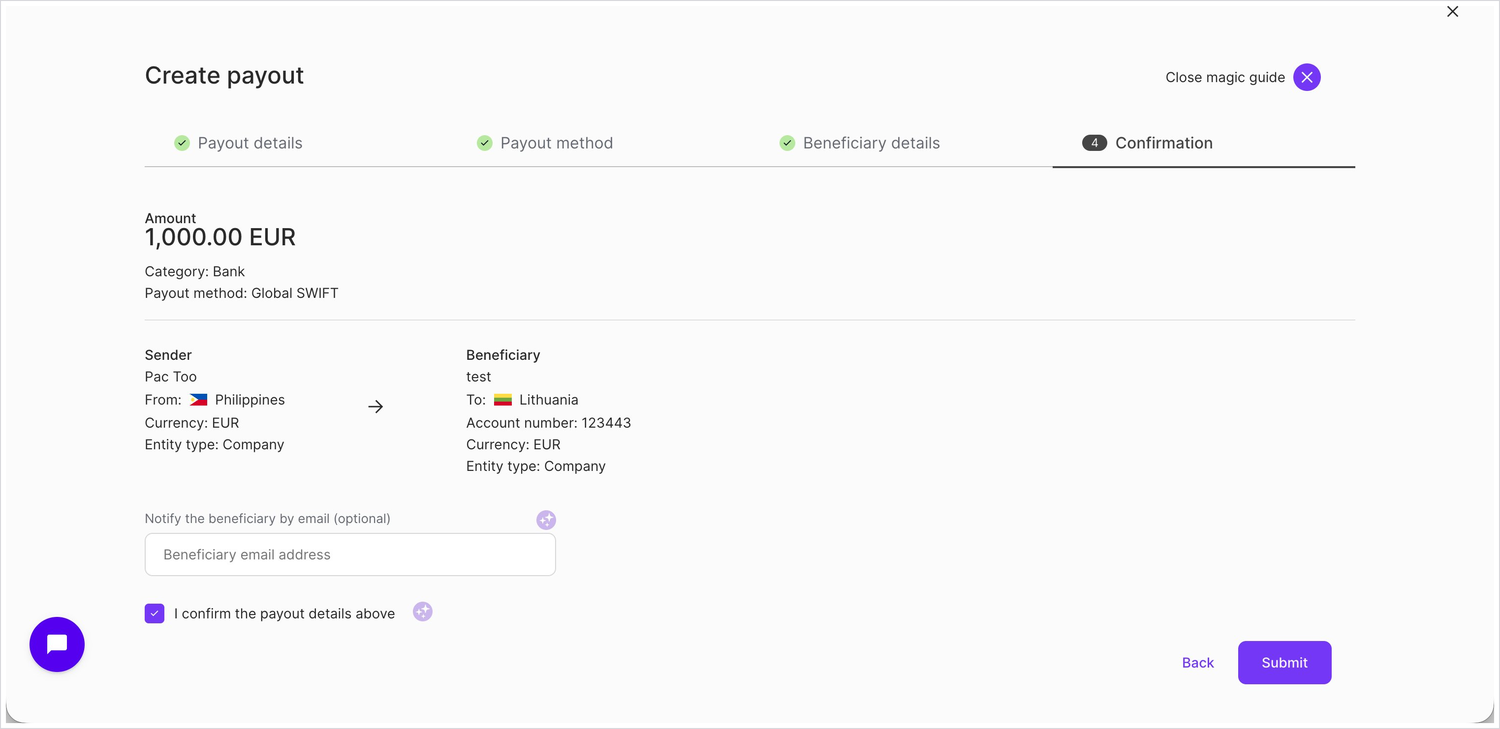
Check the summary: Amount, Category, Payout method, Sender, and Beneficiary (including account number and currency).
Optionally enter the Beneficiary email address to notify the recipient by email when the payout completes.
Select the I confirm the payout details above checkbox.
Click Submit to create the payout.
Important
Double-check the amount, currency, and beneficiary account number before submitting. Once submitted, a payout cannot be edited.
You can view the payout status under Disburse > Payouts as described in Listing Payouts .