Activating Apple Pay
Activate Apple Pay using the Rapyd Client Portal.
You can accept Apple Pay from your customers with any Apple Pay enabled payment methods. For more information about retrieving your payment session, see Retrieve Apple Pay Session.
Note: Apple Pay is currently available with the following requirements:
Clients who are domiciled in Europe can collect payments worldwide using Apple Pay.
Customers must checkout in on iOS, iPadOS or macOS using the Safari browser.
Before Activating Apple Pay
Make sure Apple Pay is available for your payment methods in your region. You can reach out to your Rapyd Relationship Manager.
Hosted | Plugins* | Toolkit | API Payments | |
|---|---|---|---|---|
Toggle on Apple Pay in Client Portal | ||||
Register with Apple | ||||
Verify Your Domain | N/A | N/A | ||
Initialize Full Integration with Apple | N/A | N/A | N/A |
*Includes Shopify, Wix, and Ecwid
How to Activate Apple Pay
If you are using the Rapyd Hosted Page, you will only need to complete the following steps 1-4 to activate Apple Pay.
Sign in as described in Signing in to the Client Portal .
Navigate to Settings > Payment Methods > Digital Wallets.
The Digital Wallets section appears.
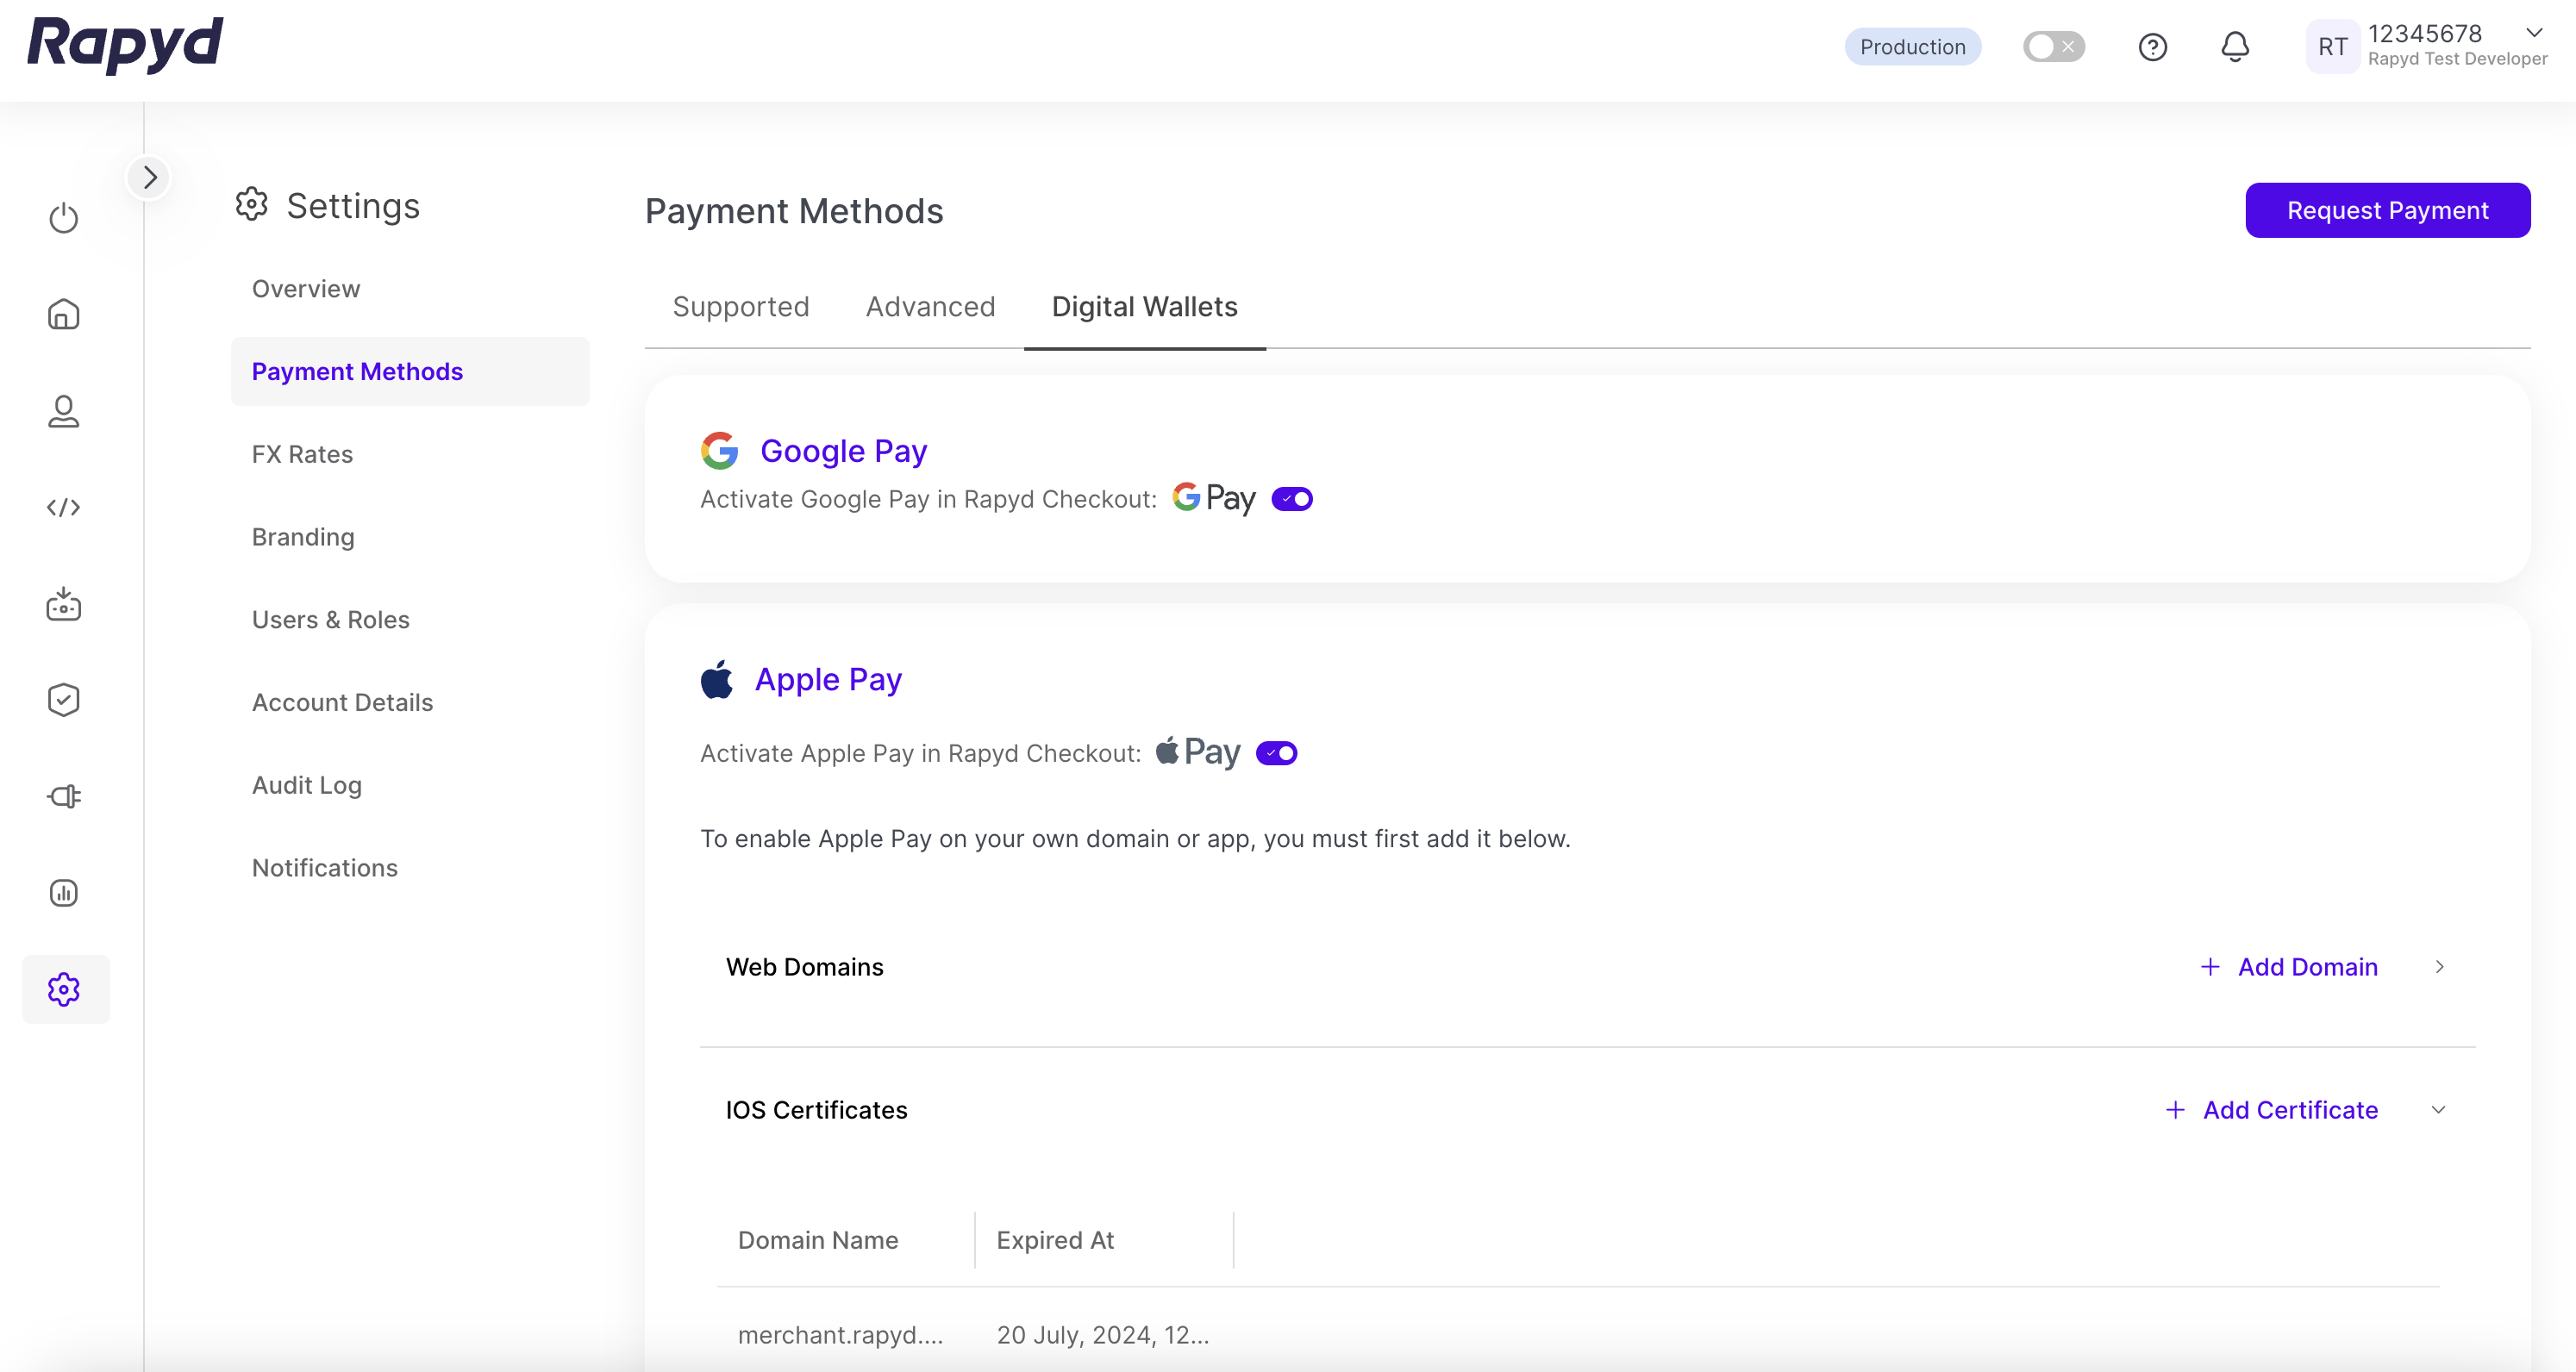
Under Apple Pay, toggle on the on/off switch.
You will be able to enable or disable Apple Pay collections using the Apple Pay on/off switch.
You can now start accepting payments with Apple Pay using the Hosted Checkout Page.
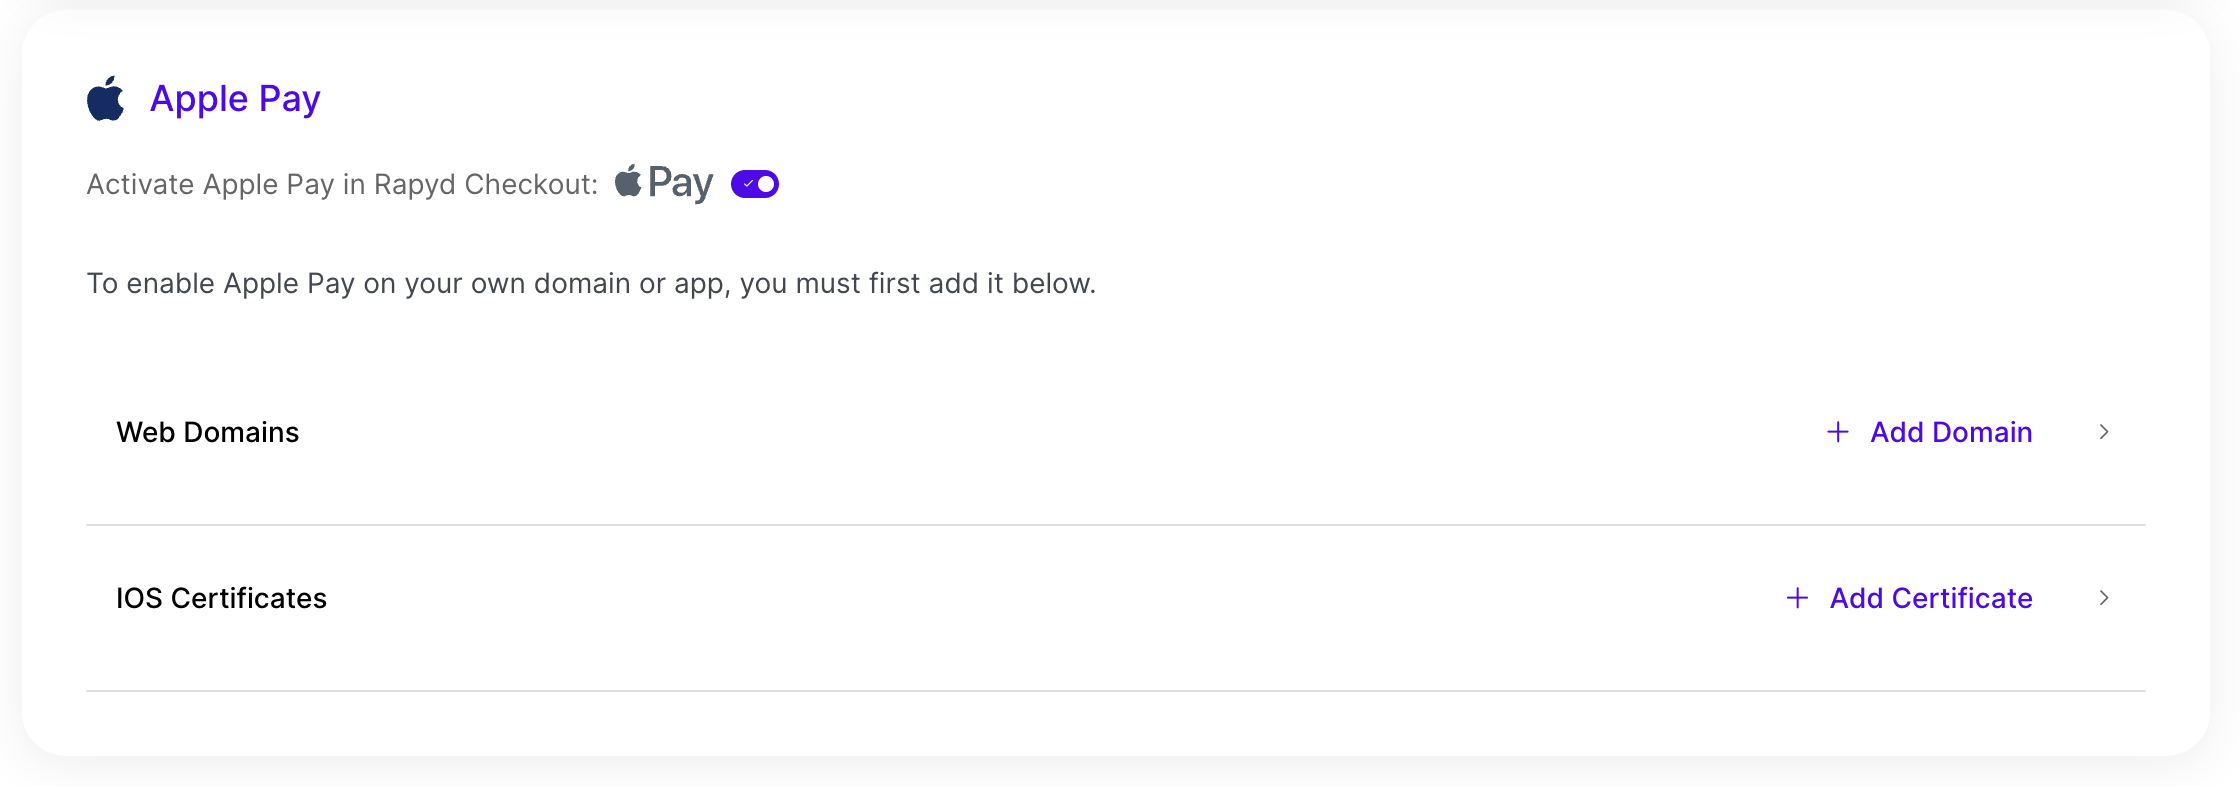
Before Verifying Your Domain
You do not need to verify your domain if you are using:
Rapyd's Hosted Checkout Page
The following plugins:
Shopify
Wix
Ecwid
Using Apple Pay with the Checkout Toolkit Integration and Rapyd APIs.
If you are using the Checkout Toolkit Integration or payments via API, and plan to activate Apple Pay, you will need to verify your domain. Follow the steps below to complete your verification.
Verify Your Domain
You will need to take a few more steps to verify your domain with Apple if you wish to integrate Apple Pay with one of the following:
Checkout Toolkit - offer Apple Pay within an embedded version of Rapyd checkout.
Collect API integrate directly to offer your own checkout page.
This process is required to prove to Apple that you are the owner of a specific domain.
Select + Add Domain in the Web Domains section.
The Verify Domain dialogue box appears.
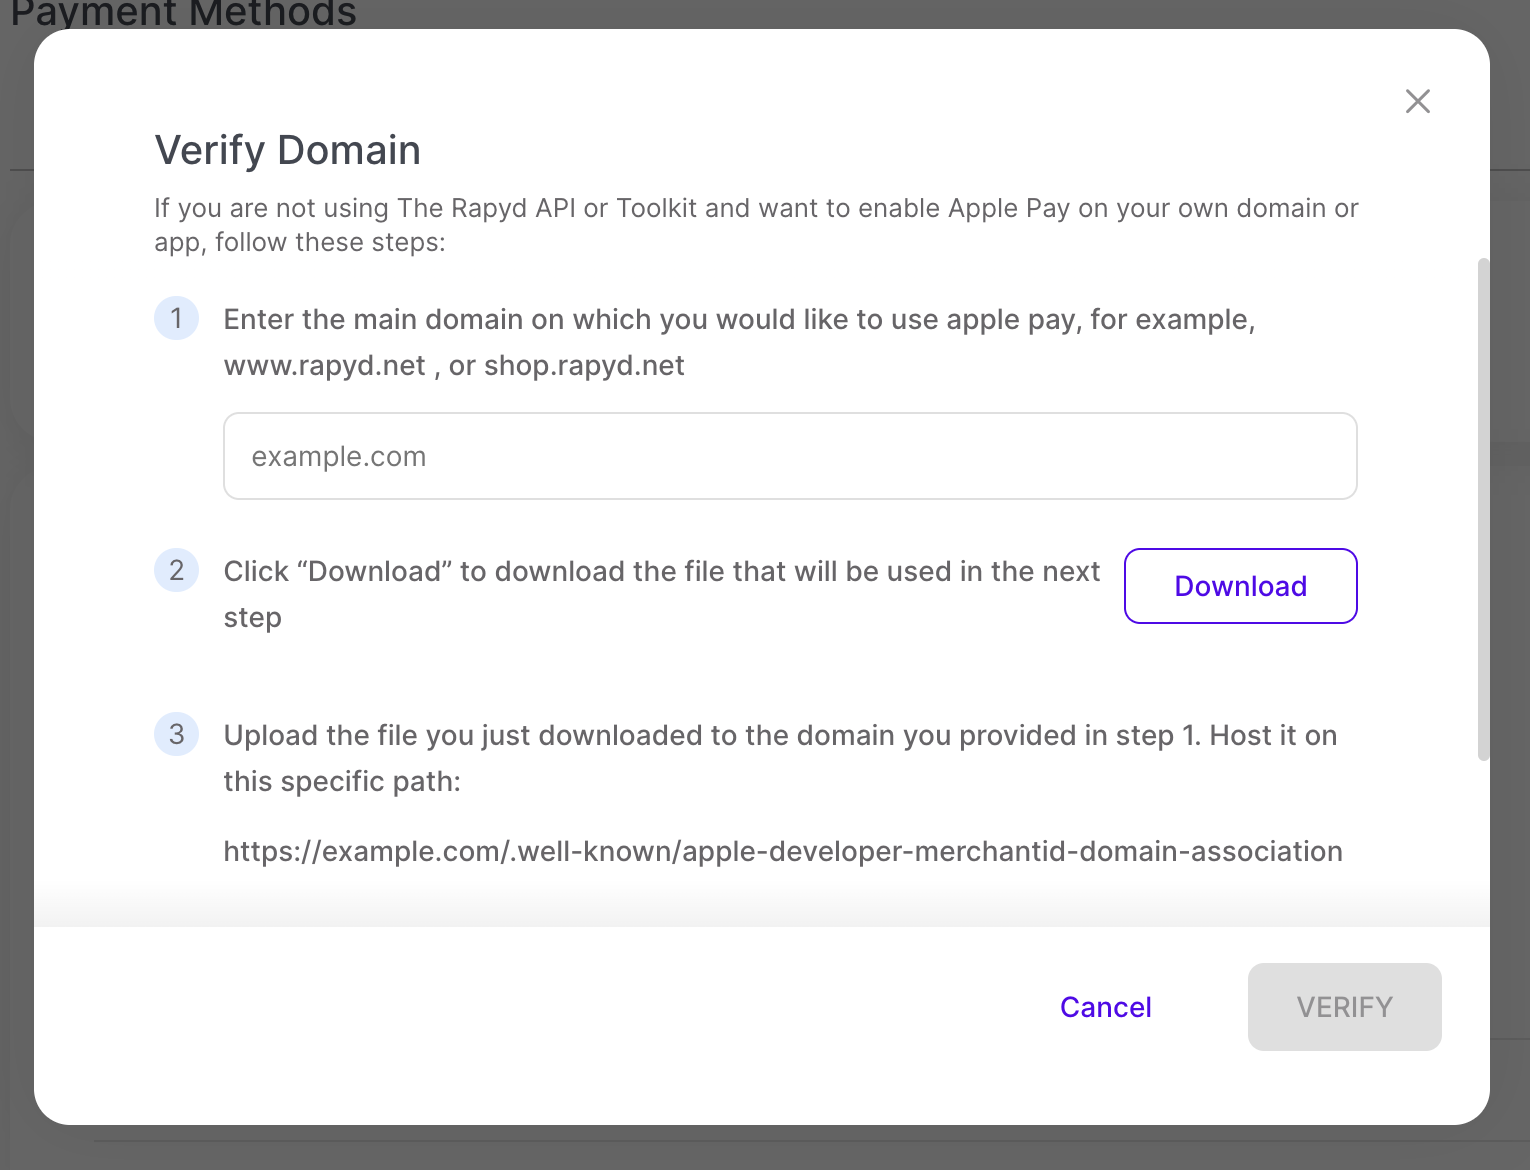
Enter the domain of your website where you will be using Apple Pay in the field.
Follow the instructions to download the file.
Upload the file to the domain you entered in the field as previously described in step 2.
Host the file on this specific path given in the instructions.
Select Verify.
Your website domain should appear in the list of verified domains.
Note: Apple Pay is currently available for web payments only and not for in-app purchases.
Activating Apple Pay Before Submitting KYB
If you have an enabled payment method that works with Apple Pay, once you submit your KYB form, you will automatically be registered with Apple and the Apple Pay option will be enabled by default.
Add Your Apple Pay Certificate
If you have an Apple Developer account, you can enable Apple Pay on your iOS app with your own Apple Pay certificate.
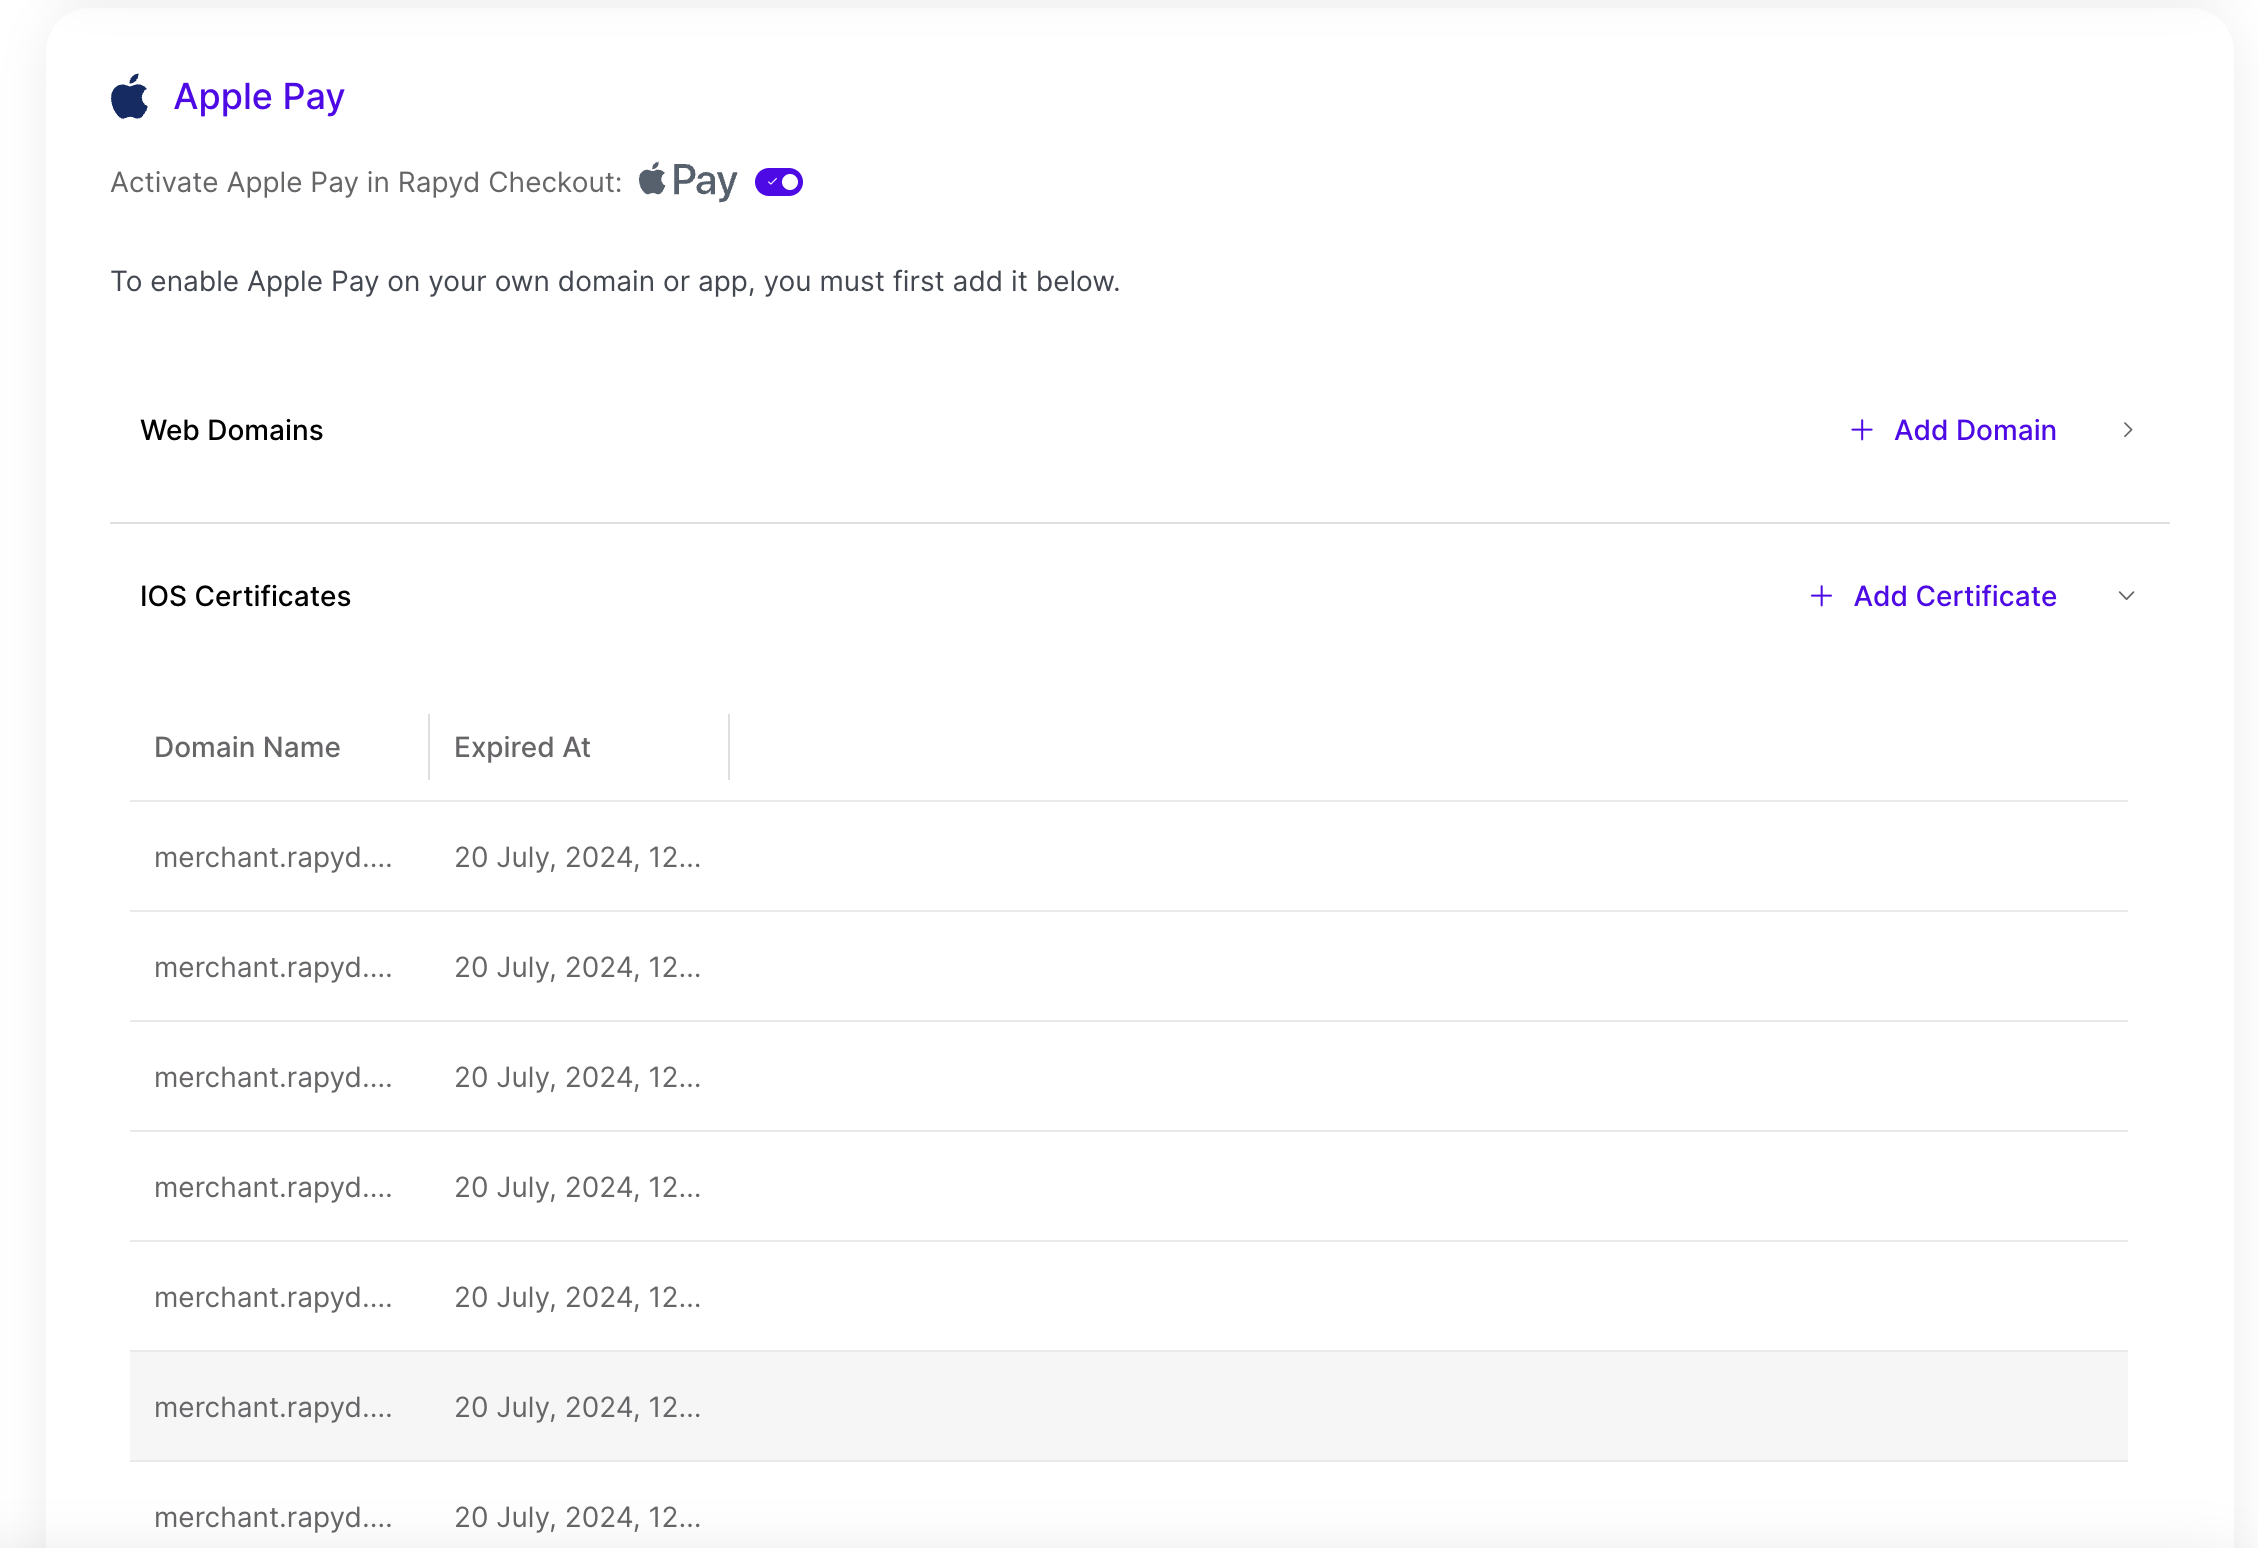
Hover over and select + Add Certificate in the IOS Certificates section.
The Certify Your Application dialogue box appears. Follow the steps to complete and submit your certification.
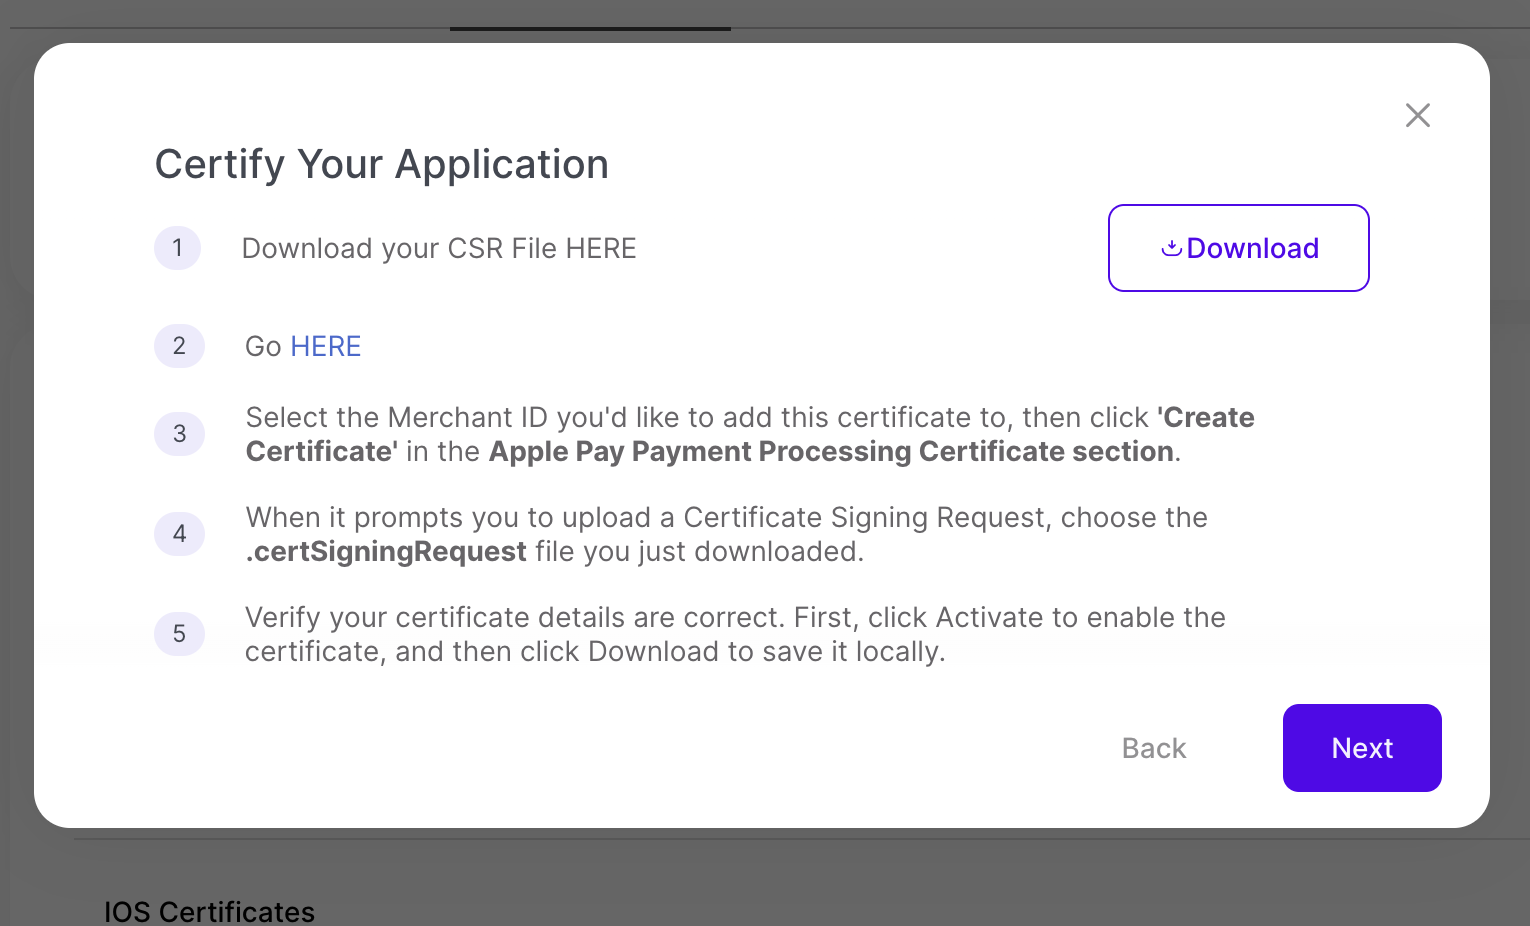
Download the CSR (Certificate Signing Request) file.
Go to the Apple Developer link and sign in.
In the Apple Developer page, follow the steps and when it prompts you to upload the Certificate Signing Request, choose the file you just downloaded (.certSigningRequest or .CSR)
Verify your certificate details are correct. First, click Activate to enable the certificate, and then click Download to save it locally.
The domain and expiration date of the certificate should appear under iOS Certificates.
Note: The Apple Pay Certificate expires every 25 months.