Create a Payout
Create a Payout using the Client Portal.
You can create a payout right from the Client Portal by logging in and going to Disburse > Payouts > Create Payout.
Note: This procedure requires Owner or Administrator privileges.
Sign in as described in Accessing the Client Portal and navigate to Disburse > Payouts > Create Payout or Disburse > Overview > Create Payout.

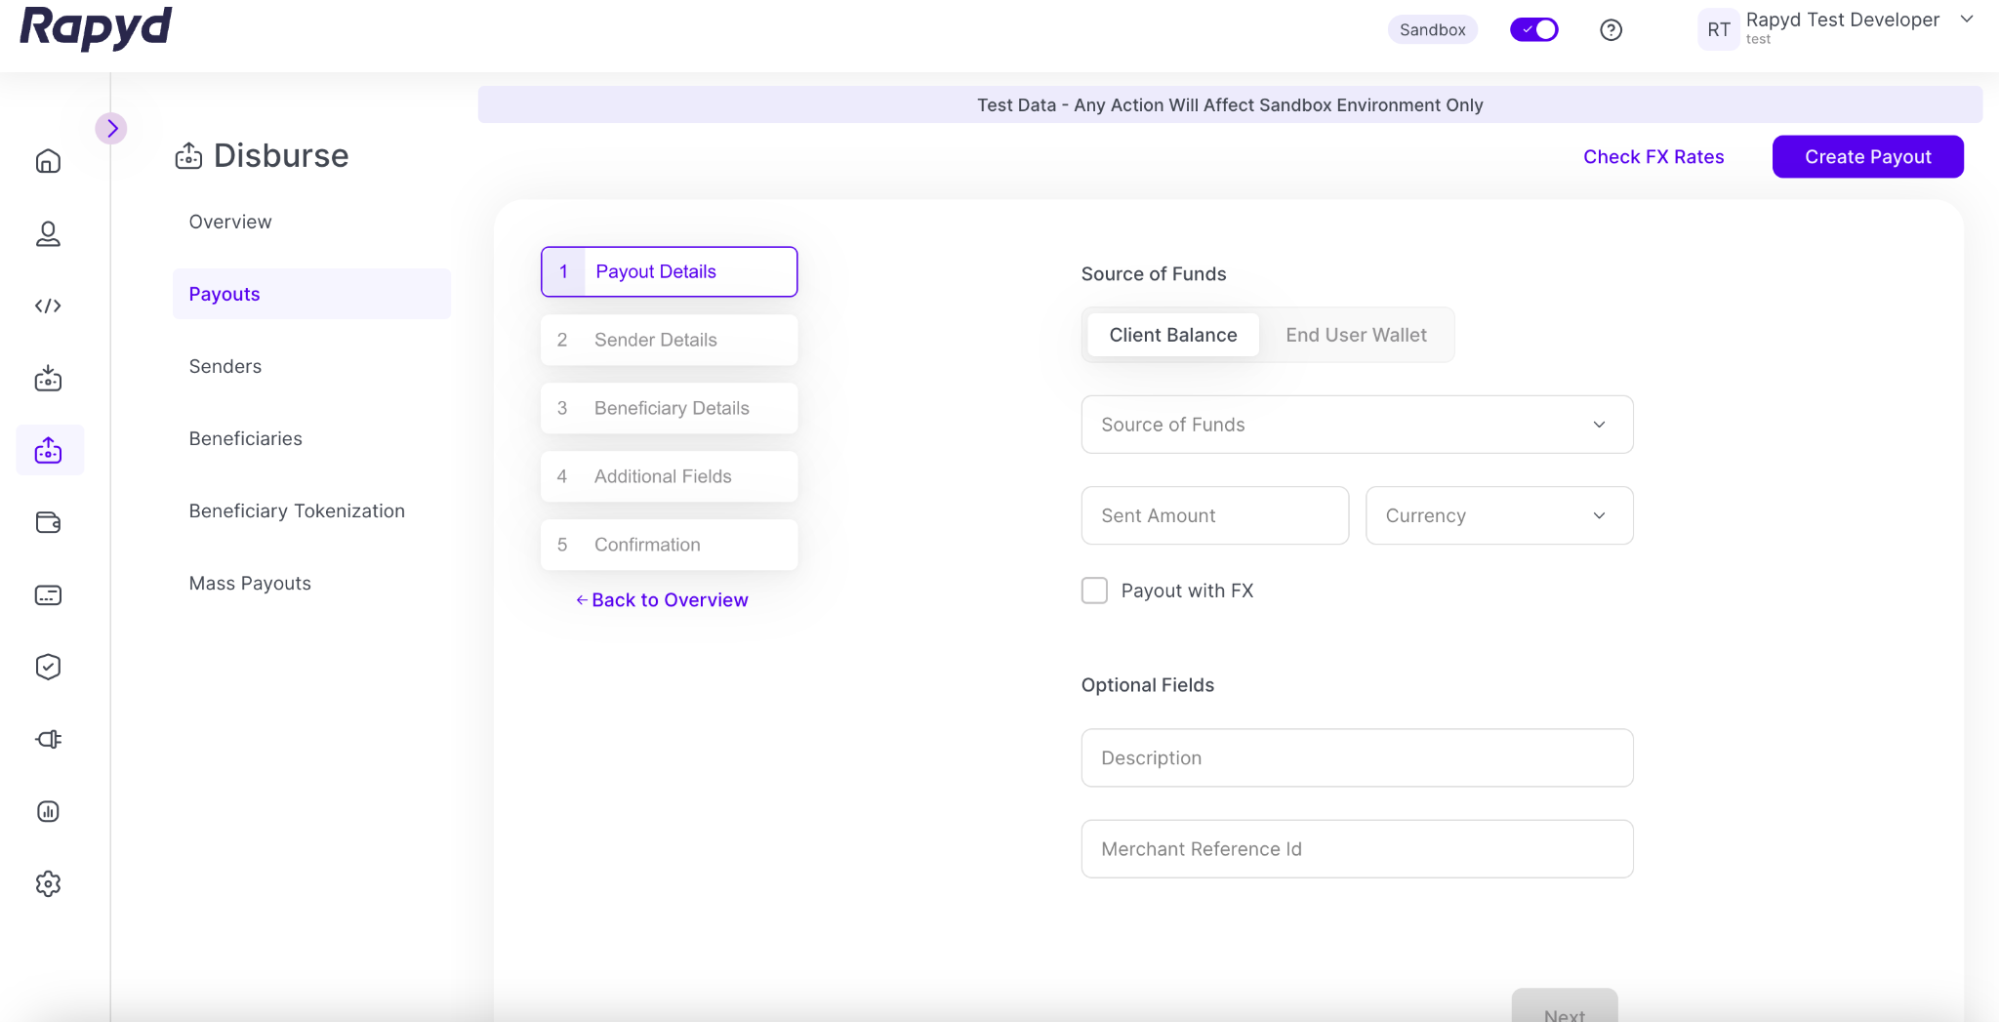
Payout Details
The Payout Details page appears.
Pay For Someone Else
The Pay for Someone Else checkbox can be clicked if you want to create a payout where someone else is the sender. This option is for enterprise customers only.
If Pay for Someone Else is selected, the Source of Funds field will appear.
If you have multiple client wallets available, then you can choose the source of funds for the payout from the dropdown menu.
Choose the Company Balance or End User Wallet option.
Note: The End User Wallet option will only appear if you are creating a payout on behalf of someone else.
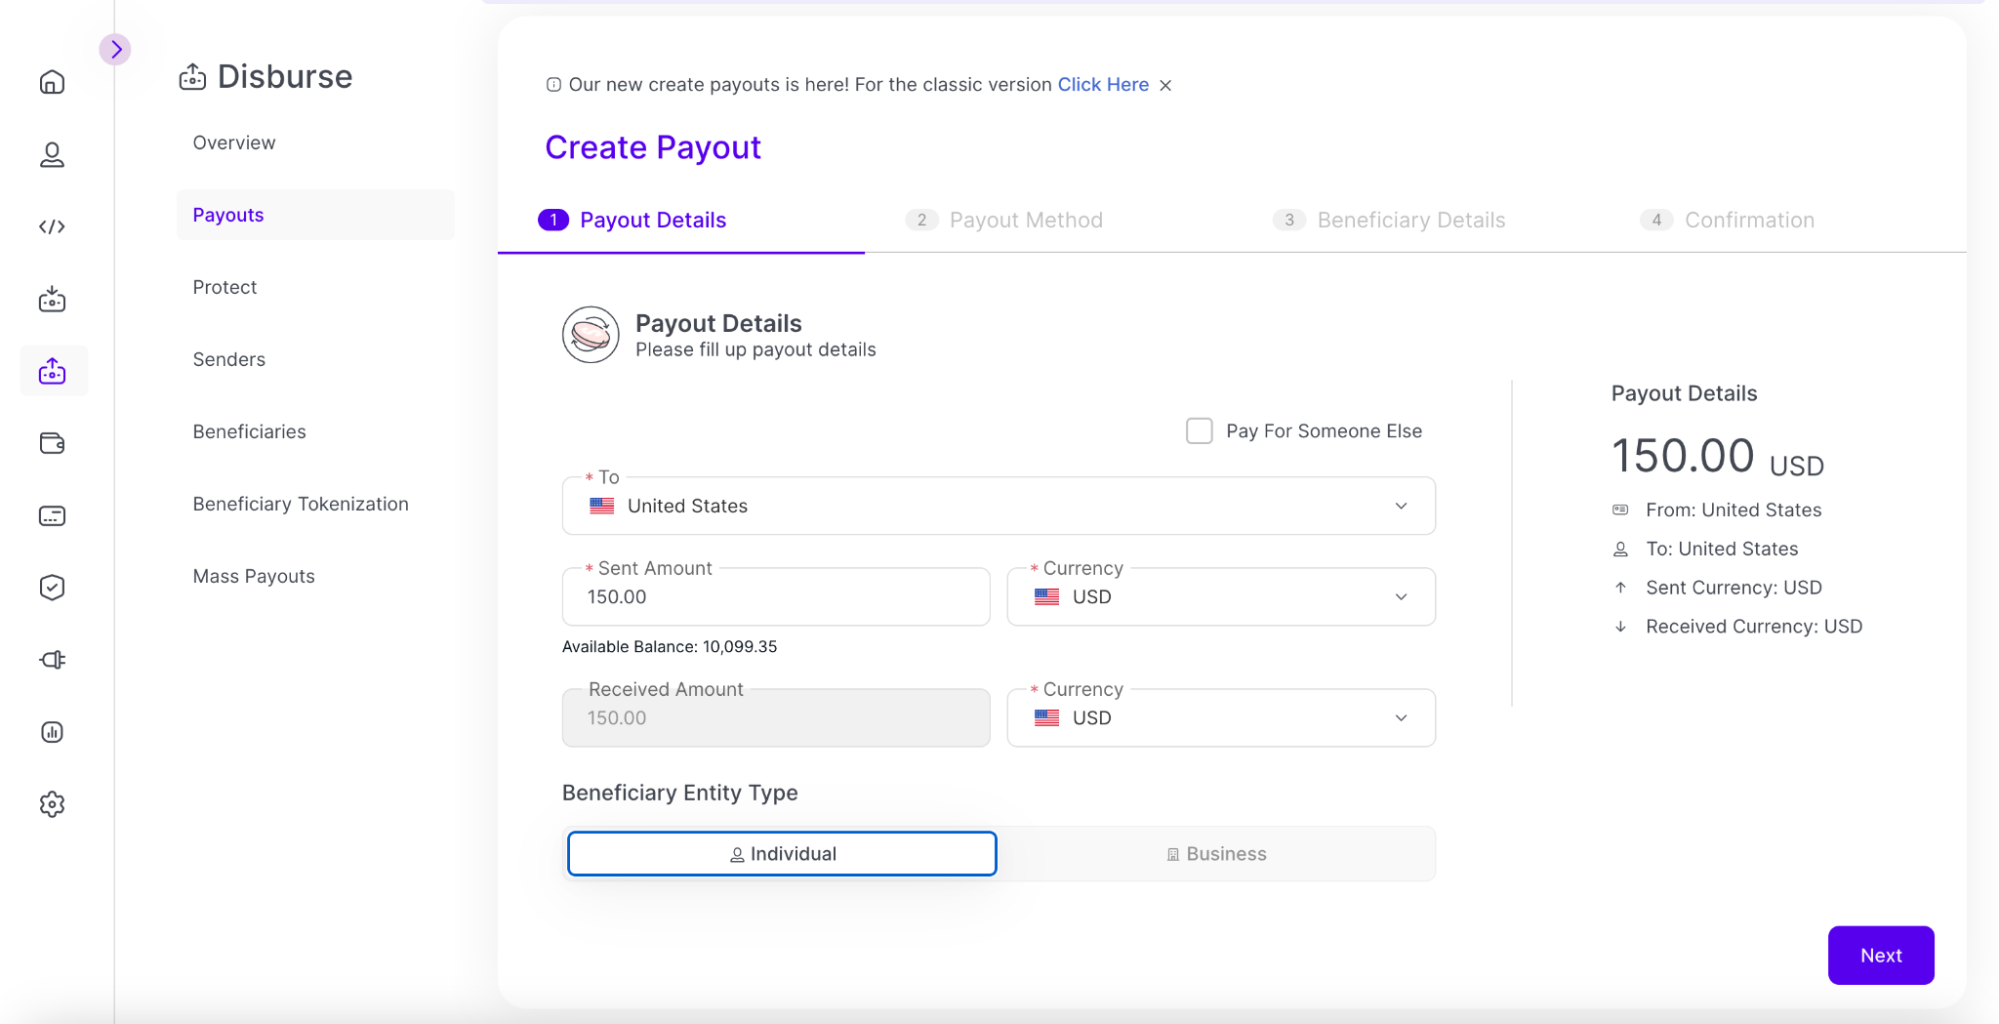
Fill out the following fields:
From: The origin country for the payout. This field is optional and will appear if Pay for Someone Else is checked.
To: The destination country for the payout
Sent Amount: The currency amount for the payout
Currency (for Sent Amount): The currency the payout will be sent
Currency (for Received Amount): The currency the payout will be received in by the beneficiary
Select the Beneficiary Entity Type: Individual or Business.
Note: The selected option will determine if the beneficiary will be an individual or a company.
Click Next.
Payout Method
The Payout Method page appears.
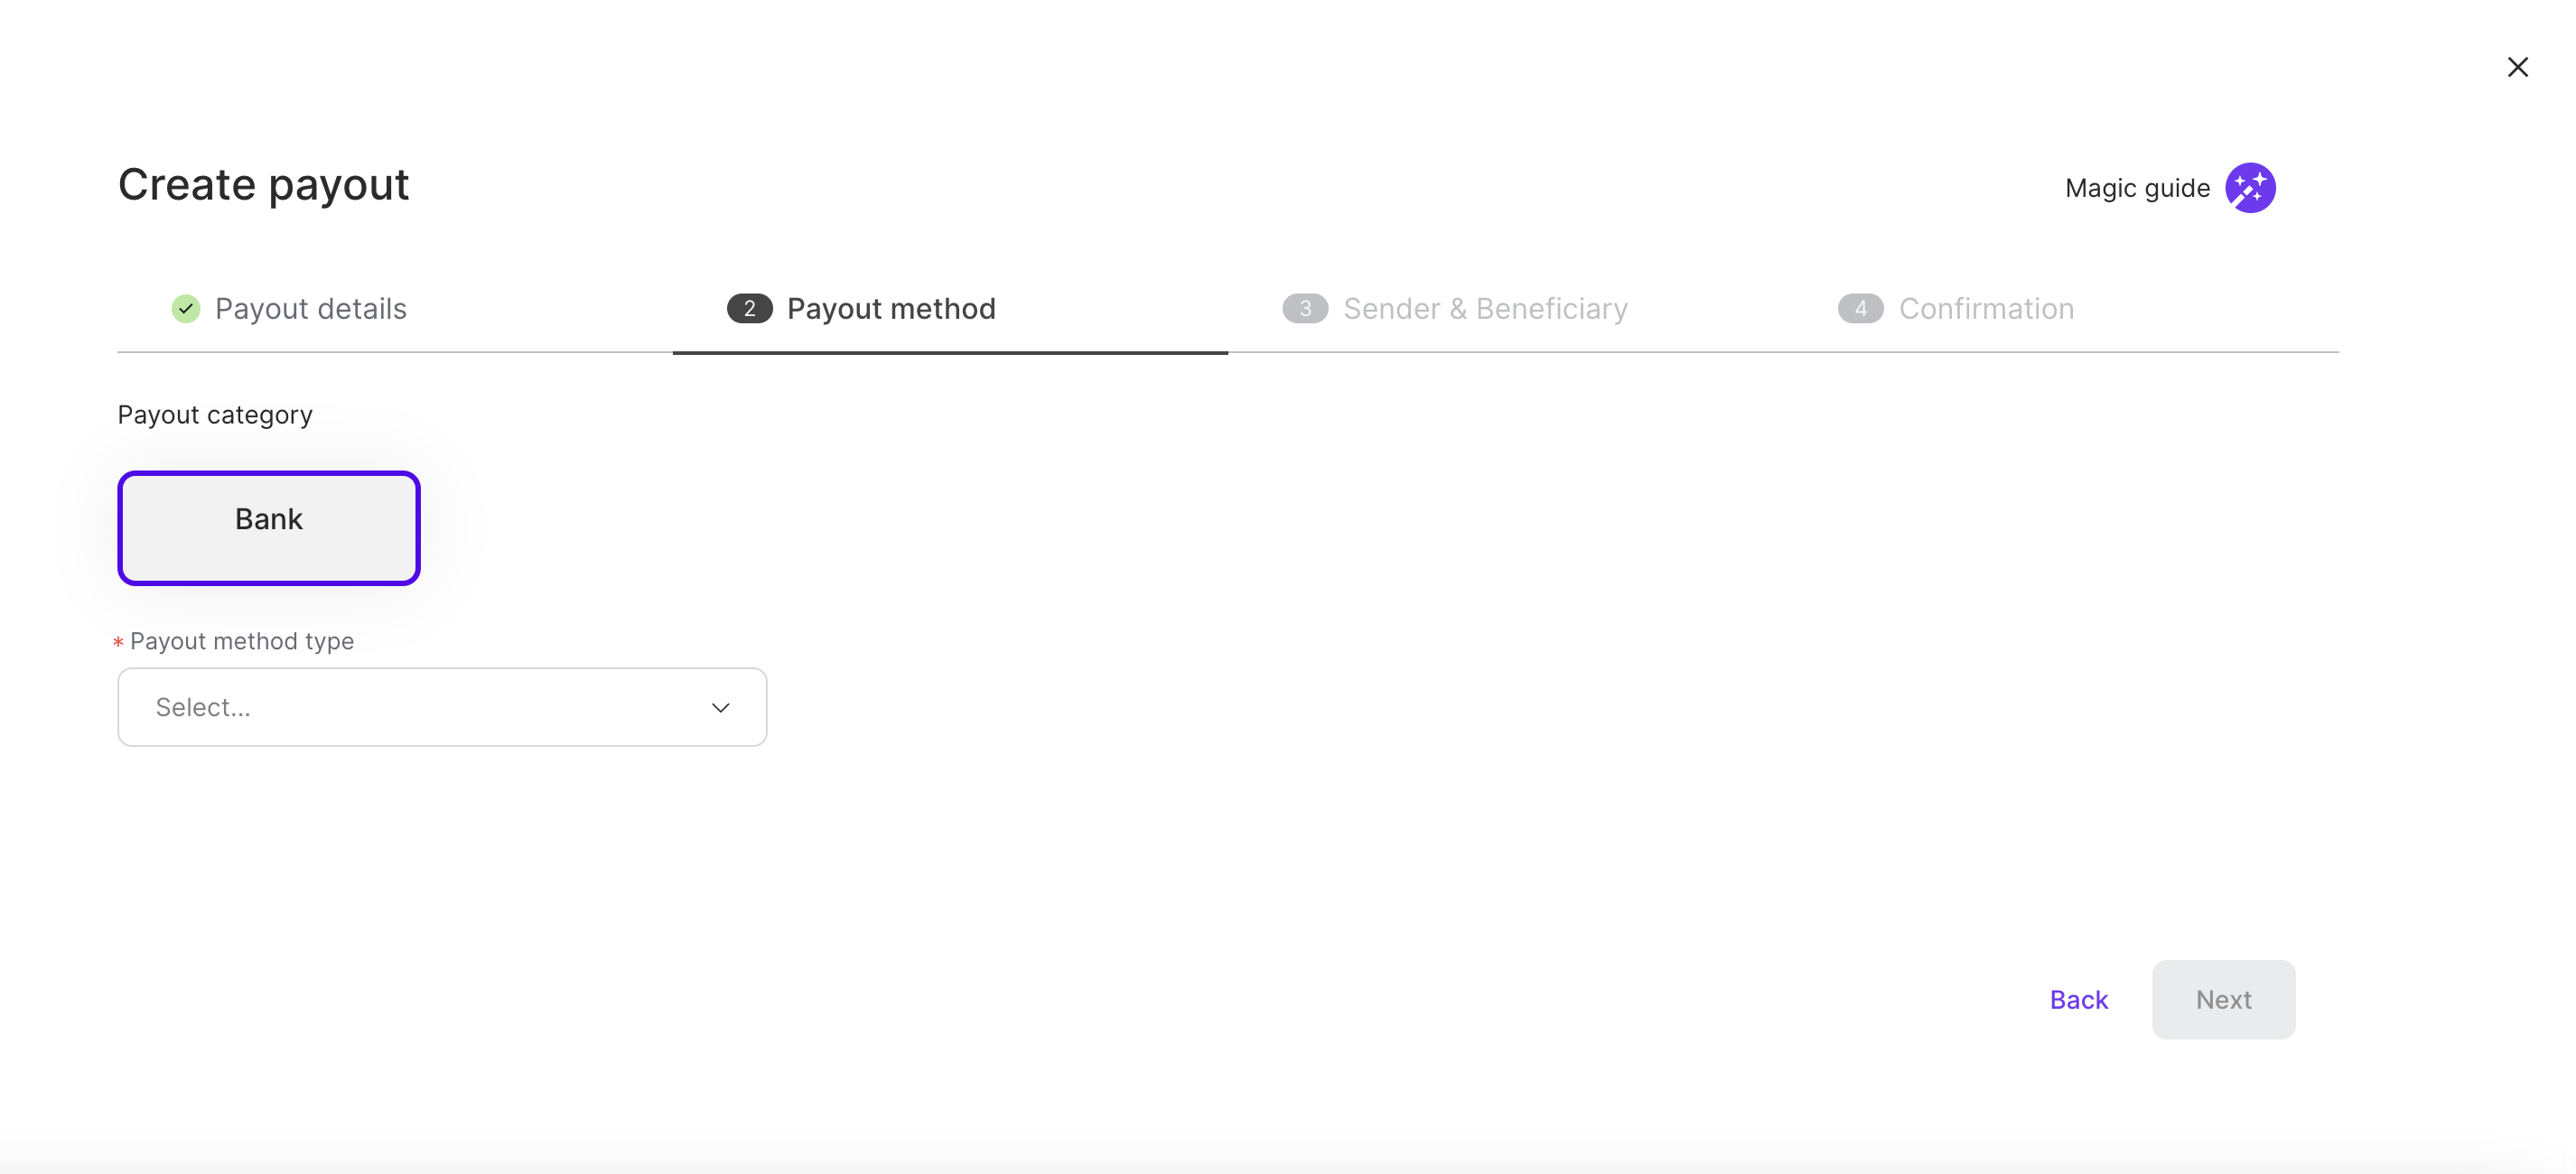
Select the Payout Category for the Payout Method Type:
Bank
Card
Rapyd Wallet
Note: Only the payout categories available to you will be shown.
Choose the specific Payout Method Type from the drop down menu.
Note: Arrival Time Details will be shown in the callout below the payment method type selection.
Click Next.
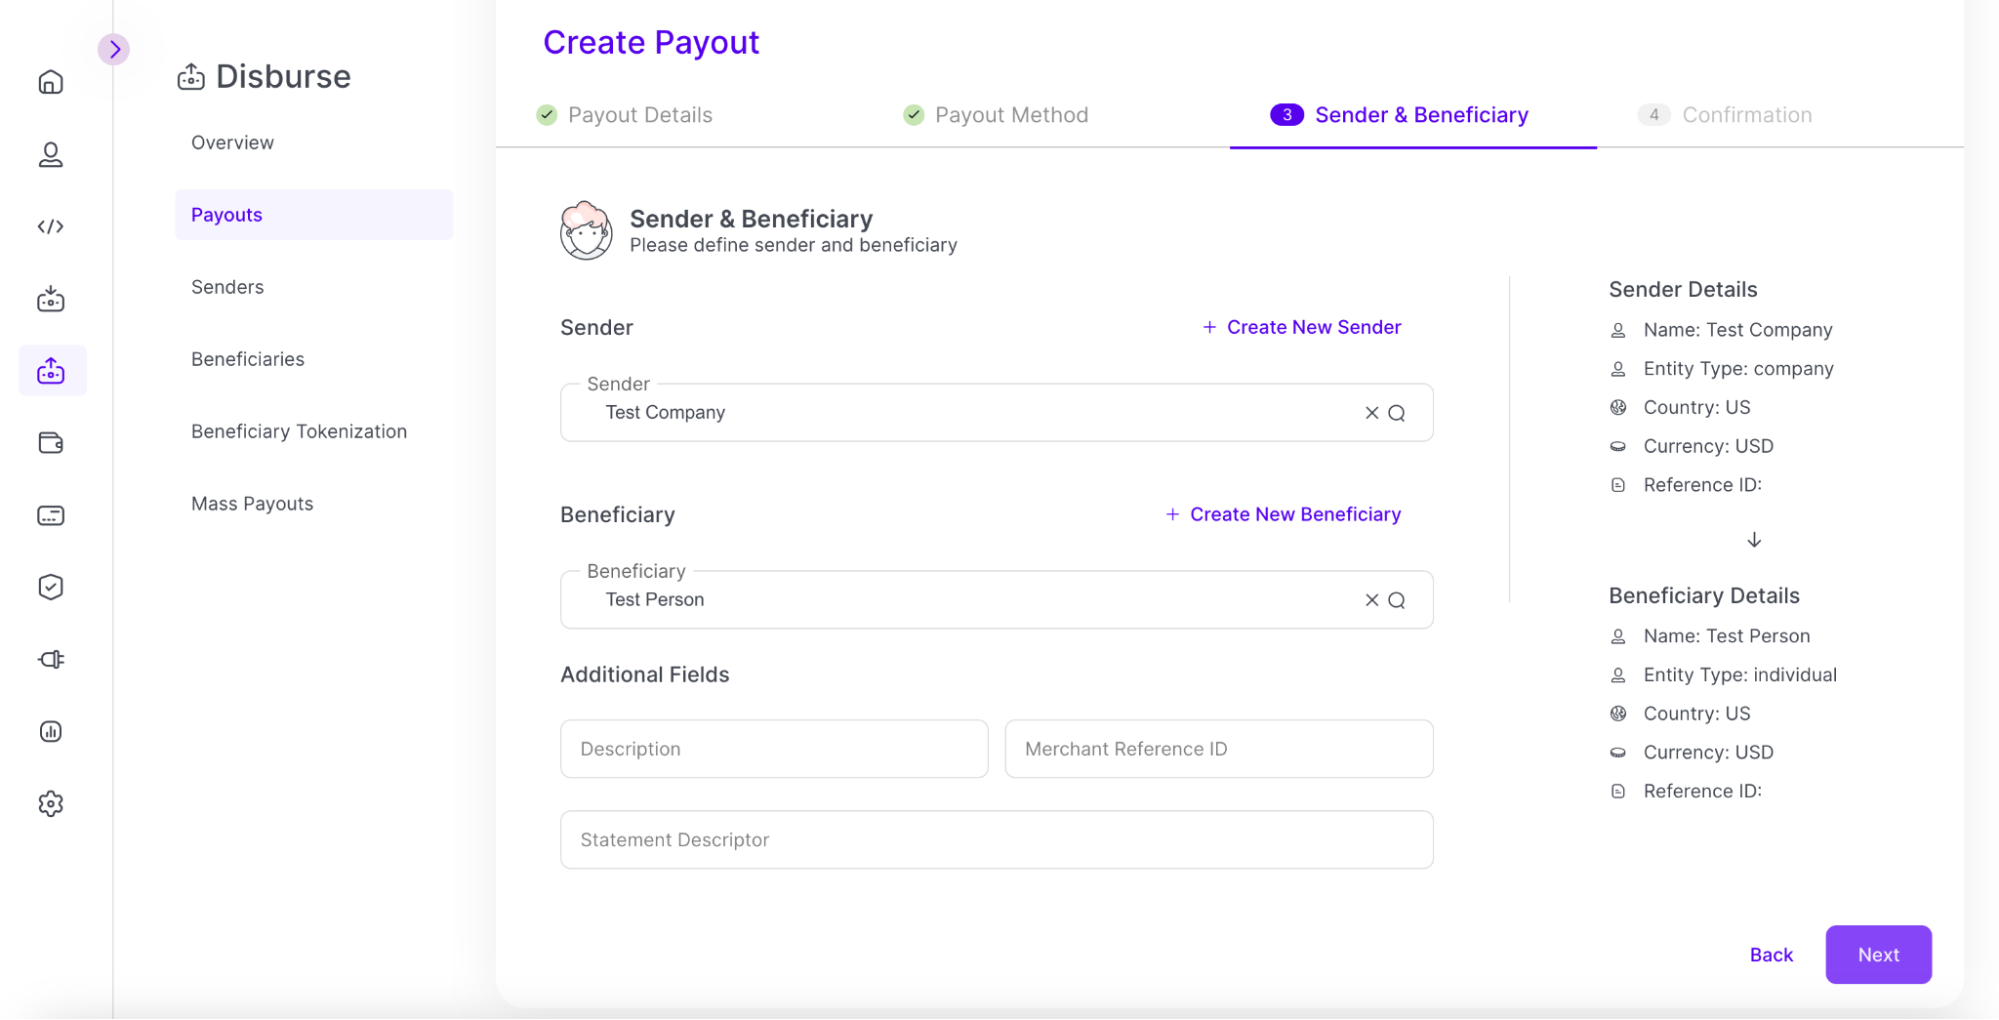
Sender and Beneficiary
The Sender and Beneficiary page appears.
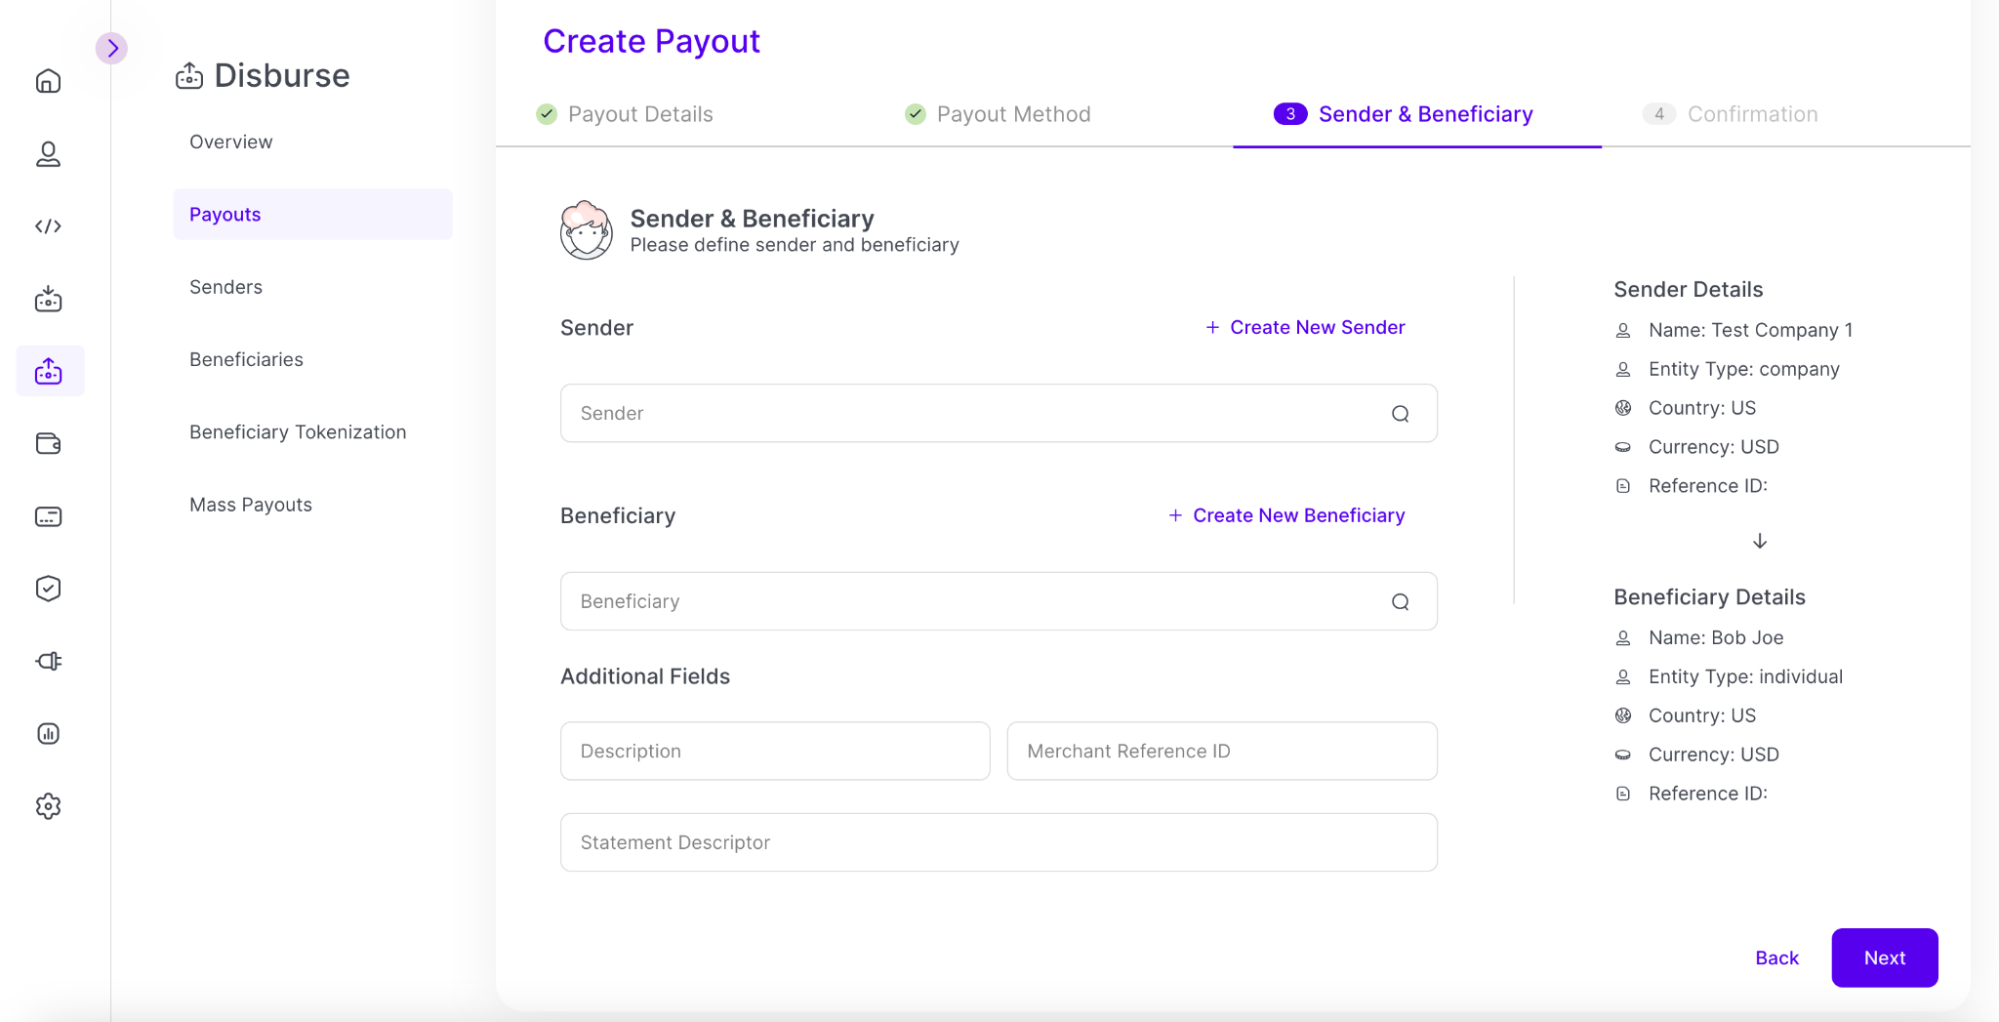
You must create or select a Sender and Beneficiary for the payout.
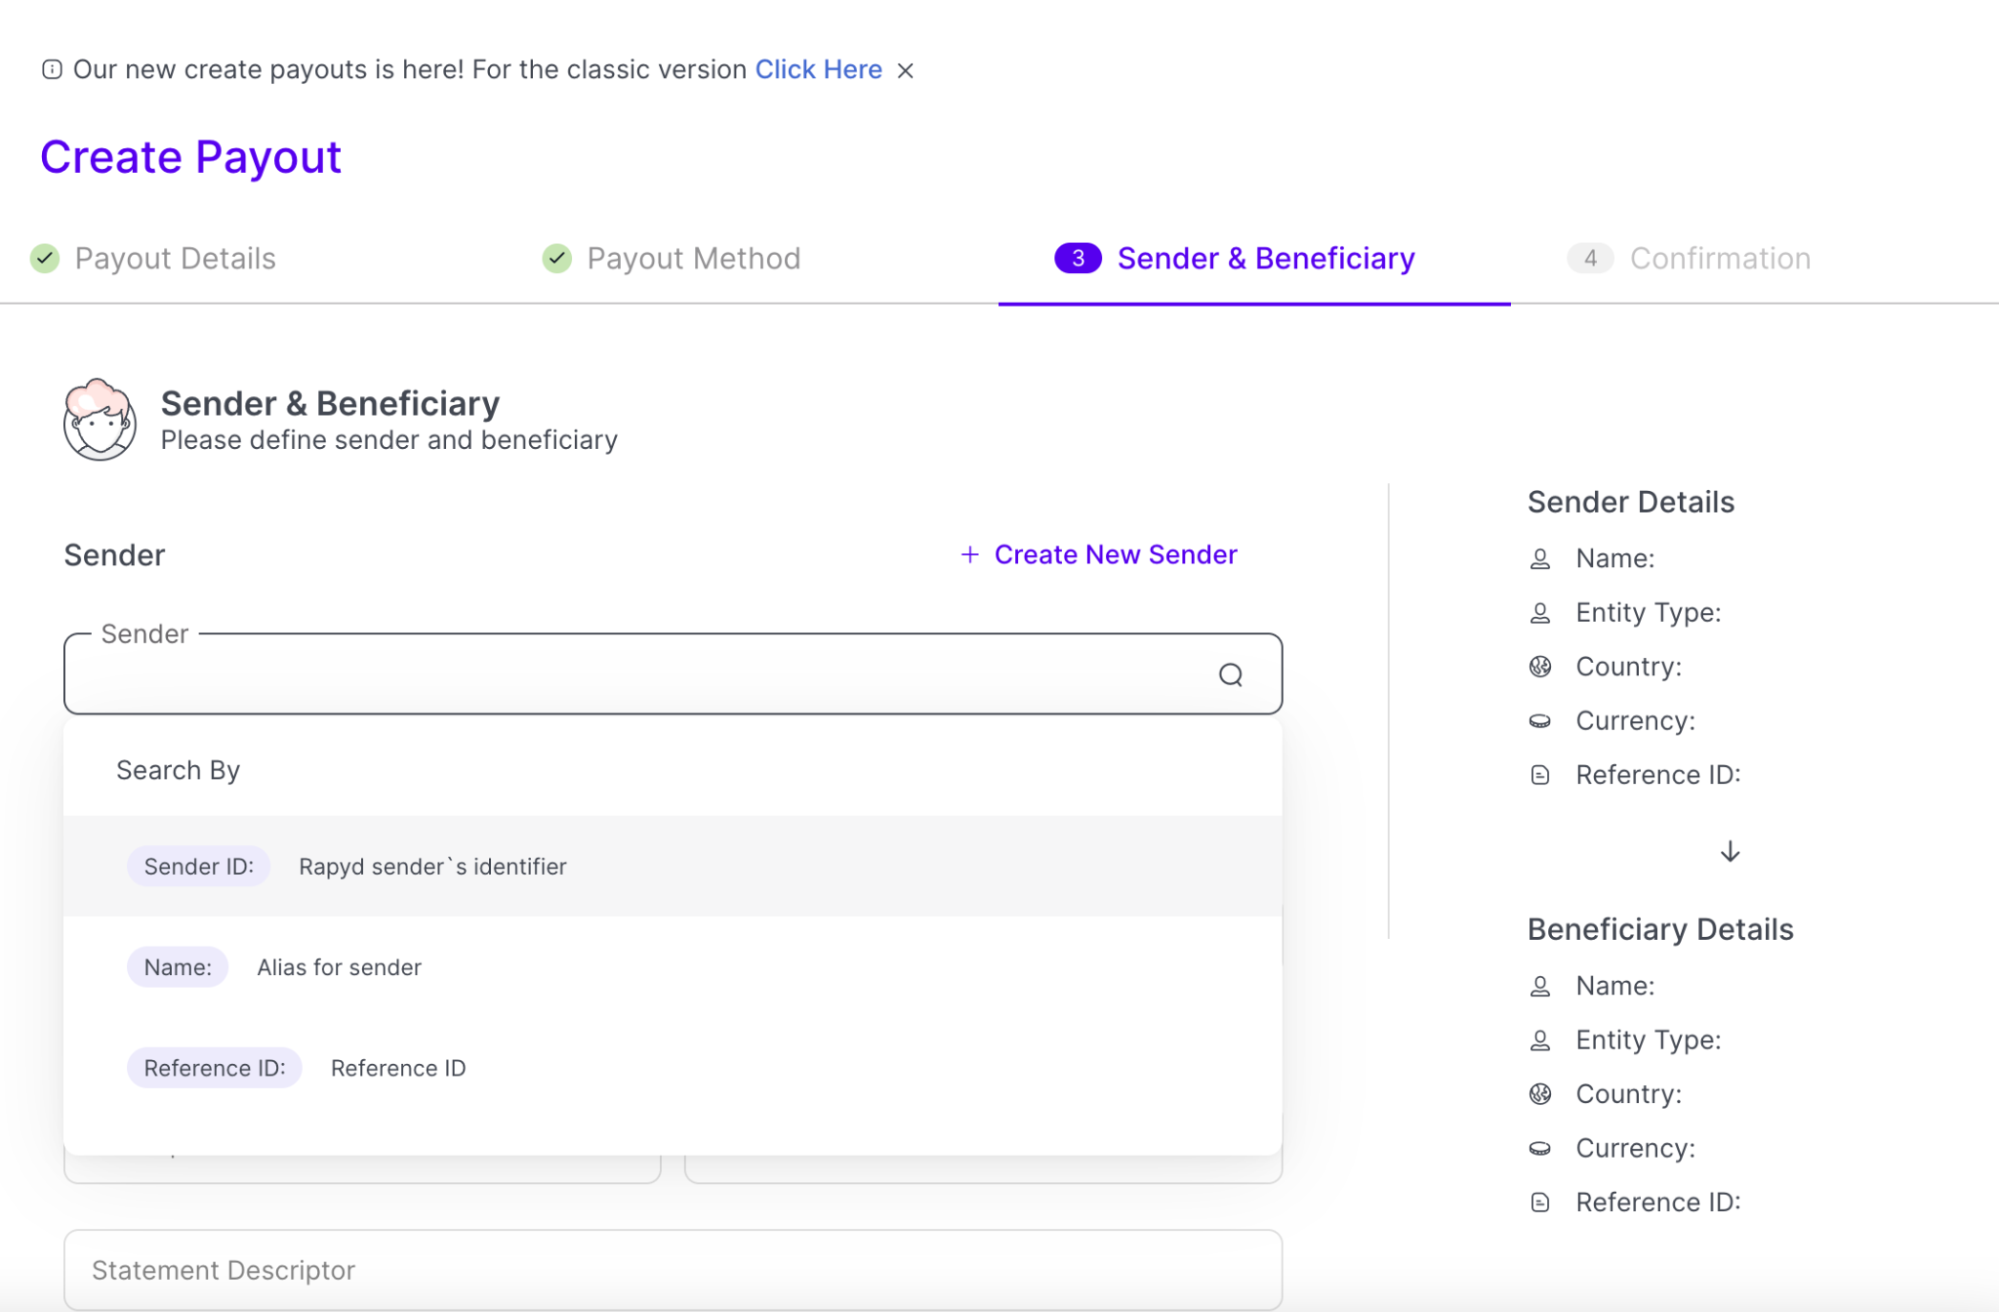
Search for a sender using the search bar. Search by: Sender ID, Name, or Reference ID. For more information on the fields, see Listing Payouts.
Optional: You can click + Create New Sender if you want a new sender for the payout. This option will appear if the Pay for Someone Else option is checked.
The Create Sender window appears.
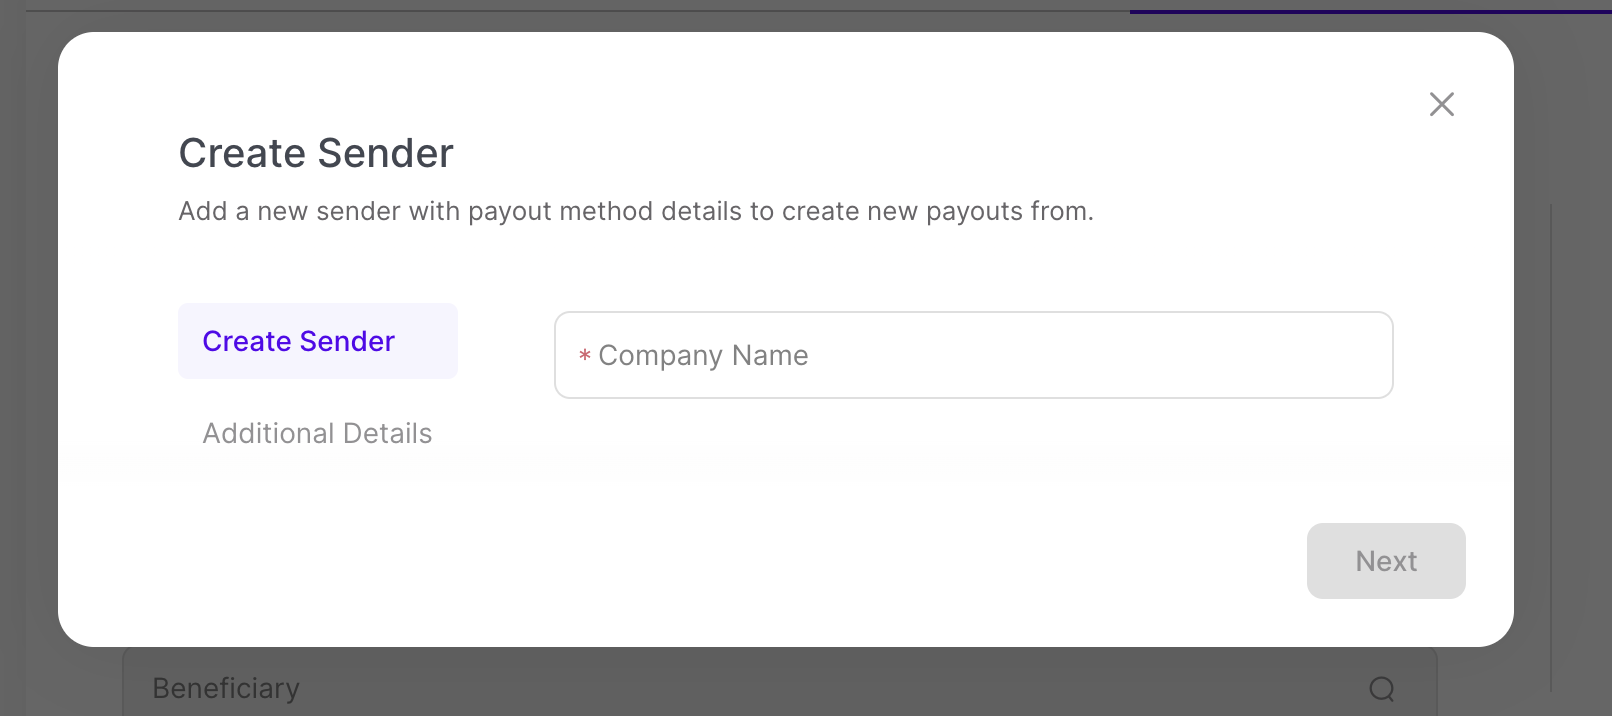
List the Company Name and click Next.
List any additional details and click Confirm.
Search for a beneficiary using the search bar. Search by: Beneficiary ID, Name ID or Reference ID. For more information on the fields, see Listing Payouts.
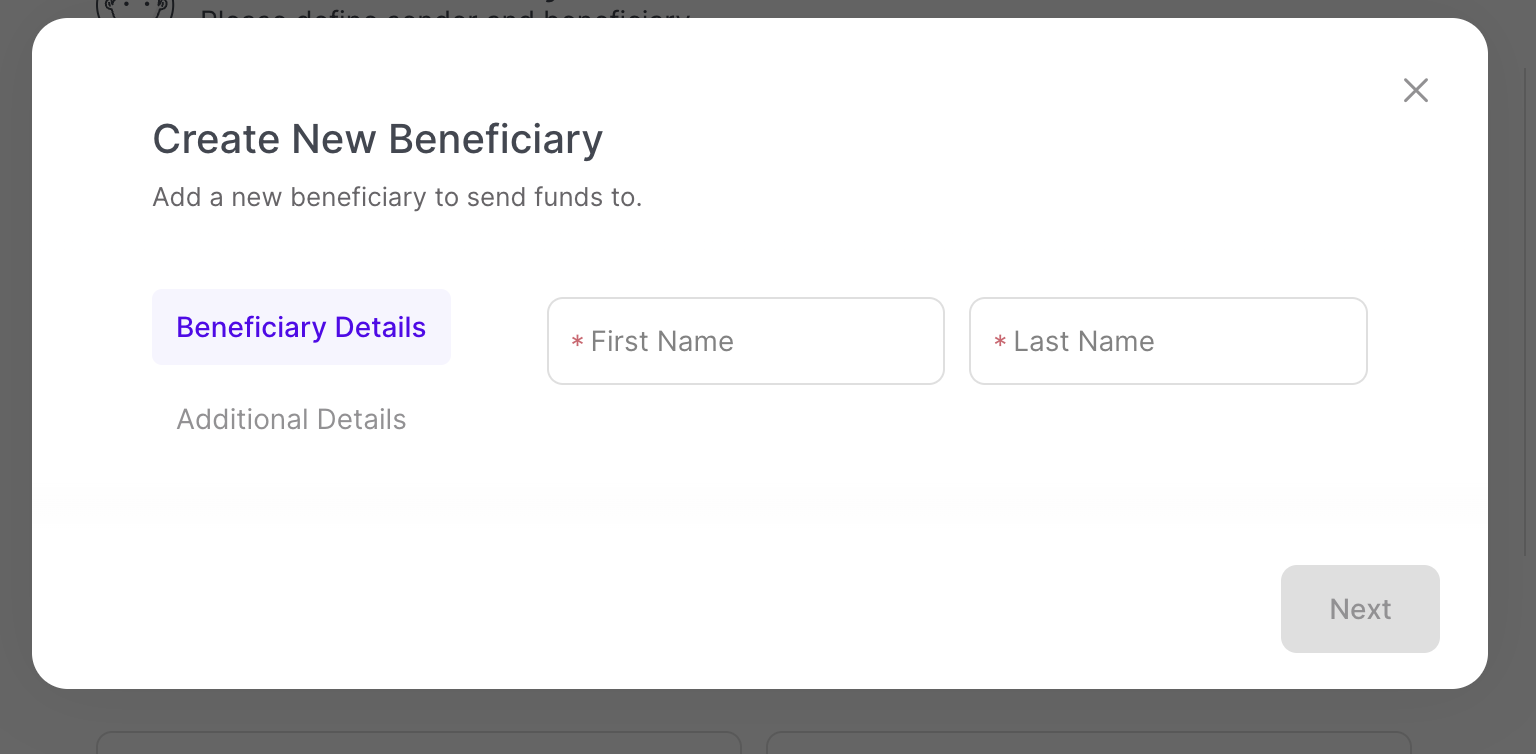
You can click + Create New Beneficiary if you want a new beneficiary for the payout.
The Create New Beneficiary window appears.
If your beneficiary is an:
Individual: Add the First Name, Last Name, click Next and add the Additional Details.
Business: Add the Company Name, click Next and add Additional Details.
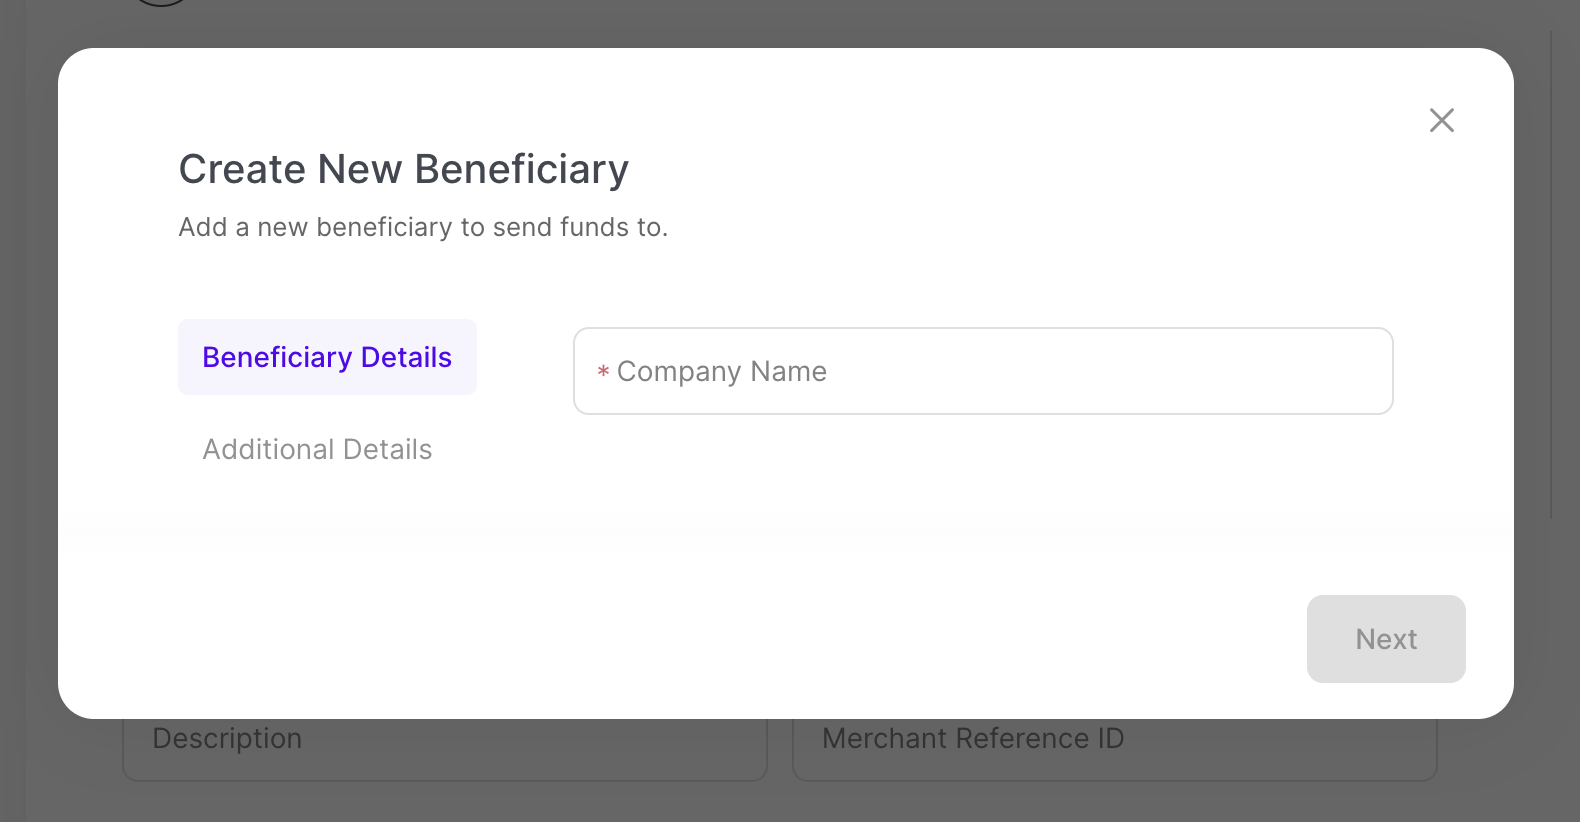
Click Confirm.
Required Fields for Sender or Beneficiary
There are required fields for both the Sender and Beneficiary in order to create a successful payout.
If the sender or beneficiary you selected is missing required fields, you will be prompted to fill in the missing fields. A new sender or beneficiary will be created with the updated required fields.
Once the Sender and Beneficiary have been selected, click Next.
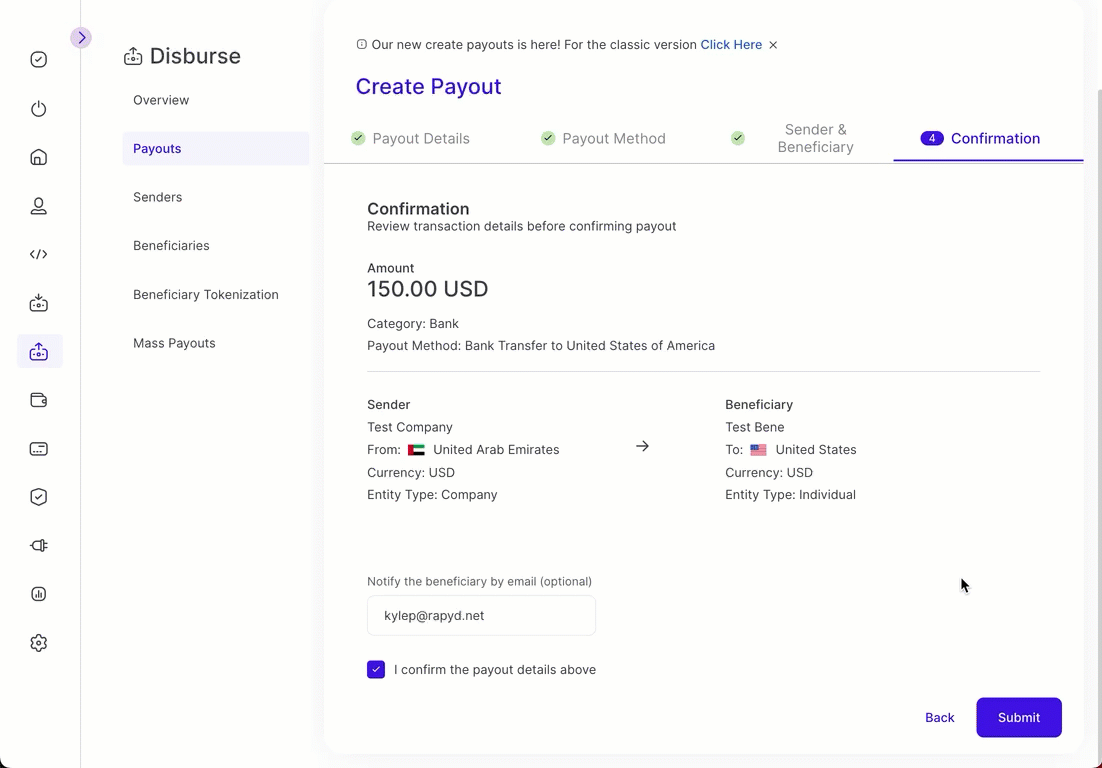
Confirmation
The Confirmation page appears.
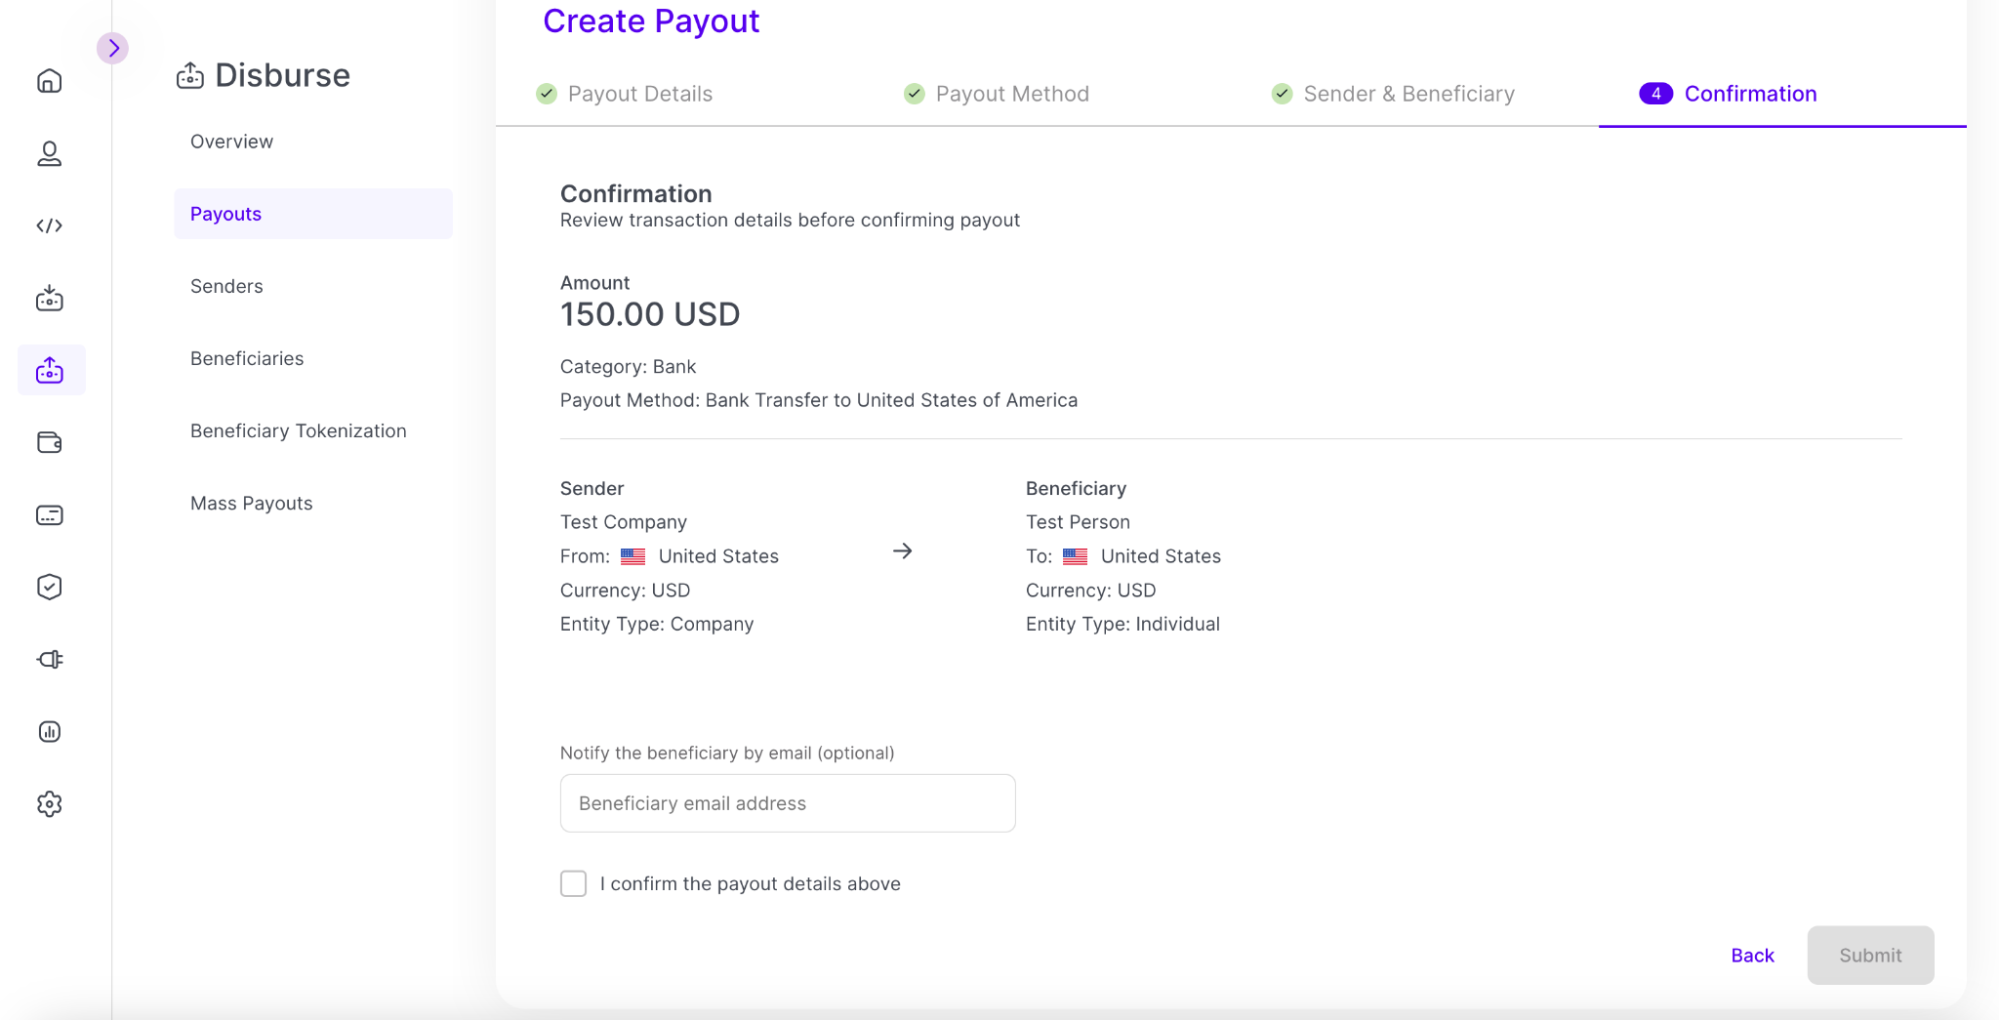
Review the transaction details before confirming the payout.
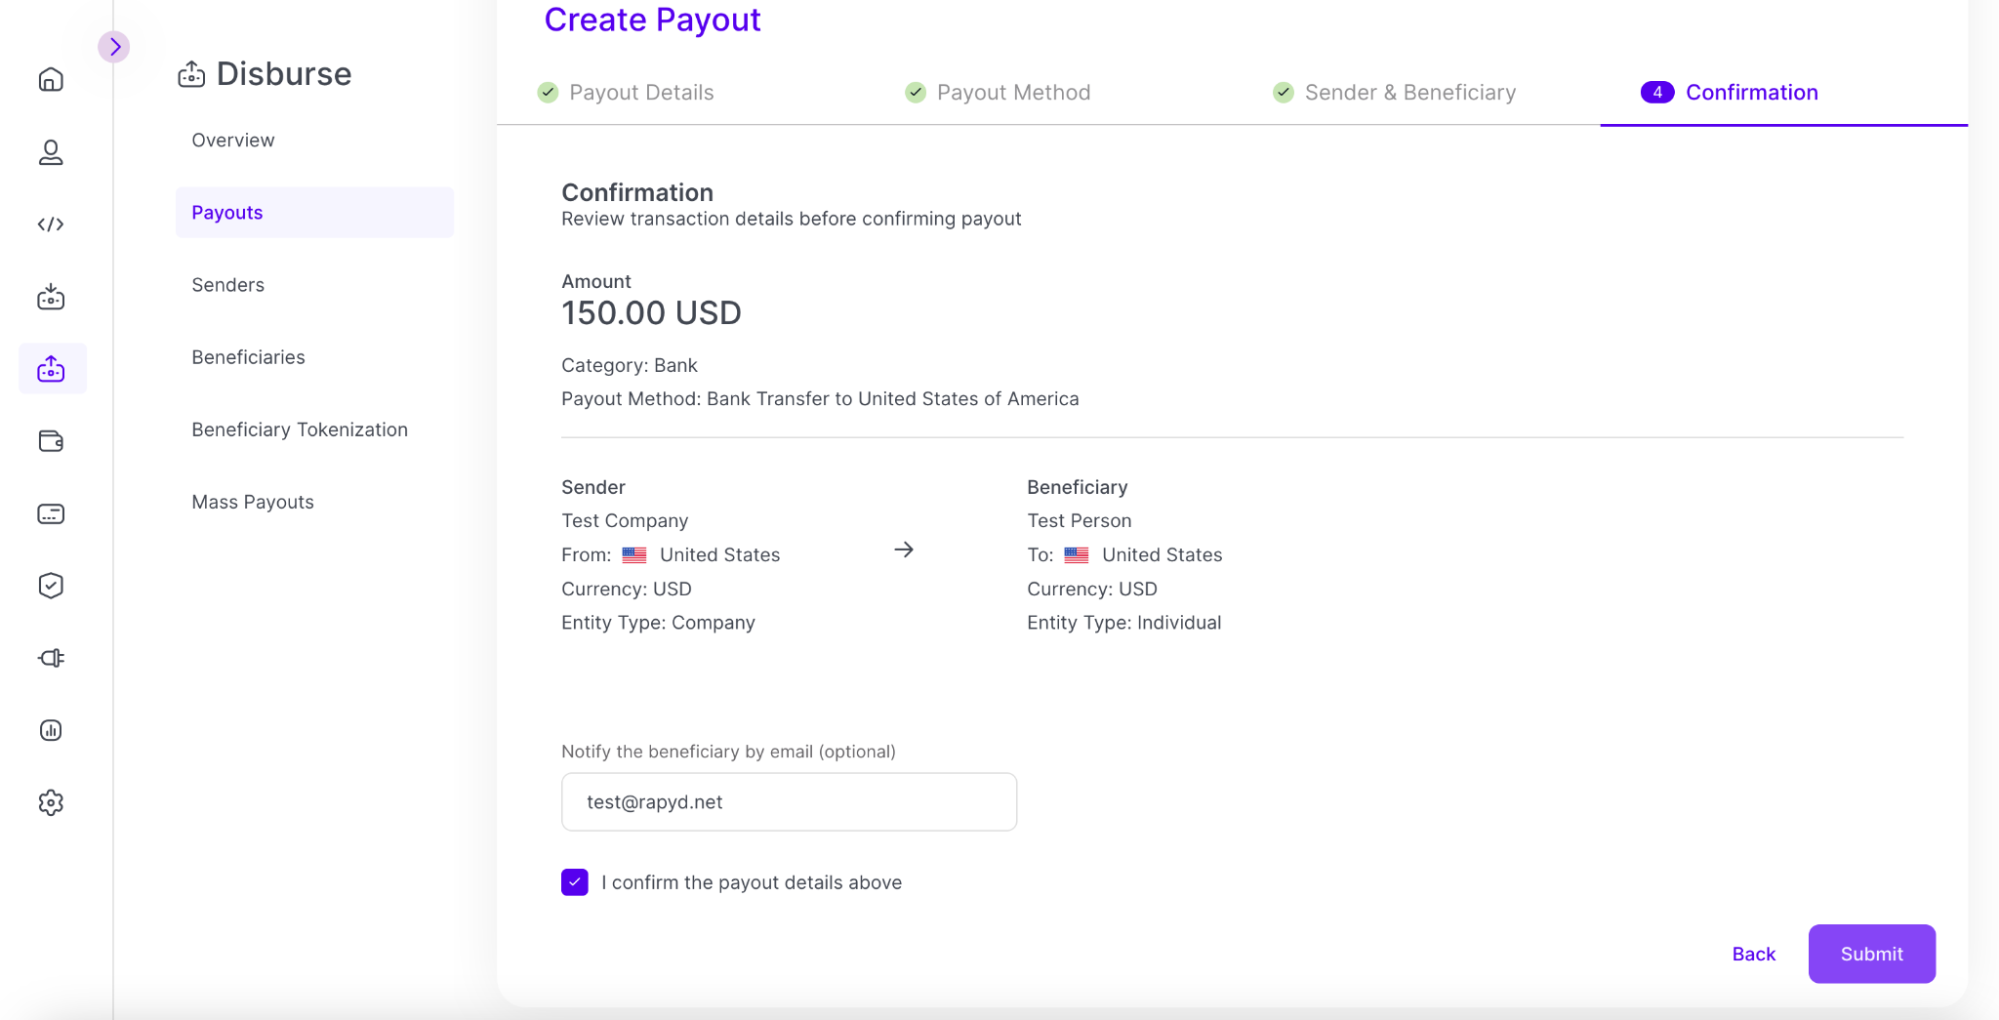
Check the I confirm the payout details above checkbox.
Click Submit.
You can send an email notification to the beneficiary when the payout is completed by submitting their email address in the provided field. This is optional.
The Payout confirmation dialogue box appears.
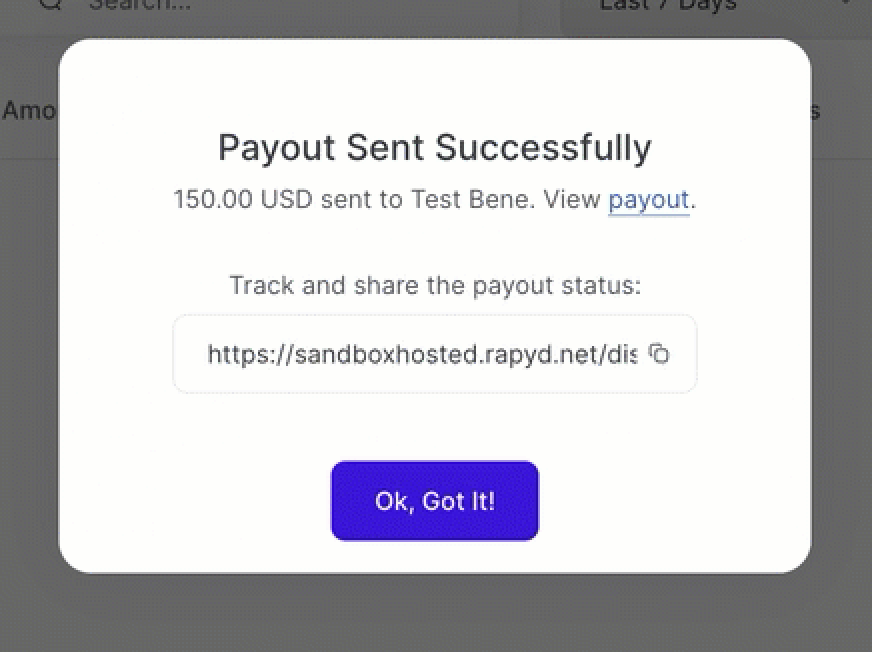
You can see the payout status under Disburse > Payouts as described in Listing Payouts.
Note: The payout tracker status can be shared with the beneficiary. For more information see Payout Tracker Link.
Classic Version Still Available
You can click on the link at the top of the page to access the classic version of Create Payout.

The classic layout of Create Payout appears.
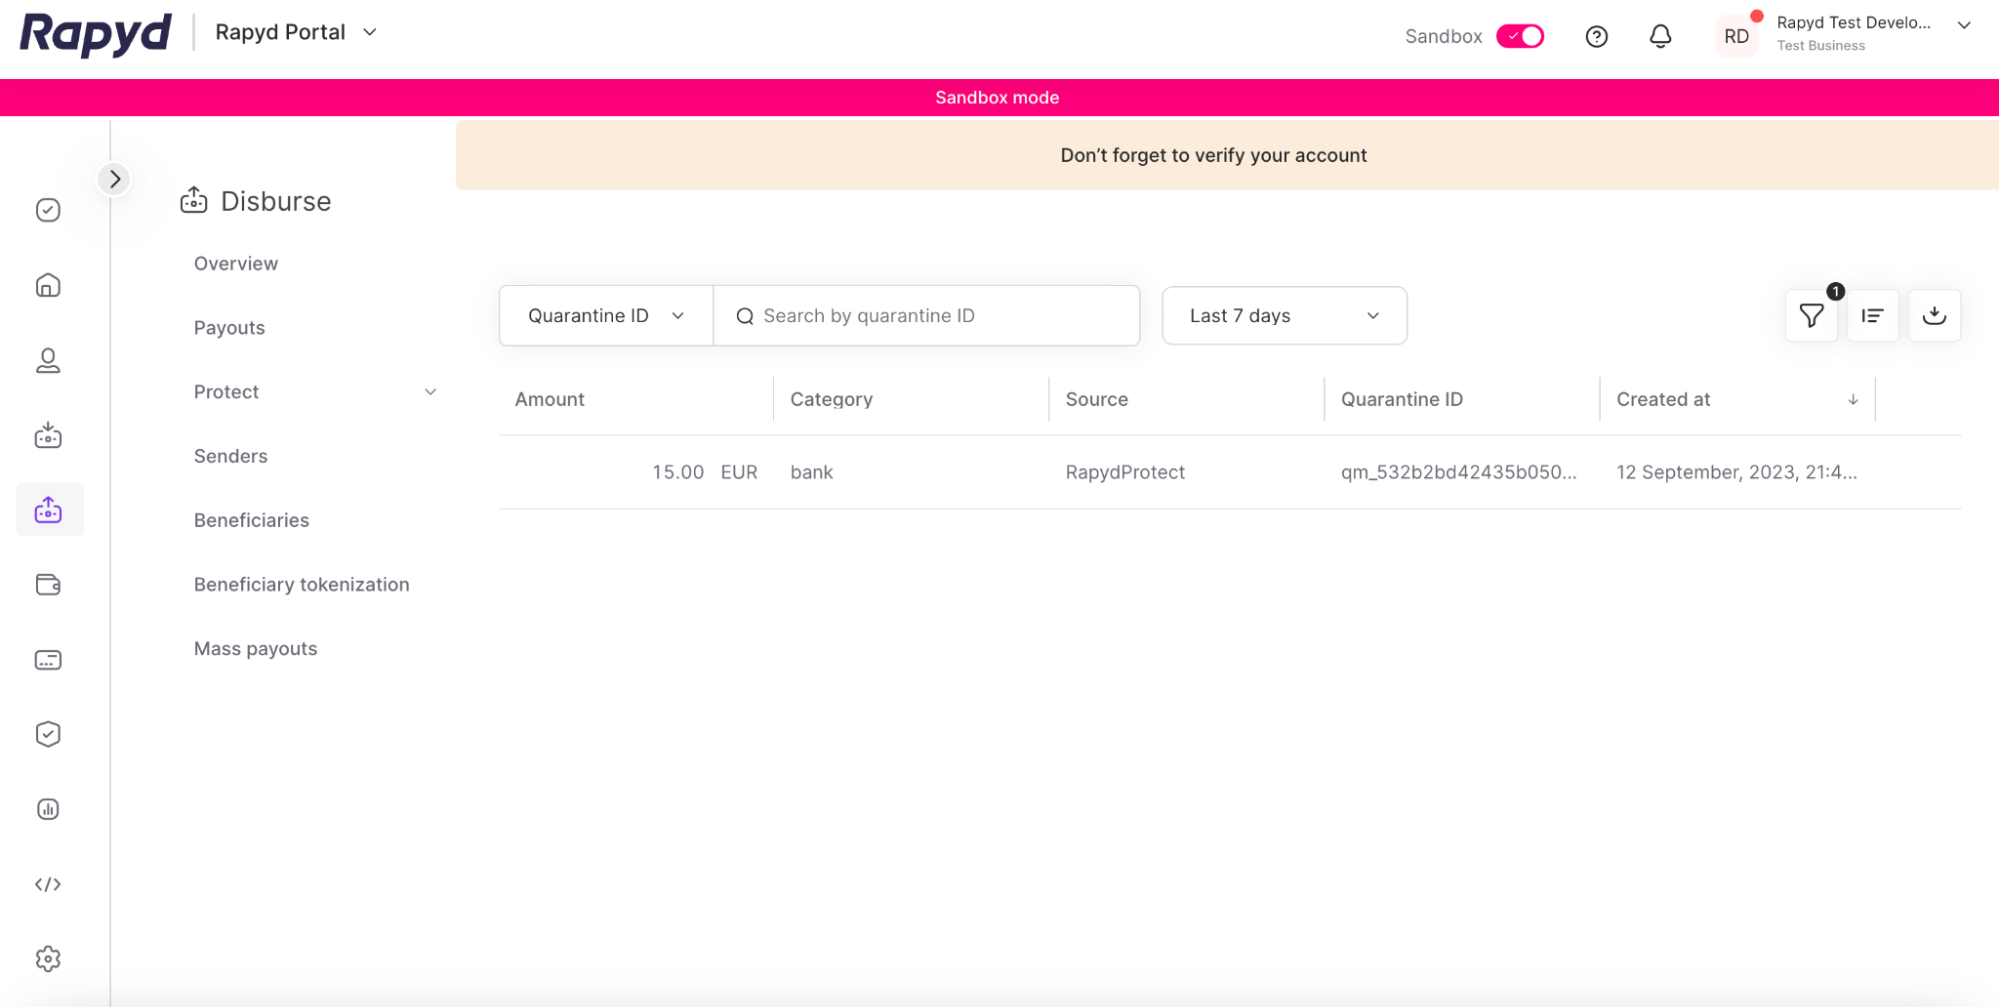
Blocked Payouts
The payouts you create can be blocked if they trigger a rule set by Rapyd Protect. See Creating a Fraud Rule for more information.
When a payout is blocked by Rapyd Protect, the following error message appears:
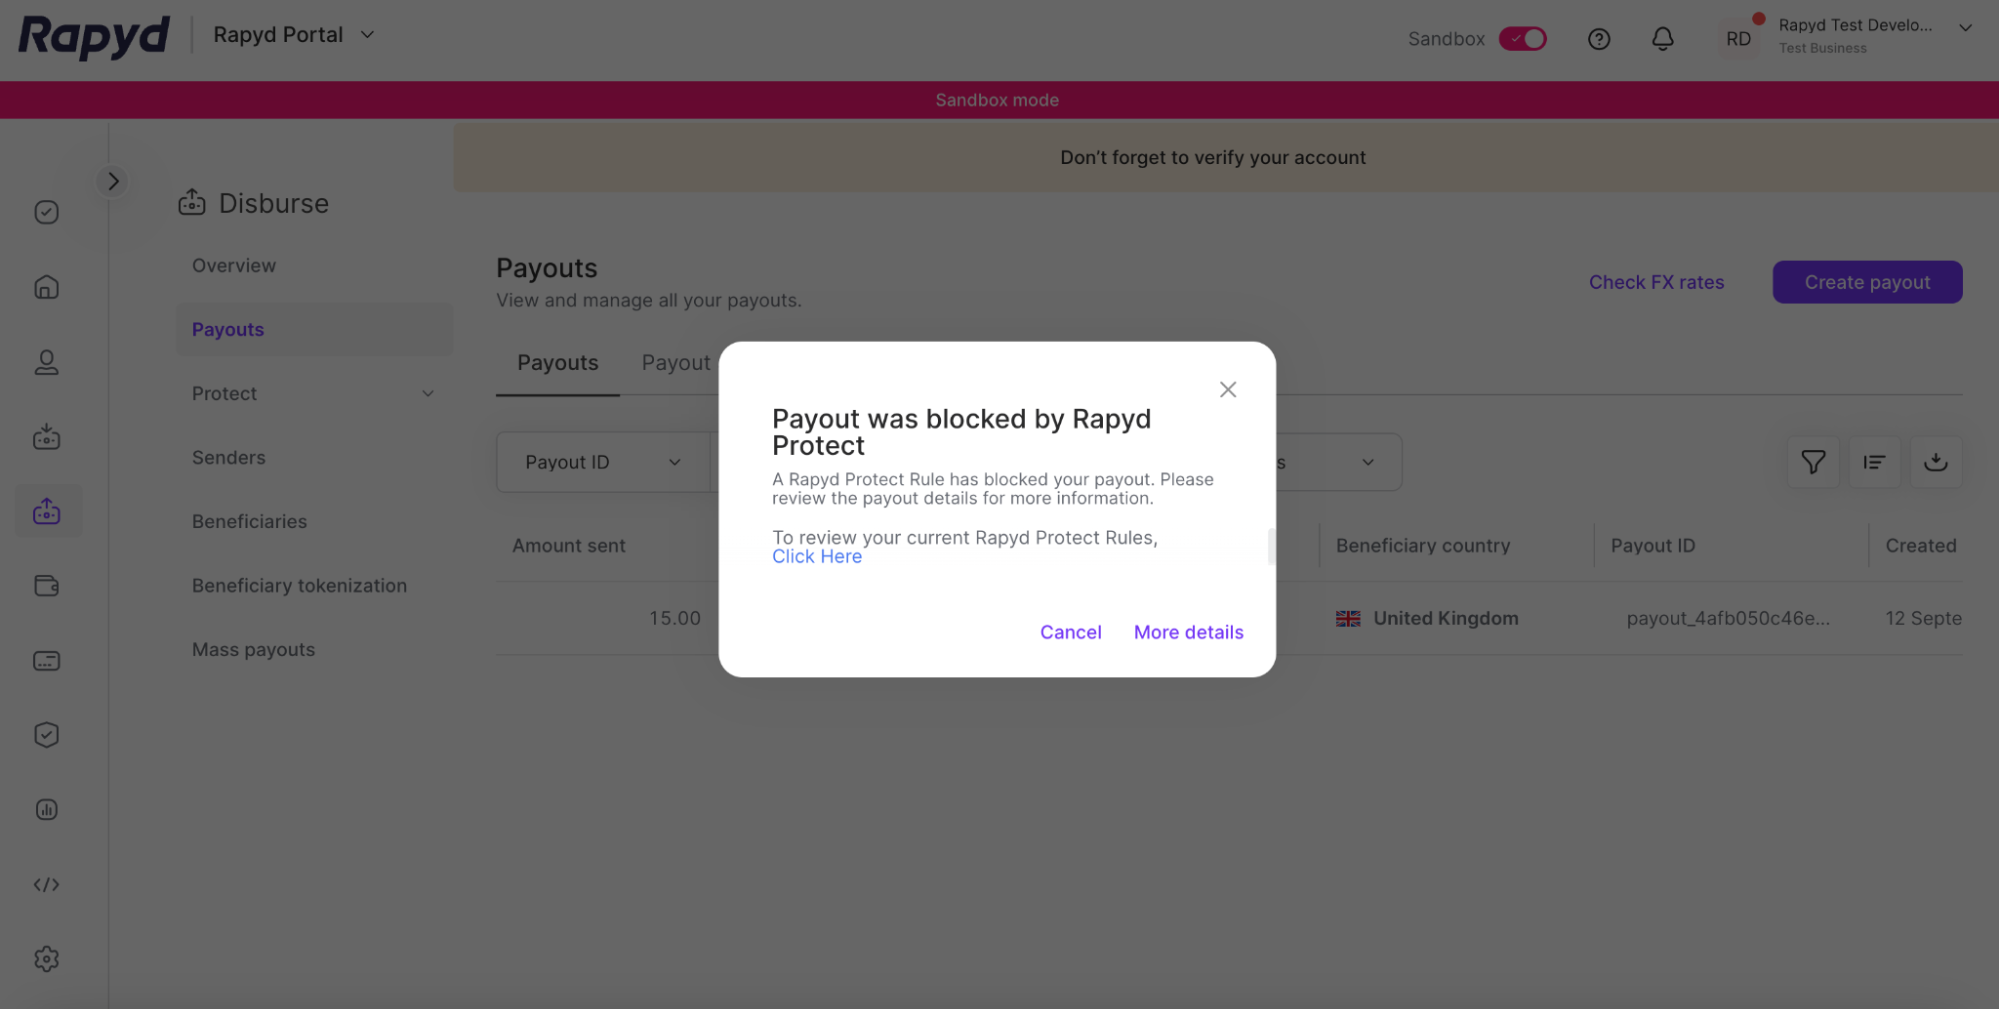
Click the More details link to view a list of blocked transactions.