Creating and Saving Table Filters
You can create, save, reuse, and share table filters for all tables in Client Portal.
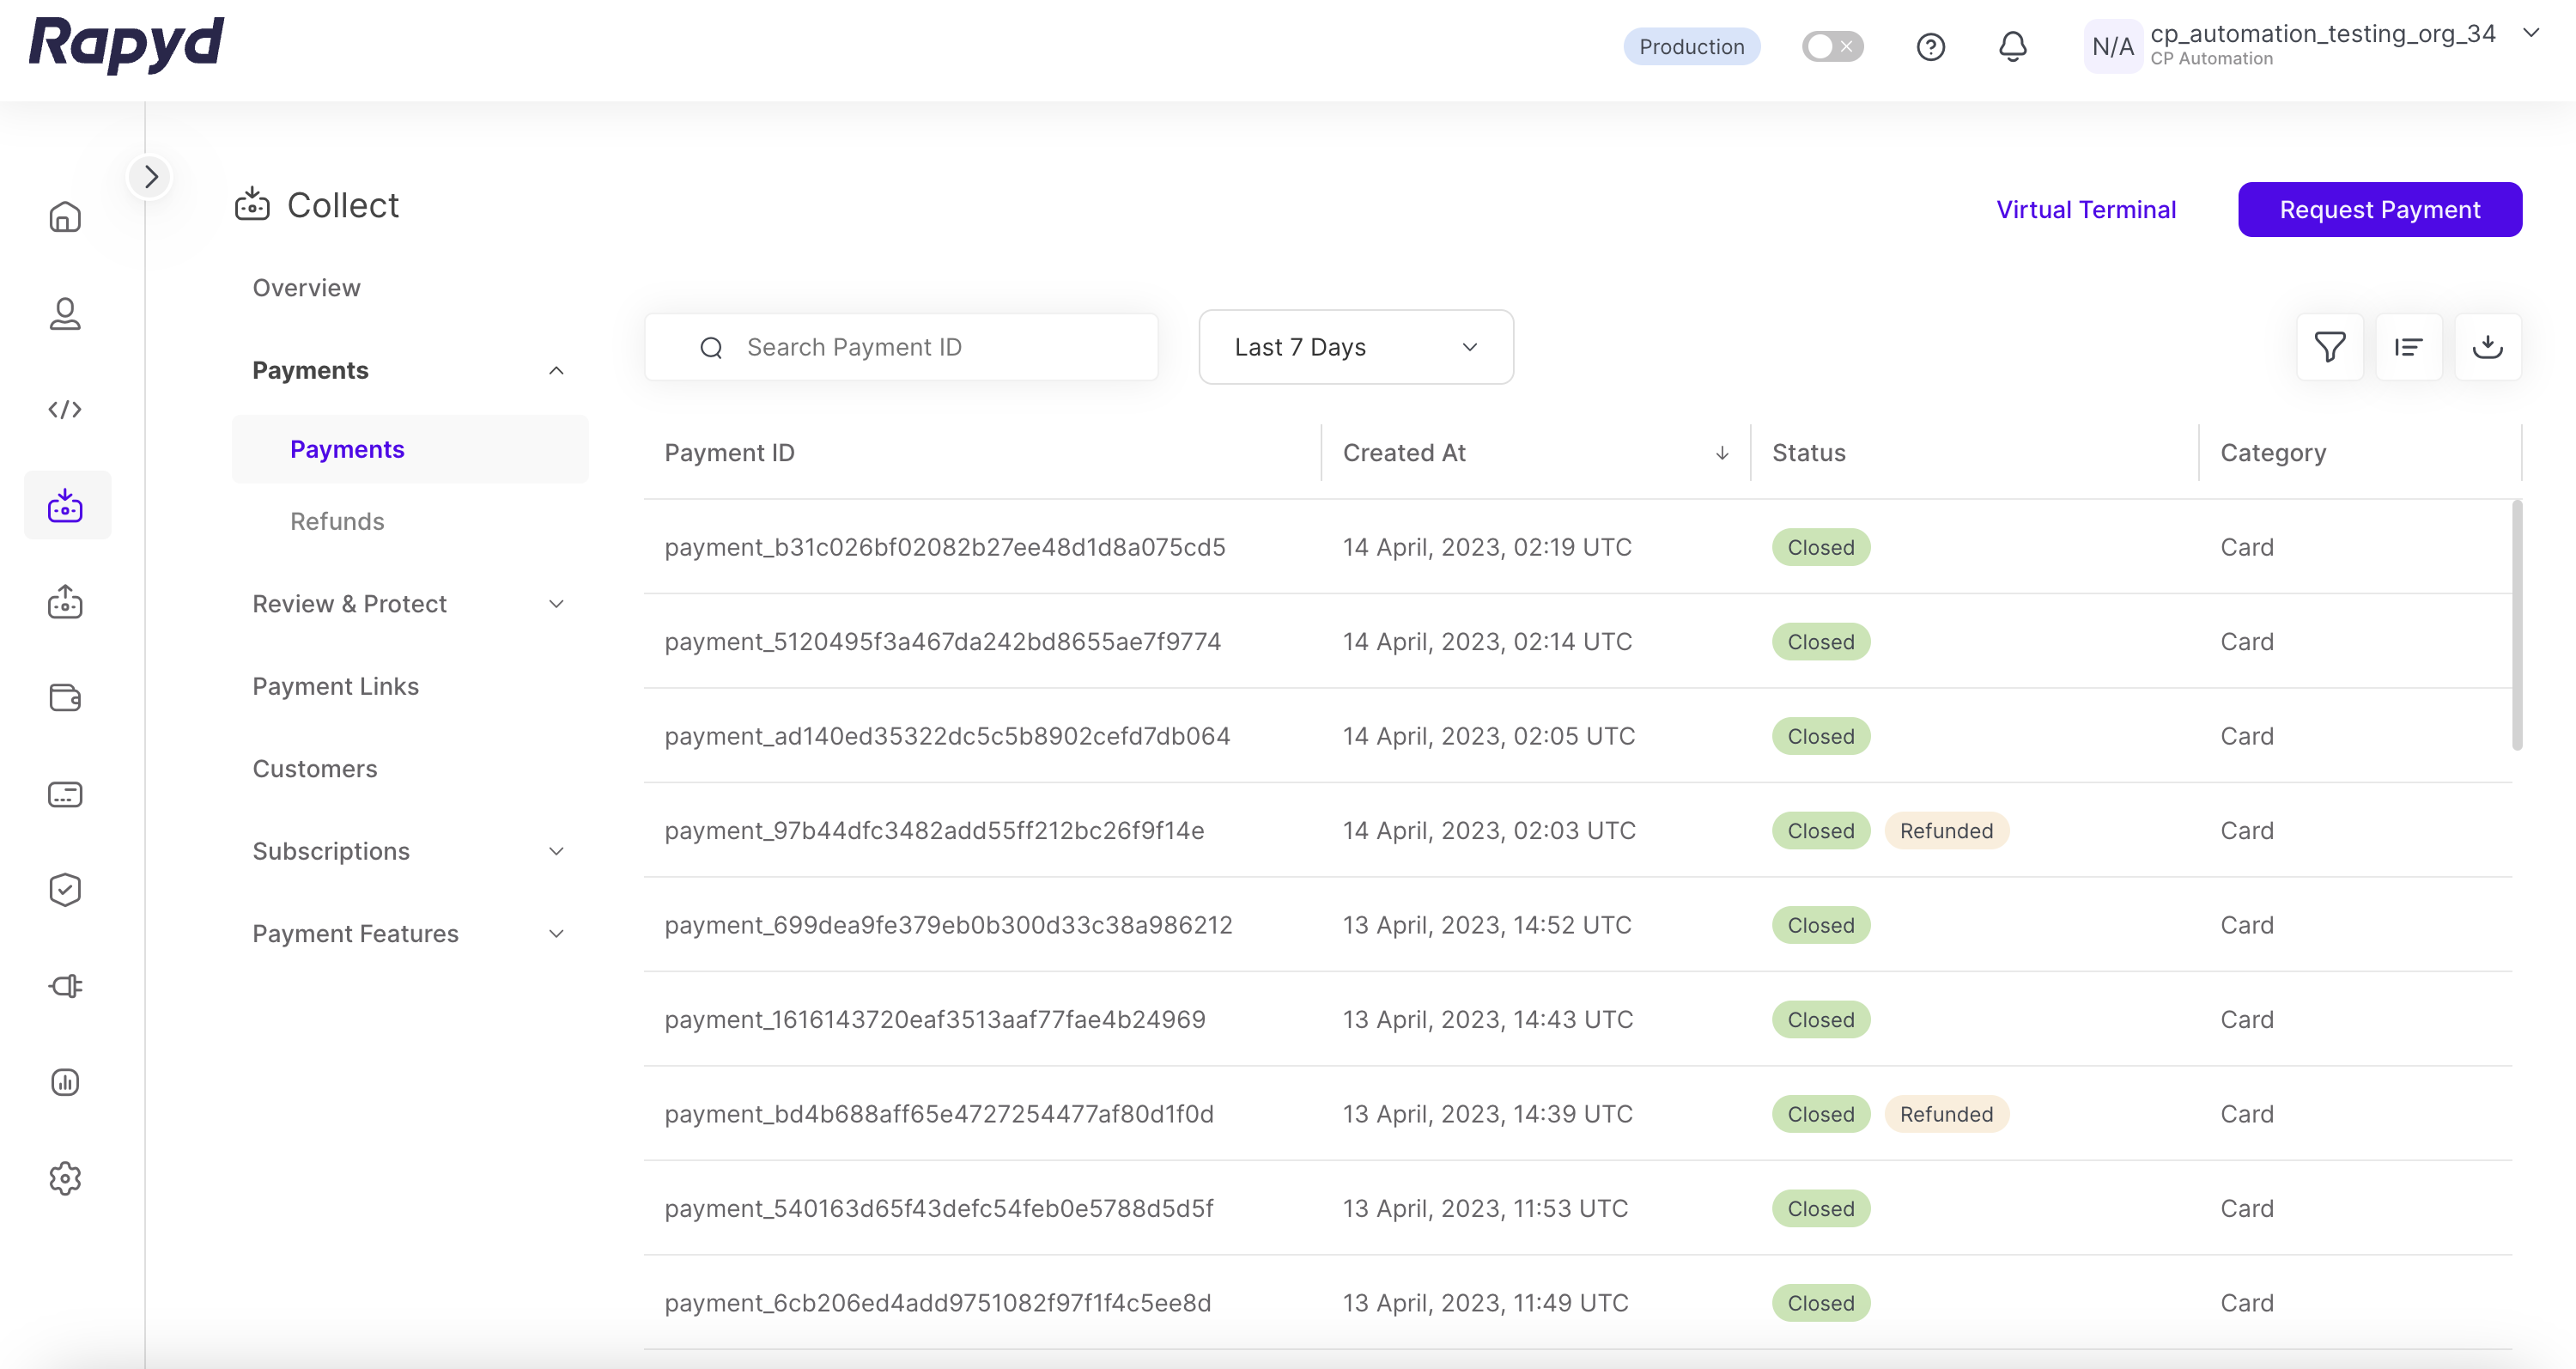
Sign in as described in Accessing the Client Portal and navigate to Collect > Payments. The Payments page appears.
Note
Table filters can be created for any table that appears in the Client Portal.
Click the Filter button in the upper right corner of the Payments page.
The Filter window appears.

Navigate to the Select Filter Group drop-down menu if you want to add your filter to a previously saved filter group.
Note: Leave this field blank if you are saving your filter in a new group.
Enter the Field for the filter. This will filter your payments by a particular field. For more information on payment fields, see Listing Payments.
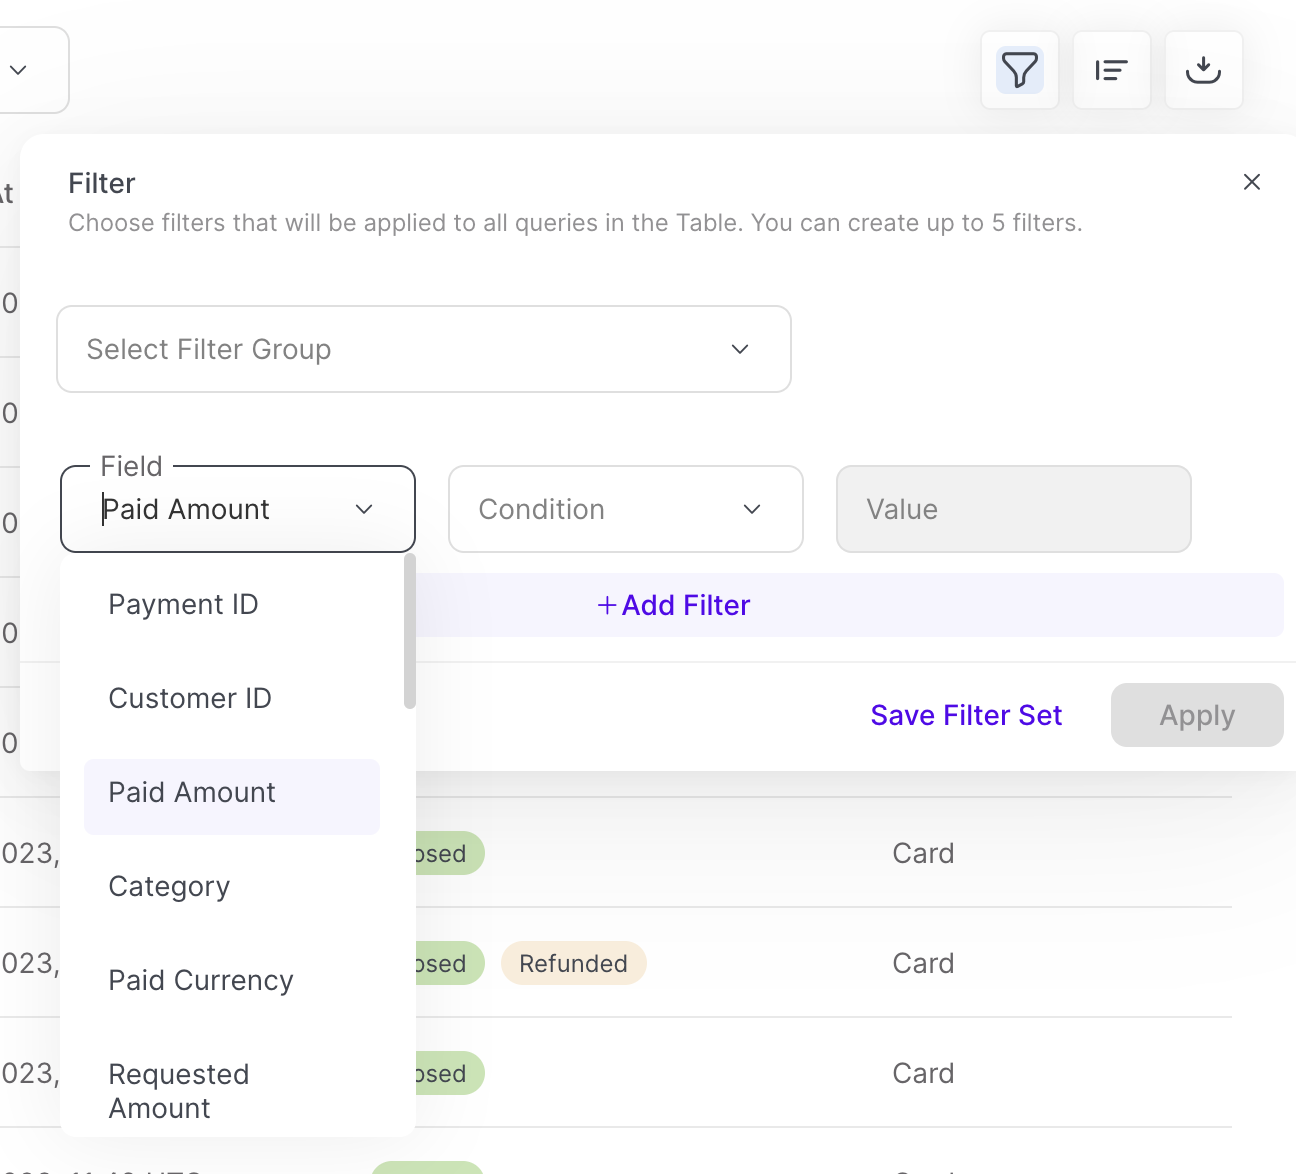
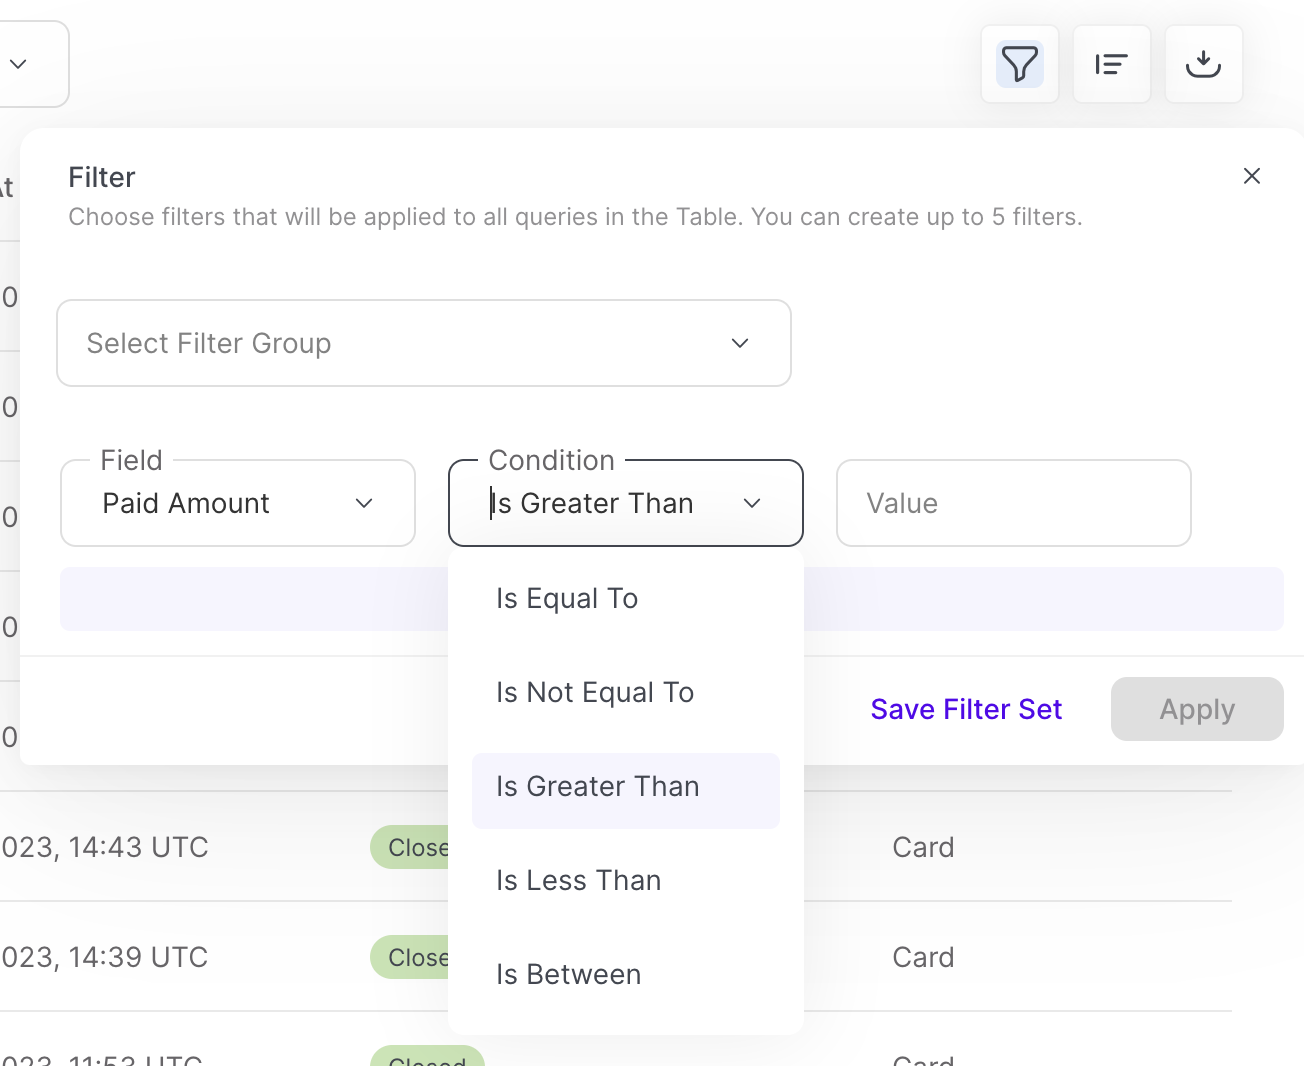
Select the Condition for the filter. This will apply a certain operator to your filter to include or exclude certain fields.
Enter the Value the Condition is evaluating for. For example, you may place a text string in this field if filtering by Customer ID, or an integer if filtering by Paid Amount.
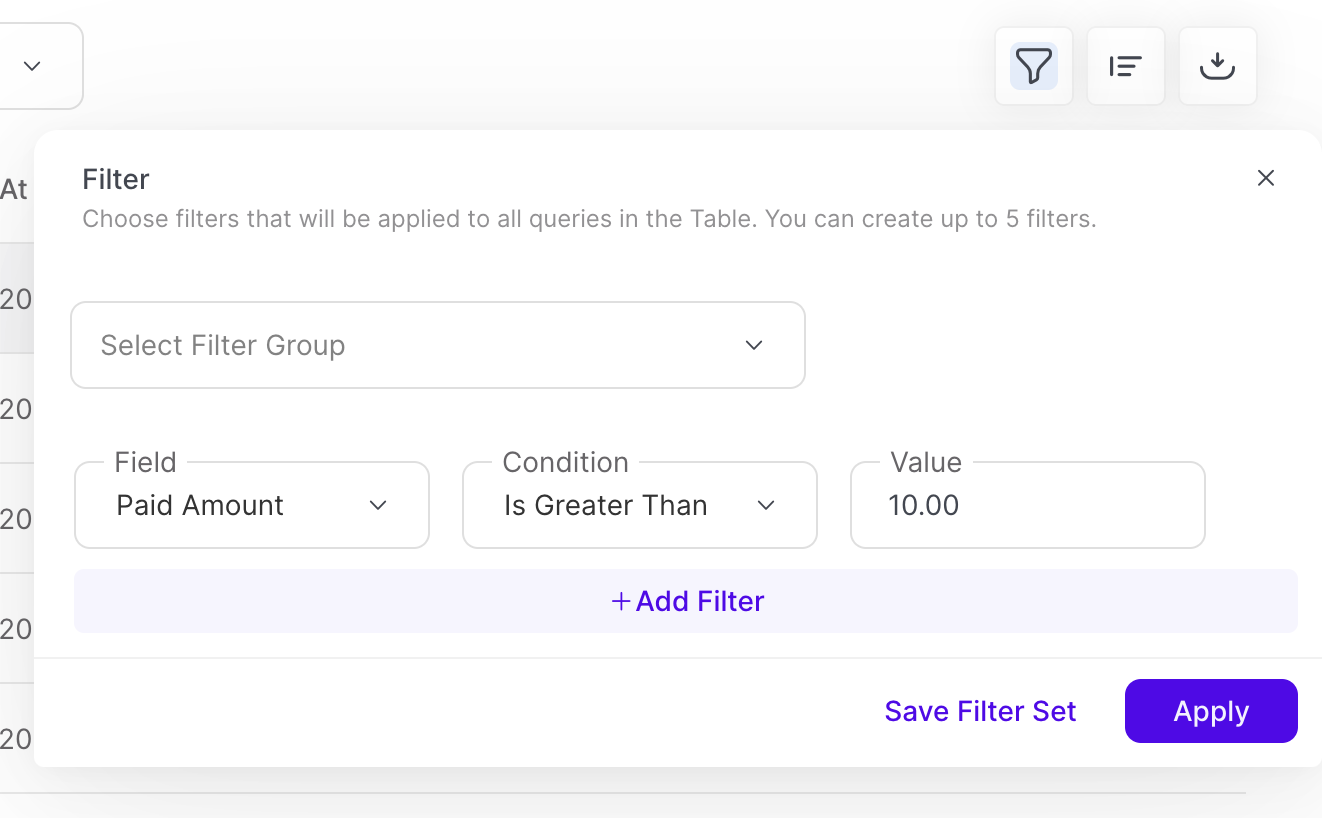
Click Apply.
Click on the Filter button in the upper right corner of the Payments page to view any currently active filters.
Click Save Filter Set to save your filter set.
The Save Your Filter Set window appears.
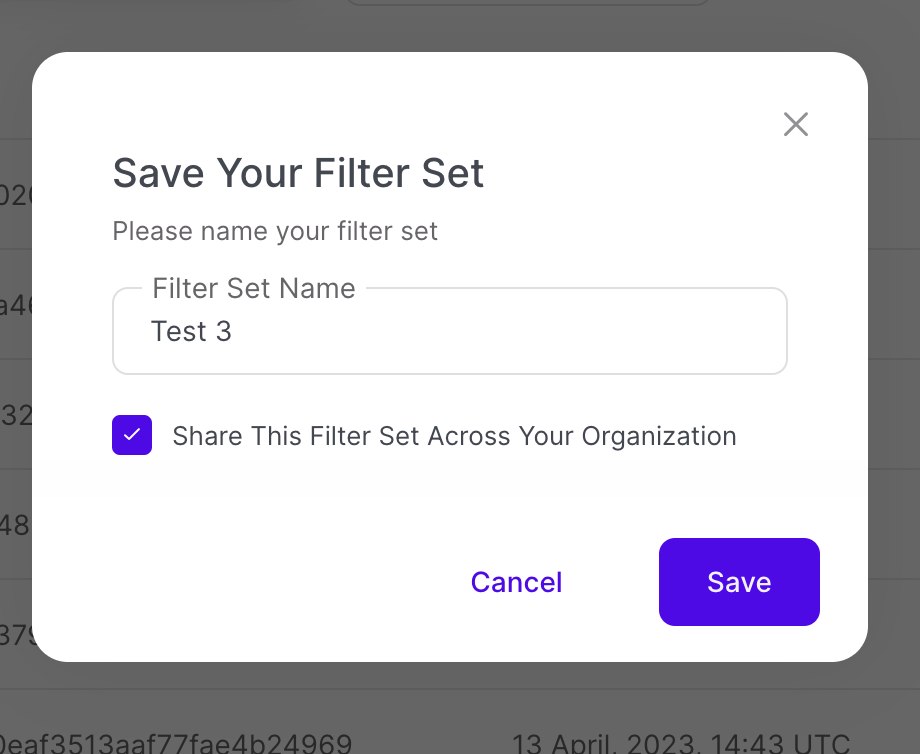
Enter the name of your filter in the Filter Set Name field.
You can create private filters, or share them across your organization. To share the filter across your organization, click the checkbox Share This Filter Across Your Organization.
Click Save.
Your filter will be automatically applied to the Payments page after saving.
Users within your organization need Edit permissions to create or delete shared filters. For more information on permissions, see Creating a New User Role
Naming Filters
A public filter set is created when you share the filter with your organization. A private filter set is saved to a specific User and is not shared.
If you try to save a filter with the same name, you will receive an error message.
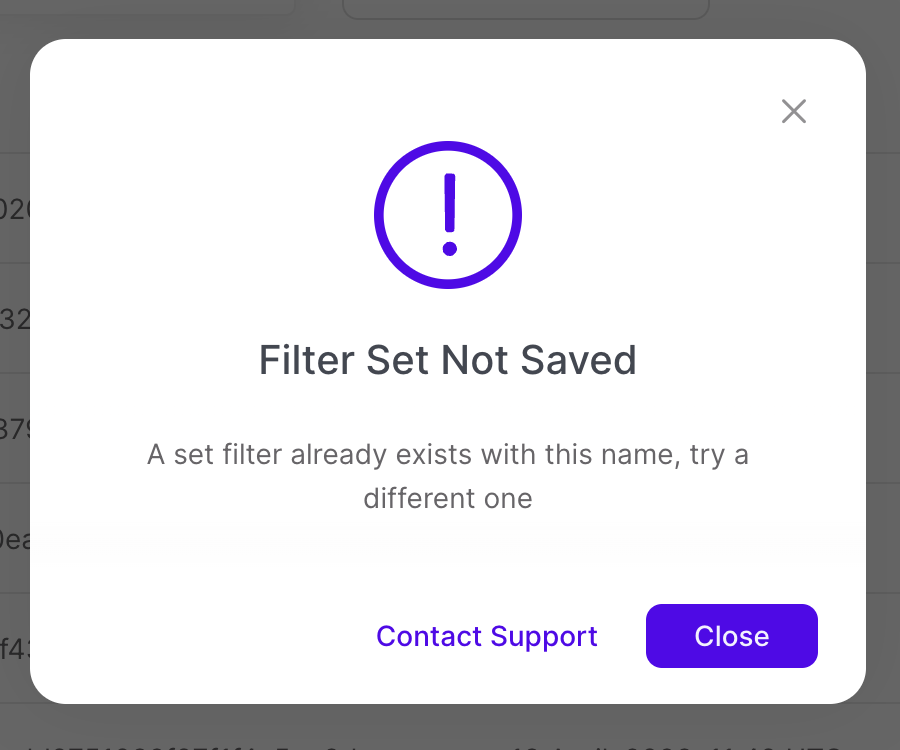
Saving Filters With the Same Name
You can have a private filter set and a public filter set saved with the same name.